 |
VOOZH | about |
|
VOOZH | about |
In this article, we will build a Address Book using the MERN stack. The application will enable users to add, remove, edit and view addresses. The project will use the MongoDB database for storage and React for UI part. This classic address book helps you to save your contacts easily and data can be retrieved easily.
Preview of Final Output: Let us have a look at how our final project will look like:
The project will have following functionalities .
Step 1: First we will create a frontend for our application in React . start a new react project using below command .
npx create-react-app address-bookStep 2: For this project we will require axios to make API calls to backend . Also we will require bootstrap for elegant design . We are also going to use react-bootstrap-icons for icons . finally we will use react-router-dom package for routing in frontend.
Step 3: Install all the dependencies using npm as below inside frontend folder.
npm i axios react-bootstrap-icons react-router-dom Step 4: For bootstrap get CDN links of bootstrap and jquery and paste it inside index.html file in public folder as below.
<link href="https://cdn.jsdelivr.net/npm/bootstrap@5.0.2/dist/css/bootstrap.min.css" rel="stylesheet" integrity="sha384-EVSTQN3/azprG1Anm3QDgpJLIm9Nao0Yz1ztcQTwFspd3yD65VohhpuuCOmLASjC" crossorigin="anonymous">
<script src="https://cdn.jsdelivr.net/npm/bootstrap@5.0.2/dist/js/bootstrap.bundle.min.js" integrity="sha384-MrcW6ZMFYlzcLA8Nl+NtUVF0sA7MsXsP1UyJoMp4YLEuNSfAP+JcXn/tWtIaxVXM" crossorigin="anonymous"></script>
<script src="https://code.jquery.com/jquery-3.7.1.min.js" integrity="sha256-/JqT3SQfawRcv/BIHPThkBvs0OEvtFFmqPF/lYI/Cxo=" crossorigin="anonymous"></script>
Step 5: Create a folder called components in src directory and create files AddAddress.js, AddressList.js, Navigation.js inside it.
For backend create a separate folder outside of React folder called 'address-book-backend'.
Step 1: Inside this folder initiate node project using below command.
npm initStep 2: Now lets install required packages nodemon , express , mongoose , cors , body-parser as below
npm i express nodemon mongoose cors body-parserStep 3: Once the packages are installed create a app.js file which will contain our backend code . Also create a folder models and create a file address.js
The updated dependencies in package.json will look like:
Frontend :
"dependencies": {
 "@testing-library/jest-dom": "^5.17.0",
 "@testing-library/react": "^13.4.0",
 "@testing-library/user-event": "^13.5.0",
 "axios": "^1.5.1",
 "http": "^0.0.1-security",
 "react": "^18.2.0",
 "react-bootstrap-icons": "^1.10.3",
 "react-dom": "^18.2.0",
 "react-router-dom": "^6.16.0",
 "react-scripts": "5.0.1",
 "web-vitals": "^2.1.4"
 }
Backend :
"dependencies": {
 "body-parser": "^1.20.2",
 "cors": "^2.8.5",
 "express": "^4.18.2",
 "mongoose": "^7.6.0",
 "nodemon": "^3.0.1"
 }
Example: Write the following code in respective file
Frontend Code :
Backend Code :
Steps for running frontend code :
Step 1: Open terminal inside frontend folder and run below command .
npm start Step 2: The browser will automatically open tab with home page.
Step 1: For running application first lets add start script inside package.json of backend. add line for nodemon start script.
"scripts": {
 "test": "echo \"Error: no test specified\" && exit 1",
 "start": "nodemon app.js"
}
Step 2: Open another terminal inside backend folder and run below command.
npm startOutput :
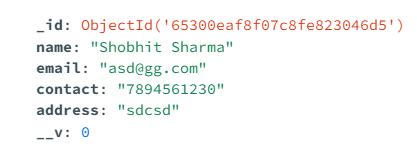
The saved data in database will look like:
.png)
.png)