 |
VOOZH | about |
|
VOOZH | about |
In this article, we will explore how to build a simple CRUD (Create, Read, Update, Delete) application using Node.js for the backend and React for the frontend. Additionally, we will integrate MongoDB as the database to store our data.
Preview of final output:
👁 OutputMernstudentnode -v and npm -v in the terminal.REST API Request | URL |
| GET | http://localhost:4000/students |
| GET | /students/students/id |
| POST | /students/students |
| PUT | /students/students/id |
| DELETE | /students/students/id |
Building a basic CRUD app with Node and React is a perfect way to learn full-stack development.
Now, first of all, we will work on the frontend part of our application using React.js.
Let’s start building the Front-end part with React. To create a new React App, enter the following code into terminal and hit enter.
npx create-react-app mern-stack-crudMove into the React project folder.
cd mern-stack-crudTo run the React App, run the following command:
npm startThis command opens the React App to the browser on the following URL:
To build the React App we need to install some external modules.
NPM | Detail |
|---|---|
| React-Bootstrap | React-Bootstrap has evolved and grown alongside React, making it an excellent choice for your UI. |
| React-Router-Dom | React Router DOM enables you to implement routing in a React App. |
| Axios | It is a promise base HTTP Client and use for network request. |
| Formik | A great library to build form in React. |
| Yup | Yup is a JavaScript schema builder for form validation. |
To install, run the following code on the terminal.
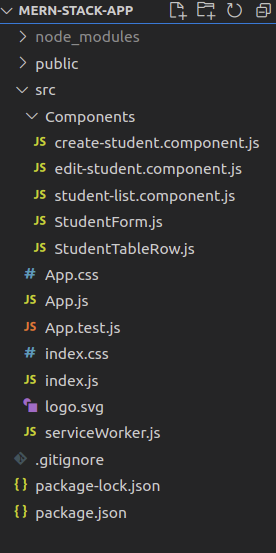
npm install react-bootstrap bootstrap react-router-dom axios formik yupIn this step we will create some React Components to manage student data.
Head over to src folder, make a folder and name it Components and within that directory create the following components.
 "dependencies": {
 "@testing-library/dom": "^10.4.0",
 "@testing-library/jest-dom": "^6.6.3",
 "@testing-library/react": "^16.3.0",
 "@testing-library/user-event": "^13.5.0",
 "axios": "^1.2.1",
 "bootstrap": "^5.2.0",
 "formik": "^2.2.9",
 "react": "^19.1.0",
 "react-bootstrap": "^2.7.0",
 "react-dom": "^19.1.0",
 "react-router-dom": "^6.6.1",
 "react-scripts": "5.0.1",
 "web-vitals": "^2.1.4",
 "yup": "^0.32.11"
 },
For the Frontend of this Student database App
Example: This example creates frontend for Student database app including a student form and table to display data.
Now, we have successfully created the frontend for our mern-stack-app. Let's build the backend part. Before, jumping to next section take a look how the frontend part working without backend.
Step to Run the application: Open the terminal and type the following command.
npm startOutput
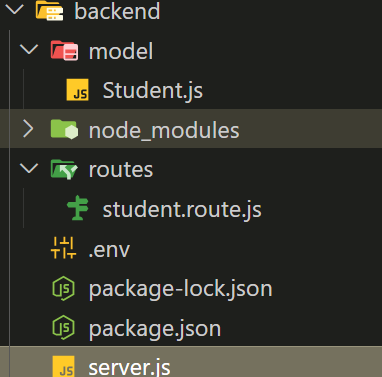
Run command to create backend folder for server and get inside of it.
mkdir backend
cd backend
Create package.json - Next, we need to create a separate package.json file for managing the server of our mern-stack-crud app.
npm init -yInstall the following Node dependencies.
| Package | Description |
|---|---|
express | Web framework to handle routing and server logic. |
cors | Middleware to handle Cross-Origin Resource Sharing. |
mongoose | ODM (Object Data Modeling) library for MongoDB. |
dotenv | Loads environment variables from a .env file. |
To install the above dependencies, run the following code on the terminal.
npm install express cors mongoose dotenv
npm install --save-dev nodemon
"dependencies": {
 "express": "^4.18.2",
 "mongoose": "^7.2.2",
 "cors": "^2.8.5",
 "dotenv": "^10.0.0"
 },
 "devDependencies": {
 "nodemon": "^2.0.22"
 }
For backend of Student database app
Example: This example uses mongo and node, express to setup the backend.
Now, we have successfully created the backend for our mern-stack-app.
Open a terminal and run the following command to start the Nodemon server by staying in the backend folder.
nodemon server.jsOutput:
This article creates a Student database application using MERN (Mongo, Express, React, Node) to show the Basic CRUD Operations in a MERN App. It uses the api endpoints for HTTP requests like GET, POST, PUT, DELETE to create, read, update and detele the student data in the mongo database.