 |
VOOZH | about |
|
VOOZH | about |
Creating a Social Fitness App is a great opportunity for anyone who wants to understand full-stack development. In this article, we'll make a Social Fitness App from scratch using the MERN(MongoDB, Express.js, React, Node.js) stack. This project will help navigate backend development, and teach you the process of integrating frontend functionality with backend infrastructure. It will also showcase how to leverage MongoDB for storing user profiles, workout data, and interaction.
Output Preview: Let us have a look at how the final output will look like.
Step 1: Create a new directory named backend.
mkdir backend
cd backend
Step 2: Create a server using the following command in your terminal.
npm init -yStep 3: Install the necessary package in your server using the following command.
npm install express mongoose mongodb dotenv corsStep 4: Store Environment Variables
PORT=3001
MONGODB_URI=mongodb://localhost:27017/social_fitness_app
JWT_SECRET=your_secret_key
The updated dependencies in package.json file of backend will look like:
 "dependencies": {
 "bcryptjs": "^2.4.3",
 "cors": "^2.8.5",
 "dotenv": "^16.4.5",
 "express": "^4.18.2",
 "mongodb": "^6.3.0",
 "mongoose": "^8.2.0"
 }
Step 5: Create a file 'server.js' and set up the server.
Start your server using the following command.
node server.jsStep 1: Create the frontend repository named client in the main repository.
mkdir client
cd client
Step 2: Create React project using following command.
npx create-react-app .Step 3: Install necessary dependencies in your application using following command.
npm install axios react-router-domThe updated dependencies in package.json file of frontend will look like:
 "dependencies": {
 "@testing-library/jest-dom": "^5.17.0",
 "@testing-library/react": "^13.4.0",
 "@testing-library/user-event": "^13.5.0",
 "axios": "^1.6.7",
 "react": "^18.2.0",
 "react-dom": "^18.2.0",
 "react-router-dom": "^6.22.1",
 "react-scripts": "5.0.1",
 "web-vitals": "^2.1.4"
 }
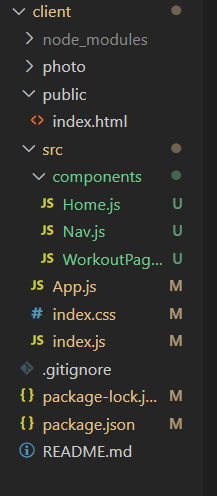
Example: Create the files according to the project structure and write the following code in respective files.
Start the project using the given command.
npm startOutput: