 |
VOOZH | about |
|
VOOZH | about |
The MERN stack, comprising MongoDB, Express, React, and Node is a powerful combination for building full-stack web applications. In this article, we'll see how we can create a Summarizer Website using MERN stack.
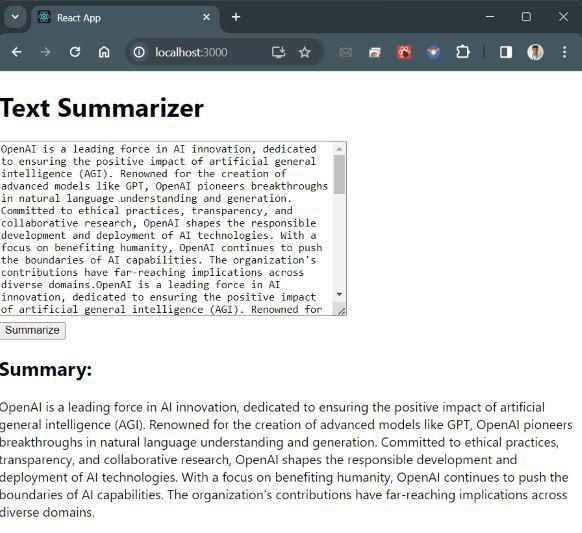
Project Preview: Let us have a look at how the final output will look like.
Step 1: Firstly you have to login to OpenAI website.
Step 2: Generate API Key
Now, hover on the left sidebar and click on 'API Keys', there click on '+ Create new secrete key'.
Note: Now Save this API Key at safe place, we will require this API Key in future.
Step 1: Create your React App and install required dependencies by running the commands below.
npx create-react-app summarizer-app
cd summarizer-app
npm install axios
Step 2: Create a .env file inside the root listing of the React app you just created
REACT_APP_BACKEND_URL=http://localhost:5000
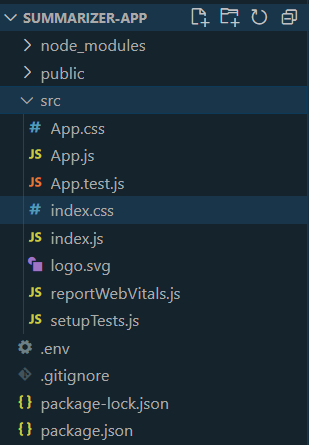
Folder Structure:
The updated dependencies in package.json file will look like:
 "dependencies": {
 "@testing-library/jest-dom": "^5.17.0",
 "@testing-library/react": "^13.4.0",
 "@testing-library/user-event": "^13.5.0",
 "axios": "^1.6.3",
 "react": "^18.2.0",
 "react-dom": "^18.2.0",
 "react-scripts": "5.0.1",
 "web-vitals": "^2.1.4"
}
Step 3: To create a simple UI for the summarizer. Enter the below code in src/App.js file:
Step 4: Set up Express Server and install required dependencies
mkdir server
cd server
npm init -y
npm install express axios body-parser dotenv
Step 5: Now create a file with name .env in the server folder and populate it with the under code:
OPENAI_API_KEY=your_openai_api_key
MONGODB_URI=your_mongodb_connection_uri
Replace 'your_openai_api_key' and 'your_mongodb_connection_uri' with the API Key that we generated above from OpenAI and MongoDB URI respectively.
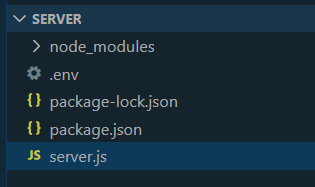
Folder Structure:
👁 rytiuopThe updated dependencies in package.json file will look like:
"dependencies": {
 "axios": "^1.6.5",
 "body-parser": "^1.20.2",
 "dotenv": "^16.3.1",
 "express": "^4.18.2",
 "mongoose": "^6.1.12",
 "cors": "^2.8.5"
}
Example: Create the 'server.js' file in the server directory:
Step 6: Start the Development Servers
In one terminal window, navigate to the server directory and start the Express server by entering the below command in the terminal:
cd server
node server.js
In another terminal window, navigate to the root directory of your React app and start the React development server by entering the below command in the terminal:
cd summarizer-app
npm start
Output:
Visit http://localhost:3000 in your browser to see the summarizer website.