In this article, we’ll walk through the step-by-step process of creating a text translation application with MongoDB, React, ExpressJS, and NodeJS. This application will provide users with a user-friendly interface for translating text between different languages.
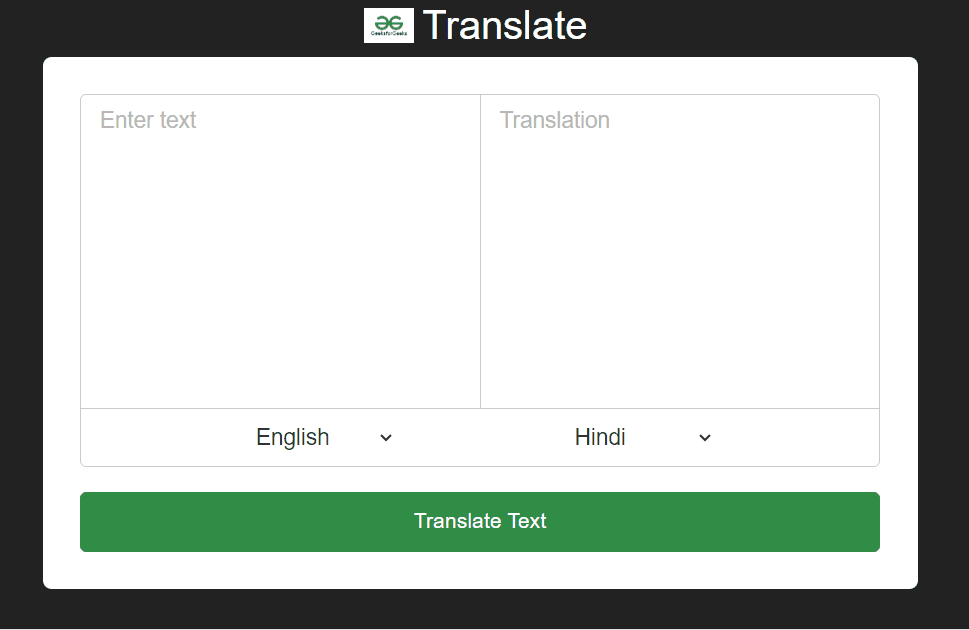
Output Preview: Let us have a look at how the final output will look like.
Approach to Create Text Translation Tool using MERN Stack:
Backend:
Set up a new NodeJS project with npm or yarn and initialize a Git repository.
Create a folder called "server" within the project directory.
Within the "server" folder, create the following file:
server.js: This file contains the server-side code using Express to create a RESTful API for translation. It listens on port 5000 and handles requests for translations.
Inside the "server" folder, run the command npm install express cors to install the dependencies.
Frontend:
Set up a new React project with create-react-app. Initialize a Git repository. Define the project structure.
Create a folder called "client" within the project directory. The "client" folder will contain the front-end code.
Within the "client" folder, create the following files and directories:
src/index.js: This file contains the client-side code to render the Translate component to the root HTML element.
src/styles/App.css: This file contains the CSS styles for the Translate component.
src/components/App.js: This file contains the main component that renders the Translate component.
src/components/data.js: This file contains an array of country codes and their corresponding languages.
src/components/Translate.js: This file contains the Translate component that handles text input and translation requests.
Inside the "client" folder, run the command npm install react react-dom to install the React library.
Steps to Create the Backend Server:
Step 1: Create a directory for the project.
mkdir server
cd server
Step 2: Initialized the Express app and installing the required packages
npm init -y
Step 3: Install the necessary package in your server using the following command.
