 |
VOOZH | about |
|
VOOZH | about |
In Spring Boot, handling client requests is a common task when building REST APIs. Developers often need to read the request body sent by the client to process data such as JSON or form inputs.
@RequestBody@RequestBody is an annotation in Spring MVC used to bind the HTTP request body to a method parameter in a controller. It automatically converts incoming JSON data into a Java object.
Syntax
@RequestBody: Annotation is used to get the request body in the incoming request.
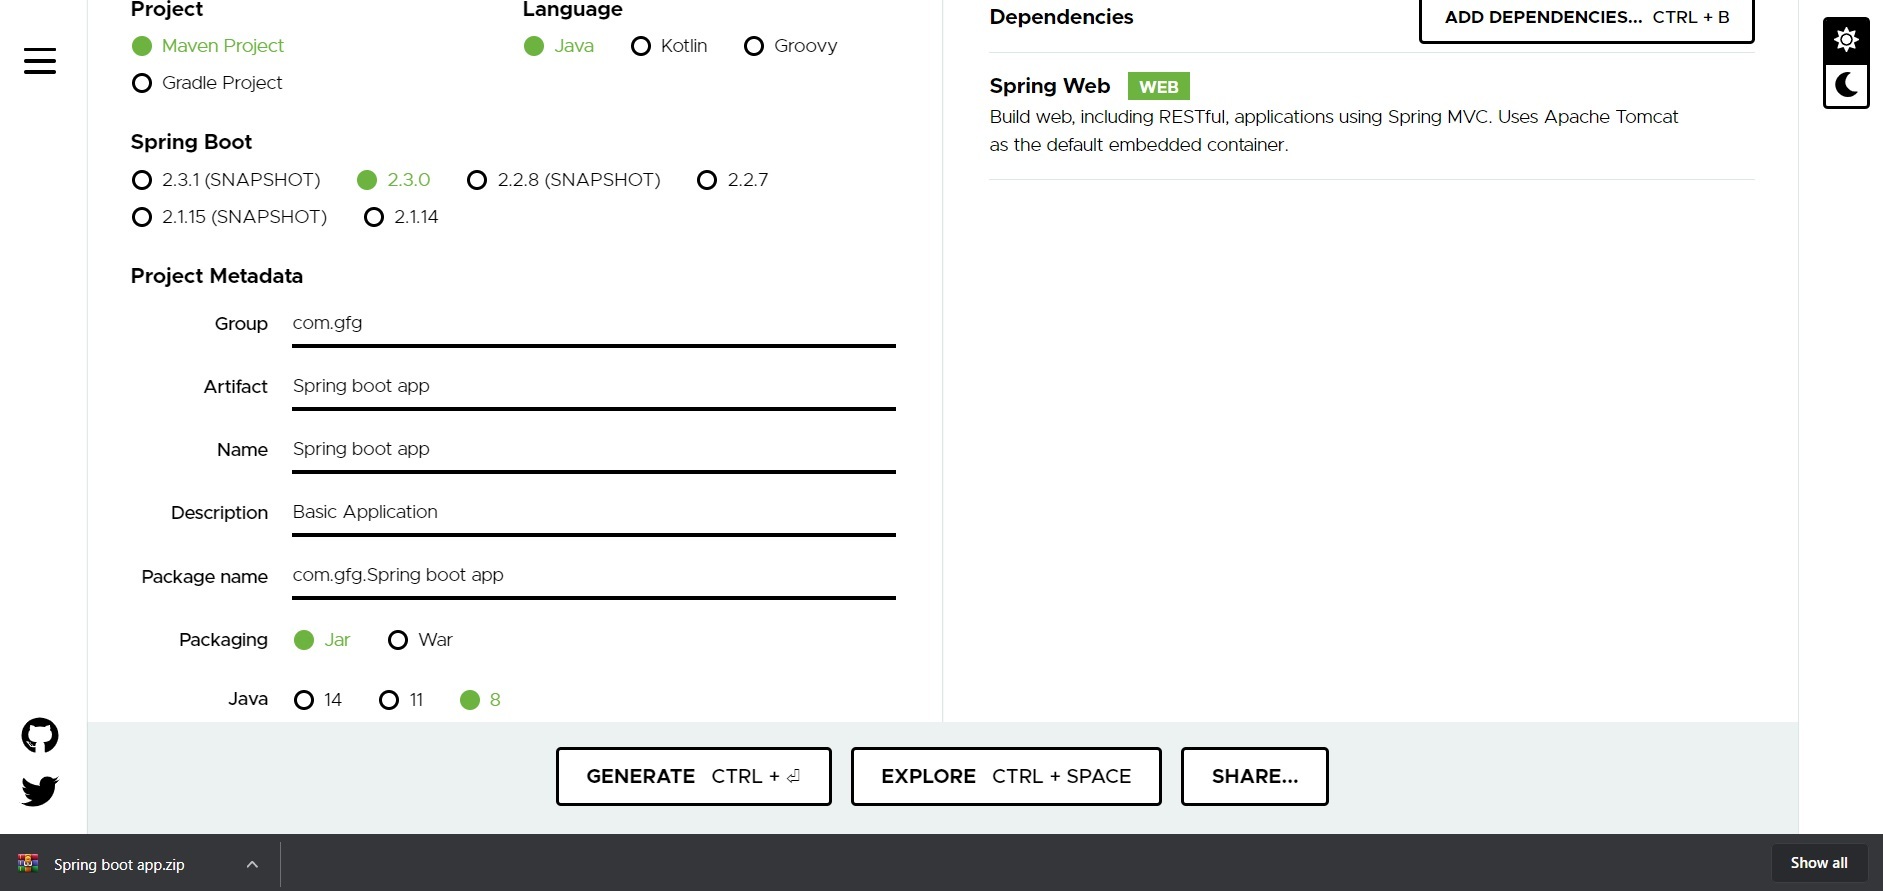
Generate a project using Spring Initializr and include the Spring Boot web dependency. Fill in the details as per the requirements. For this application:
Click on Generate which will download the starter project.
👁 Project MetadataExtract the ZIP file and open your preferred IDE. Then navigate to File → New → Project from Existing Sources, select the Spring Boot project folder, and choose the pom.xml file. Import the project and wait for the dependencies to sync.
👁 Project CreationNote: In the Import Project for Maven window, make sure you choose the same version of JDK which you selected while creating the project.
Create a class named Person inside -> src/main/java/com/example/demo.
Person.java
This class represents the data that will be received from the request body.
Create a controller class and use the @RequestBody annotation to read the request body.
Controller.java
Here, the Person object is automatically created by Spring using the JSON data received in the request body.
Run the main Spring Boot application class and wait for the embedded Tomcat server to start.
By default, the application runs on:
http://localhost:8080
Note: The default port 8080 can be changed in the application.properties file.
Open Postman and send a POST request to
http://localhost:8080/person
Request Body (JSON)
{
"id": 1,
"name": "Aayush",
"age": 32
}
Output:
The received data will be printed in the terminal/console:
1 Aayush 32