 |
VOOZH | about |
|
VOOZH | about |
H2 Database is a lightweight, in-memory relational database written in Java, widely used with Spring Boot for fast development and testing. It requires no external setup and allows quick execution of database operations.
Below are the steps to set up H2 database in Spring Boot application.
To use the H2 database in the spring boot application we have to add the following dependency in the pom.xml file:
h2 and spring-boot-starter-data-jpa dependencies:
Configure the H2 database in the application.properties file:
We can also use YAML file for database configuration by adding properties to application.yml file as depicted below:
Let's understand what these properties are by opening the H2 Database console.
By default, the console view of the H2 database is disabled. Before accessing the H2 database, we must enable it by using the following property:
spring.h2.console.enabled=true
Once we have enabled the H2 console, now we can access the H2 console in the browser by invoking the URL http://localhost:8082/h2-console .
Note : Provide your port number in which your spring application is running
The following figure shows the console view of the H2 database.
👁 Console view of H2 databaseWe are going to perform some basic CRUD Operations by creating a Spring Boot Application and using the H2 Database.
Create a Spring Boot Project with IntelliJ IDEA and create a Spring Boot project.
Below is the complete code for the pom.xml file. Please check if you have missed something.
pom.xml:
Create 4 packages and later create some classes and interfaces inside these packages as seen in the below image
Note:
- Green Rounded Icon 'I' Buttons are Interface.
- Blue Rounded Icon 'C' Buttons are Classes.
Create a simple POJO class inside the Department.java file.
Department.java:
Create a simple interface and name the interface as DepartmentRepository. This interface is going to extend the CrudRepository as we have discussed above.
Example: Below is the code for the DepartmentRepository.java file.
Inside the package create one interface named as DepartmentService and one class named as DepartmentServiceImpl.
Example 1-A:
Example 1-B:
Inside the package create one class named as DepartmentController.
Below are the properties for the application.properties file.
For application.yml file:
Now run your application and let's test the endpoints in Postman and also refer to our H2 Database.
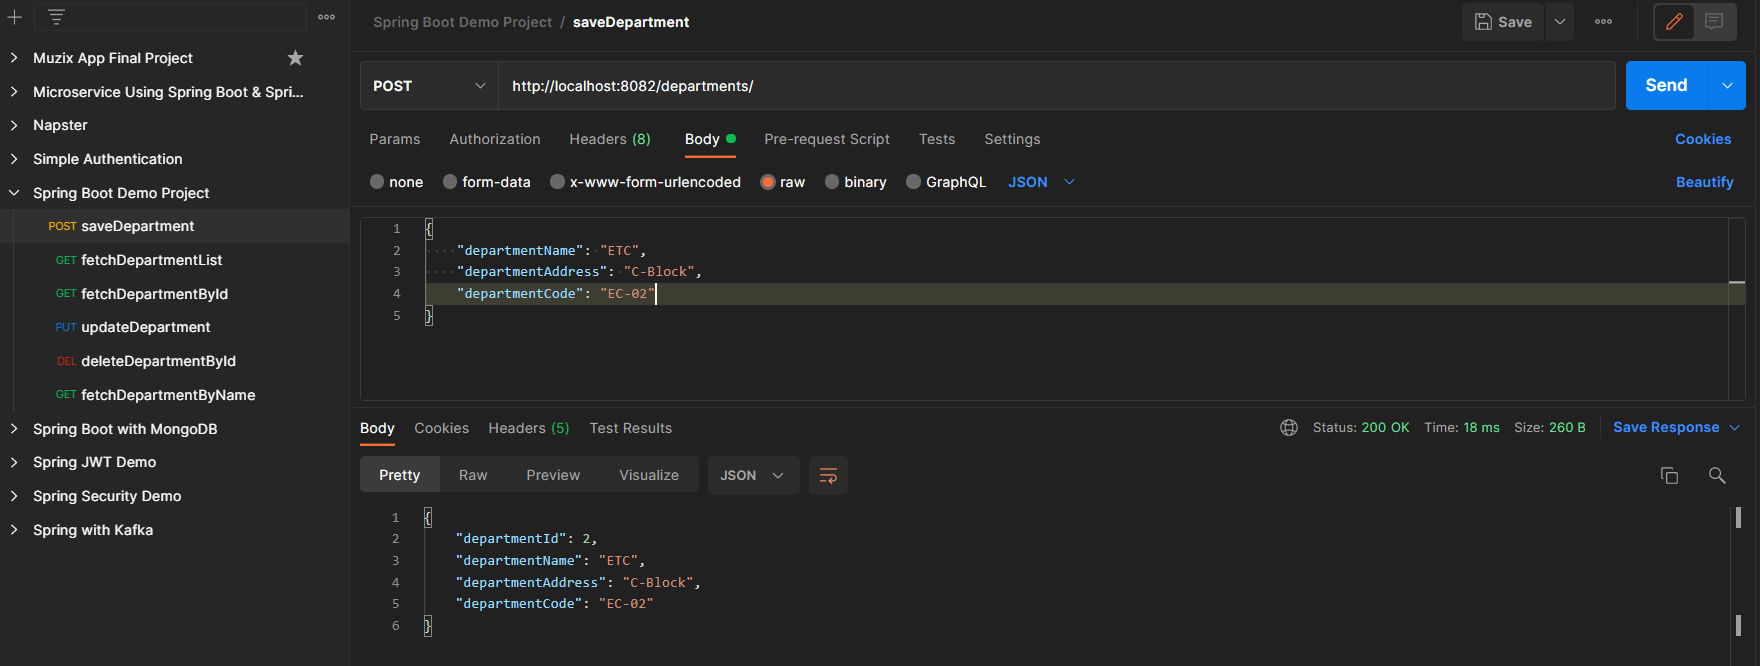
Endpoint 1: POST - http://localhost:8082/departments/
👁 Endpoint 1 for POSTEndpoint 2: GET - http://localhost:8082/departments/
👁 Endpoint 2 for GETEndpoint 3: PUT - http://localhost:8082/departments/1
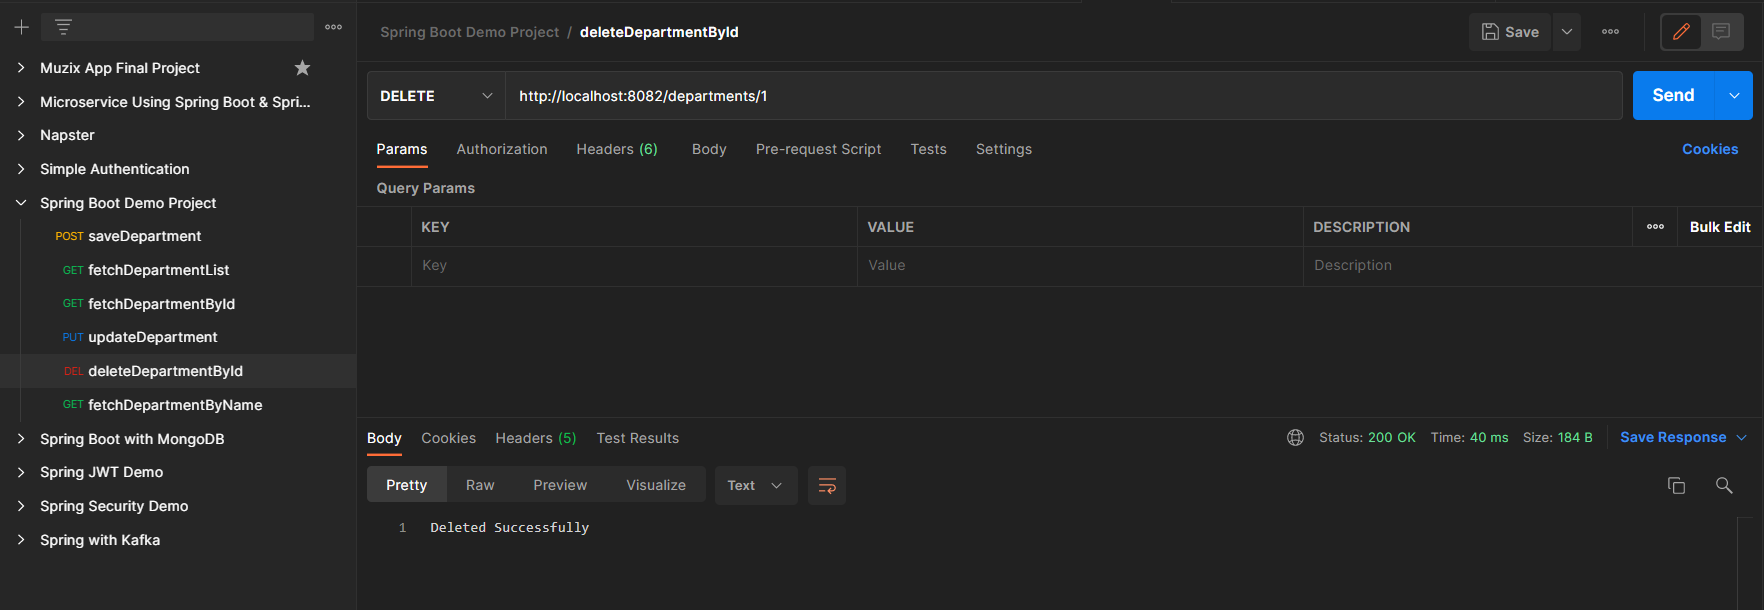
👁 Endpoint 3 for PUTEndpoint 4: DELETE - http://localhost:8082/departments/1
👁 Endpoint 4 for DELETELastly, H2 Database is as depicted in the below media as follows:
👁 H2 Dtabase