 |
VOOZH | about |
|
VOOZH | about |
When a non-prime attribute column in one table references the primary key and has the same column as the column of the table which is prime attribute is called a foreign key. It lays the relation between the two tables which majorly helps in the normalization of the tables. A table can have multiple foreign keys based on the requirement.
In this article let us see how to create a table with multiple foreign keys in MSSQL.
Syntax:
column_name(non_prime) data_type REFERENCES table_name(column_name(prime)
Step 1: Creating a Database
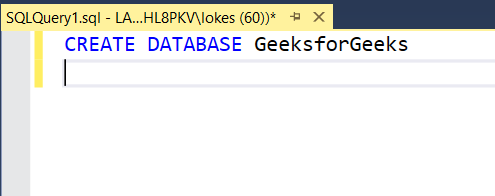
We use the below command to create a database named GeeksforGeeks:
Query:
CREATE DATABASE GeeksforGeeks👁 Image
Step 2: Using the Database
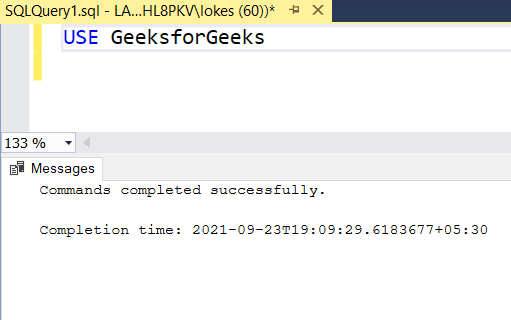
To use the GeeksforGeeks database use the below command:
Query:
USE GeeksforGeeks👁 Image
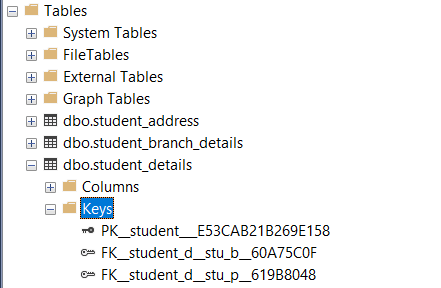
Step 3: Creating 3 tables. The table student_details contains two foreign keys that reference the tables student_branch_details and student_address.
Query:
CREATE TABLE student_details(
 stu_id VARCHAR(8) NOT NULL PRIMARY KEY,
 stu_name VARCHAR(20),
 stu_branch VARCHAR(20) FOREIGN KEY REFERENCES student_branch_details(stu_branch),
 stu_pin_code VARCHAR(6) FOREIGN KEY REFERENCES student_address(stu_pin_code)
 );
CREATE TABLE student_branch_details(
 stu_branch VARCHAR(20) PRIMARY KEY,
 subjects INT,
 credits INT
);
CREATE TABLE student_address(
 stu_pin_code VARCHAR(6) PRIMARY KEY,
 stu_state VARCHAR(20),
 student_city VARCHAR(20)
);
Output:
👁 ImageThe number and type of keys can be checked in the tables section of object explorer on the left side of the UI.
👁 ImageStep 4: Inserting data into the Table
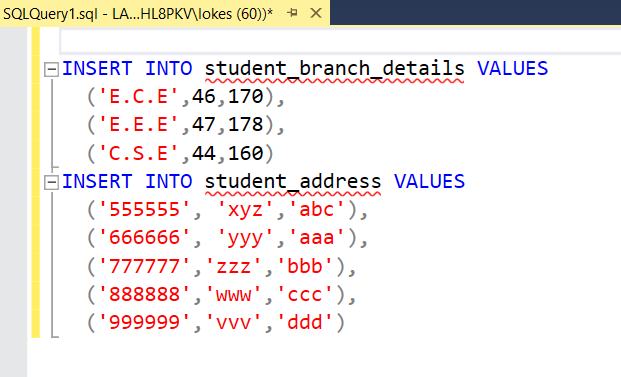
Inserting rows into student_branch_details and student_address tables using the following SQL query:
Query:
INSERT INTO student_branch_details VALUES
('E.C.E',46,170),
('E.E.E',47,178),
('C.S.E',44,160)
INSERT INTO student_address VALUES
('555555', 'xyz','abc'),
('666666', 'yyy','aaa'),
('777777','zzz','bbb'),
('888888','www','ccc'),
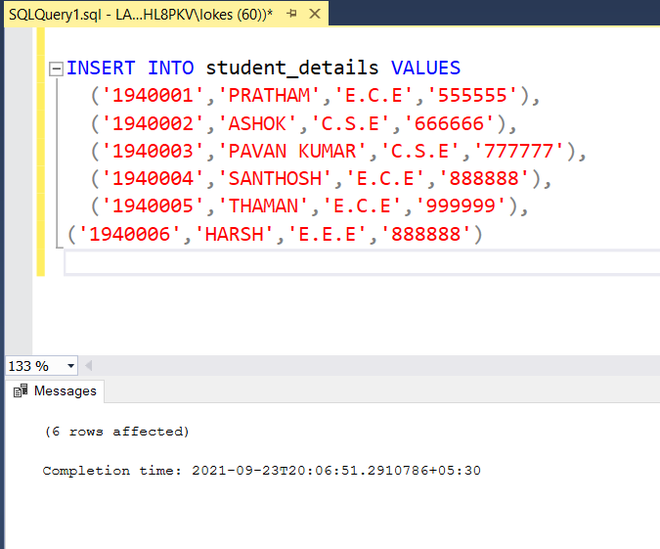
('999999','vvv','ddd')👁 ImageInserting rows into student_details
Query:
INSERT INTO student_details VALUES
('1940001','PRATHAM','E.C.E','555555'),
('1940002','ASHOK','C.S.E','666666'),
('1940003','PAVAN KUMAR','C.S.E','777777'),
('1940004','SANTHOSH','E.C.E','888888'),
('1940005','THAMAN','E.C.E','999999'),
('1940006','HARSH','E.E.E','888888')
👁 ImageStep 5: Verifying the inserted data
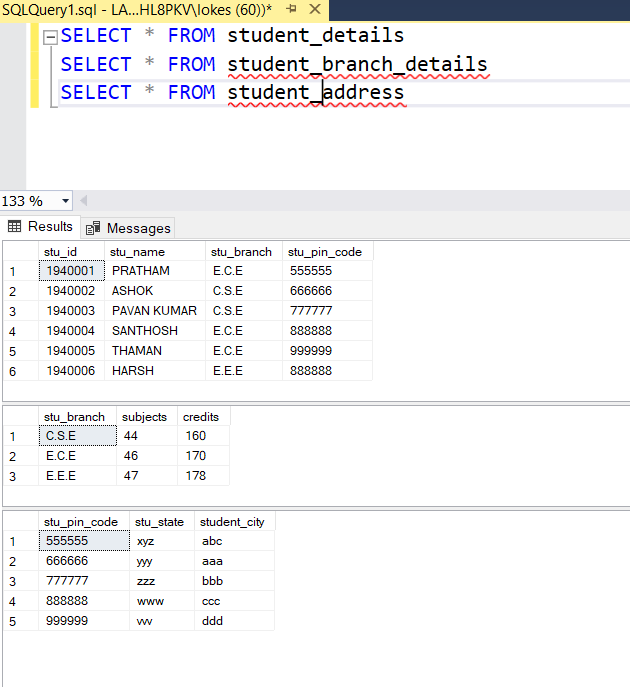
Viewing the tables student_details,student_branch_details,student_address after inserting rows by using the following SQL query:
Query:
SELECT * FROM student_details
SELECT * FROM student_branch_details
SELECT * FROM student_address
Output:
👁 Image