 |
VOOZH | about |
|
VOOZH | about |
Experiencing frequent crashes with Windows apps can be frustrating, especially when the cause is rooted in underlying system errors. These errors might be due to corrupted system files, outdated drivers, or misconfigured settings that disrupt the stability of your applications. In this guide, we’ll explore how to repair system errors that cause Windows apps to crash, using various troubleshooting methods to restore system stability and prevent further crashes.
Table of Content
Windows OS users have reported that some third-party apps and programs are shutting down independently. A virus, program issues, corrupted files, or system faults could cause Windows apps to crash.
In addition to crashing the apps, this problem keeps users from accessing their data. Even though this can appear to be a major issue, it is fixable. Let's examine a few strategies for eliminating these Windows app crashing problems.
Let's get right in; hopefully, this will be a straightforward procedure for all of you.
Here, we'll mention some easy methods to stop apps crashing in Windows 10/11.
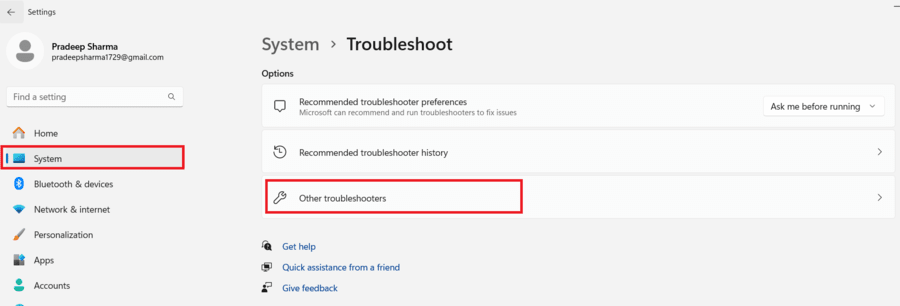
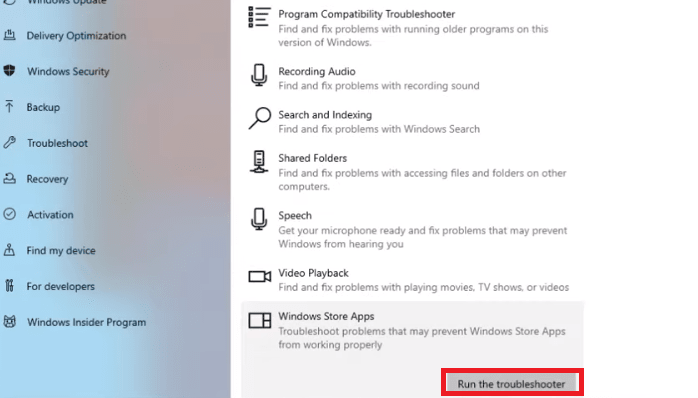
Microsoft's App Troubleshooter in Windows 11 helps fix problems with apps from the Microsoft Store by scanning and resolving the Windows app crash issues.
Step 1: Press Windows + I and navigate to System > Other troubleshooter
Step 2: Now Scroll down a bit, there you will find the Windows Store Apps option, and click Run the troubleshooter button.
Step 3: After running troubleshooter it will detect and resolve any issues with the programs that were downloaded and set up from the Microsoft Store.
In our case, the troubleshooter couldn't identify any problems, but if you have any, it will detect and diagnose those issues on your system.
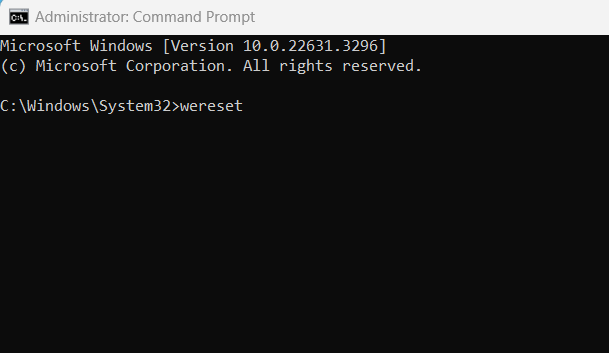
WSReset is a command-line tool in Windows that helps resolve issues with Windows Store apps by resetting their cache and settings. Here's how to do it:
Step 1: Open Command Prompt as an Administrative.
Step 2: Type "wsreset" in cmd and hit Enter.
👁 Resetting-Apps-Cache-and-Settings_1
Step 3: It may take a few moments. Once completed, the Windows Store will open, and you should see a message indicating that the cache has been cleared.
Check if the issue with the Windows Store app crashing has been resolved. If not, go for another method.
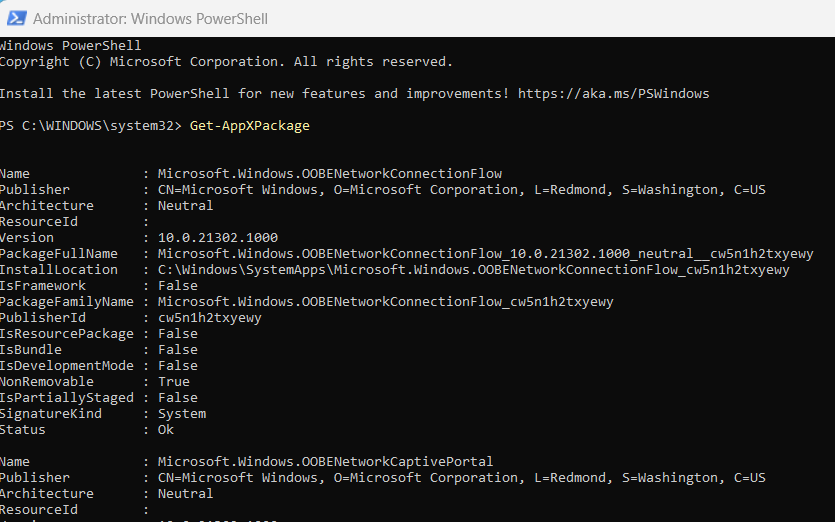
App crashing problems can be fixed by re-registering apps as they fix, corrupted files and restoring default settings. To resolve the Windows app crashing issue using PowerShell, follow these steps:
Step 1: Open PowerShell as Administrator.
Step 2: Type the command and press Enter to list installed apps.
Get-AppXPackage👁 Re-Registering-Applications_1
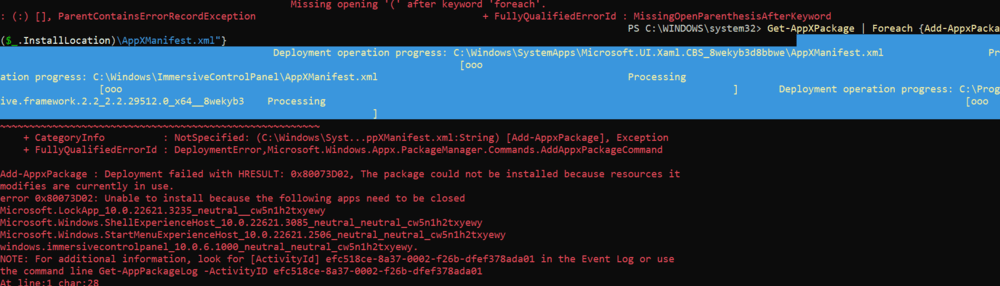
Step 3: Type copy-paste the following command and press Enter.
Get-AppXPackage | Foreach {Add-AppxPackage -DisableDevelopmentMode -Register "$($_.InstallLocation)\AppXManifest.xml"}👁 Re-Registering-Applications_2
Wait for the process to complete, as it re-registers all installed apps. you might also get some errors as some of the applications are already opened and can't be re-registered at that moment.
Step 4: Once finished, restart your computer to apply the changes.
Check if the app are were trying to access is now working properly or not. If it does, move on to the next method.
You can resolve several system issues that cause apps to abruptly crash or close by doing a clean boot. This lets you focus on the issue by starting Windows OS with the fewest possible settings and apps. To carry out this
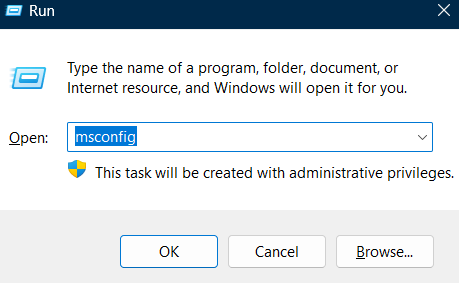
Step 1: Type "msconfig" and hit Enter after pressing WINDOWS + R.
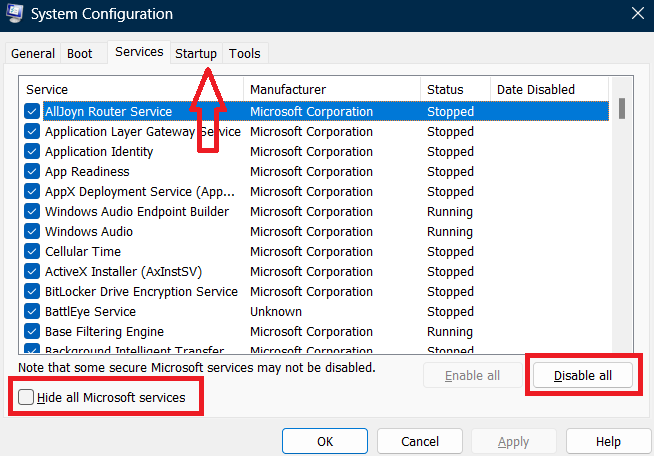
Step 2: Select the option to hide all Microsoft services by clicking on the Services tab.
Step 3: Next, select "Disable all" to turn off all non-Microsoft services.
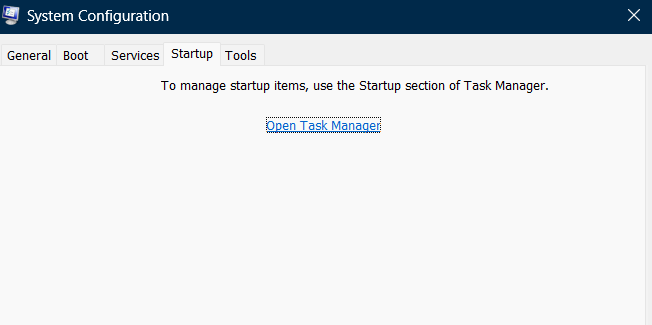
Step 4: Select Open Task Manager from the Startup tab.
Step 5: Now Right-click on each task and disable it.
Step 6: Go back to the screen showing the system configuration and select Apply and OK.
Step 7: Turn your computer back on.
By doing a clean boot, you can identify the root problem of your Windows 11 computer.
To find corrupted files on the system, we will quickly scan the system using a program called the System File Checker (SFC). Here's how to do it.
Step 1: Open Command Prompt, simply type "CMD" into the search box, right-click it, and choose "Run as administrator."
Step 2: Enter the following command and hit Enter.
sfc /scannow👁 Execute-System-File-Checker-(SFC)
Step 3: When the scan is completed 100%, restart your computer again.
The files will be automatically deleted if any corruption is found. If, however, you receive an error notice stating that "Windows Resource Protection did not find any integrity violations," then nothing went wrong.
Use Advanced System Settings to troubleshoot Windows apps that crash by doing the following steps:
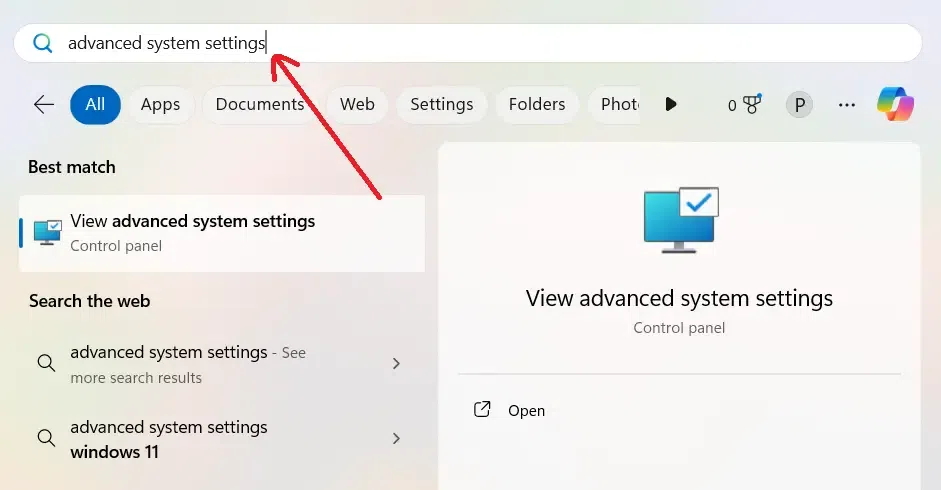
Step 1: Open the search menu and type "Advanced System Settings."
👁 Adjust-Advanced-System-Settings_1
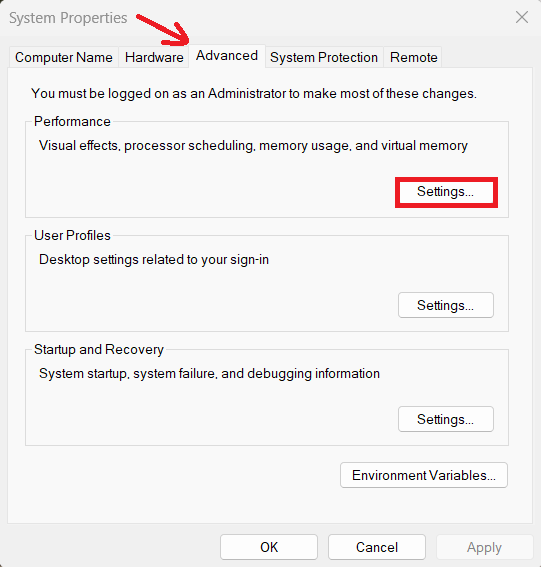
Step 2: Navigate to the Advanced Tab and click on "Settings" under "Performance
👁 Adjust-Advanced-System-Settings_2
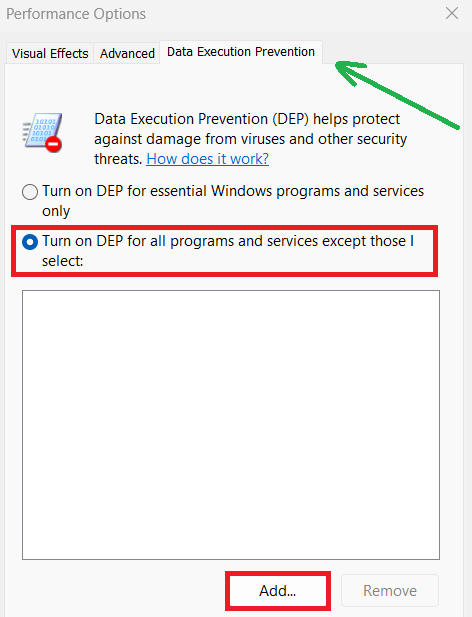
Step 3: Enable Data Execution Prevention (DEP)
👁 Adjust-Advanced-System-Settings_3
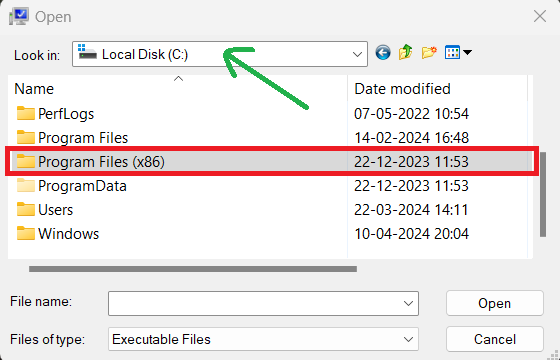
Step 4: Add Program to DEP Exceptions
👁 Adjust-Advanced-System-Settings_4
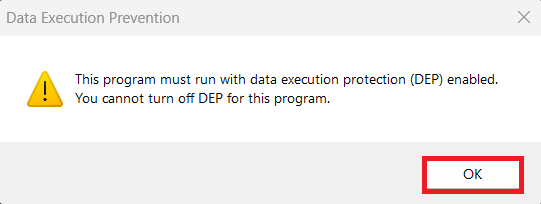
Note: If a dialogue box appears stating "You can't turn off DEP for this program," it means that Data Execution Prevention (DEP) cannot be disabled for that specific program.
👁 Adjust-Advance-System-Settings
DEP exceptions may only work for 32-bit files This provides an alternative option for troubleshooting 32-bit applications
👁 Adjust-Advanced-System-Settings_6
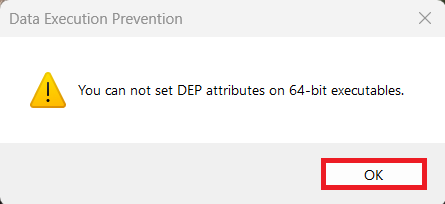
If you find this dialogue box, The dialogue box states that DEP attribute modification is not possible for 64-bit programs due to security reasons, preserving system integrity.
By following these steps to repair system errors, you can resolve the issues causing your Windows apps to crash and ensure a smoother experience. Regular system maintenance, keeping drivers updated, and using built-in Windows tools like System File Checker can help prevent crashes and improve overall system stability.
.webp)