 |
VOOZH | about |
|
VOOZH | about |
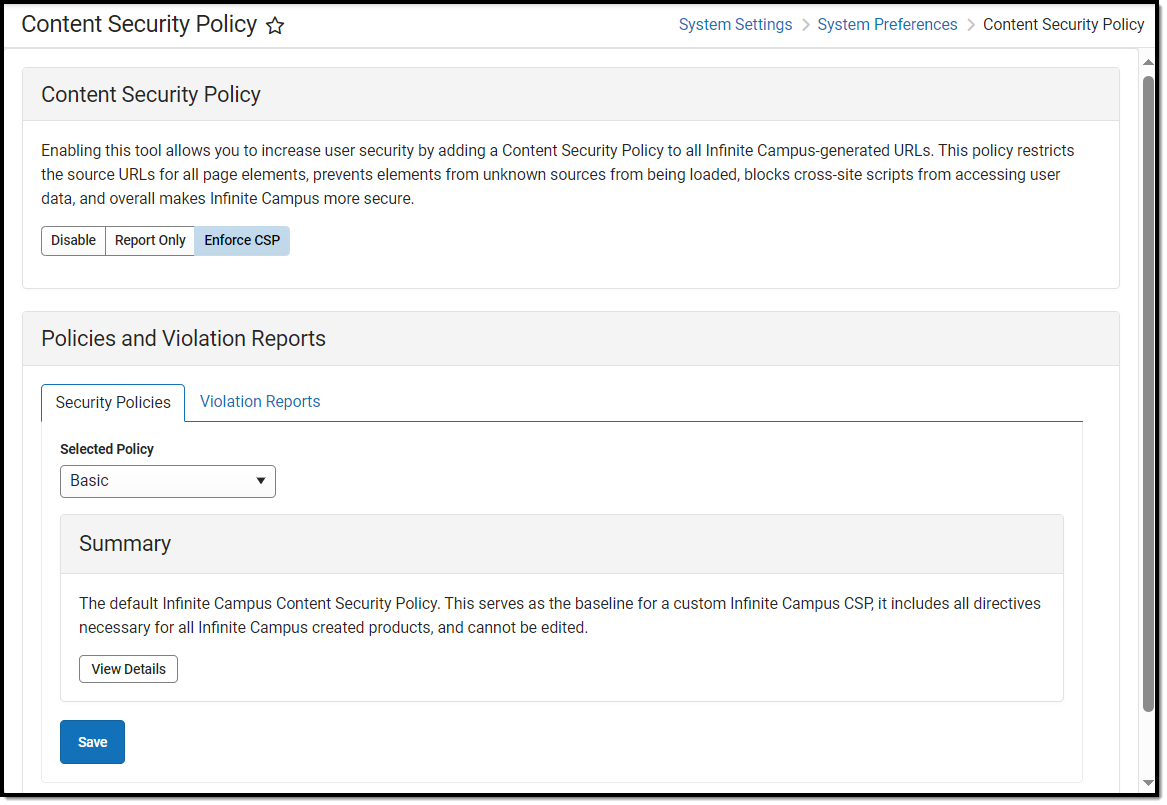
Tool Search: Content Security Policy
The Content Security Policy is an additional security directive which is added to the HTTP headers of all Campus pages. This tool allows administrators to control resources the user agent is allowed to load for a given page. Content Security Policies mostly involve specifying server origins and script endpoints, bolstering system security, especially against cross-site scripting attacks (XSS).
Unlike most Content Security Policies, this tool allows for flexibility to account for both the variety of pages used throughout Campus and custom development utilized by our customers. As a result, this tool provides a Basic Policy (all resources loaded from Campus) and a Custom Policy where users are able to build on top of the Basic policy to meet their individual needs.
For detailed information about the purpose and importance of CSPs, guidance on creating your own CSP, and understanding violation report syntax, see the Mozilla Content Security Policy guide.
This tool should only be used by a system administrator who manages and/or understands your district's Content Security Policy (CSP).
External resources pulled into Infinite Campus via an Outline Link or Custom Tool are automatically added to your CSP. When an outline link or custom tab containing an external URL is deleted, the associated URL is automatically removed from the CSP.
👁 screenshot of the content security policy tool
Image 1: Content Security Policy Tool
Only users assigned a Product Security Role of Student Information System (SIS) are allowed to use this tool.
The first step in setting your Content Security Policy is determining which policy works best for your district. See the sections below for more information about each policy:
👁 screenshot of selecting the Basic policy
Image 3: Selecting a Policy
The Basic policy is the default policy which includes all directives necessary for all Infinite Campus-created products. For most users, especially those without custom or 3rd-party tooling which makes calls outside of the Campus product, the Basic policy will work well and should be selected.
To view a breakdown of what is included within the Basic CSP, click the View Details button (Image 4).
👁 screenshot of viewing the details of the basic content policy
Image 4: Selecting and Viewing the Basic Policy
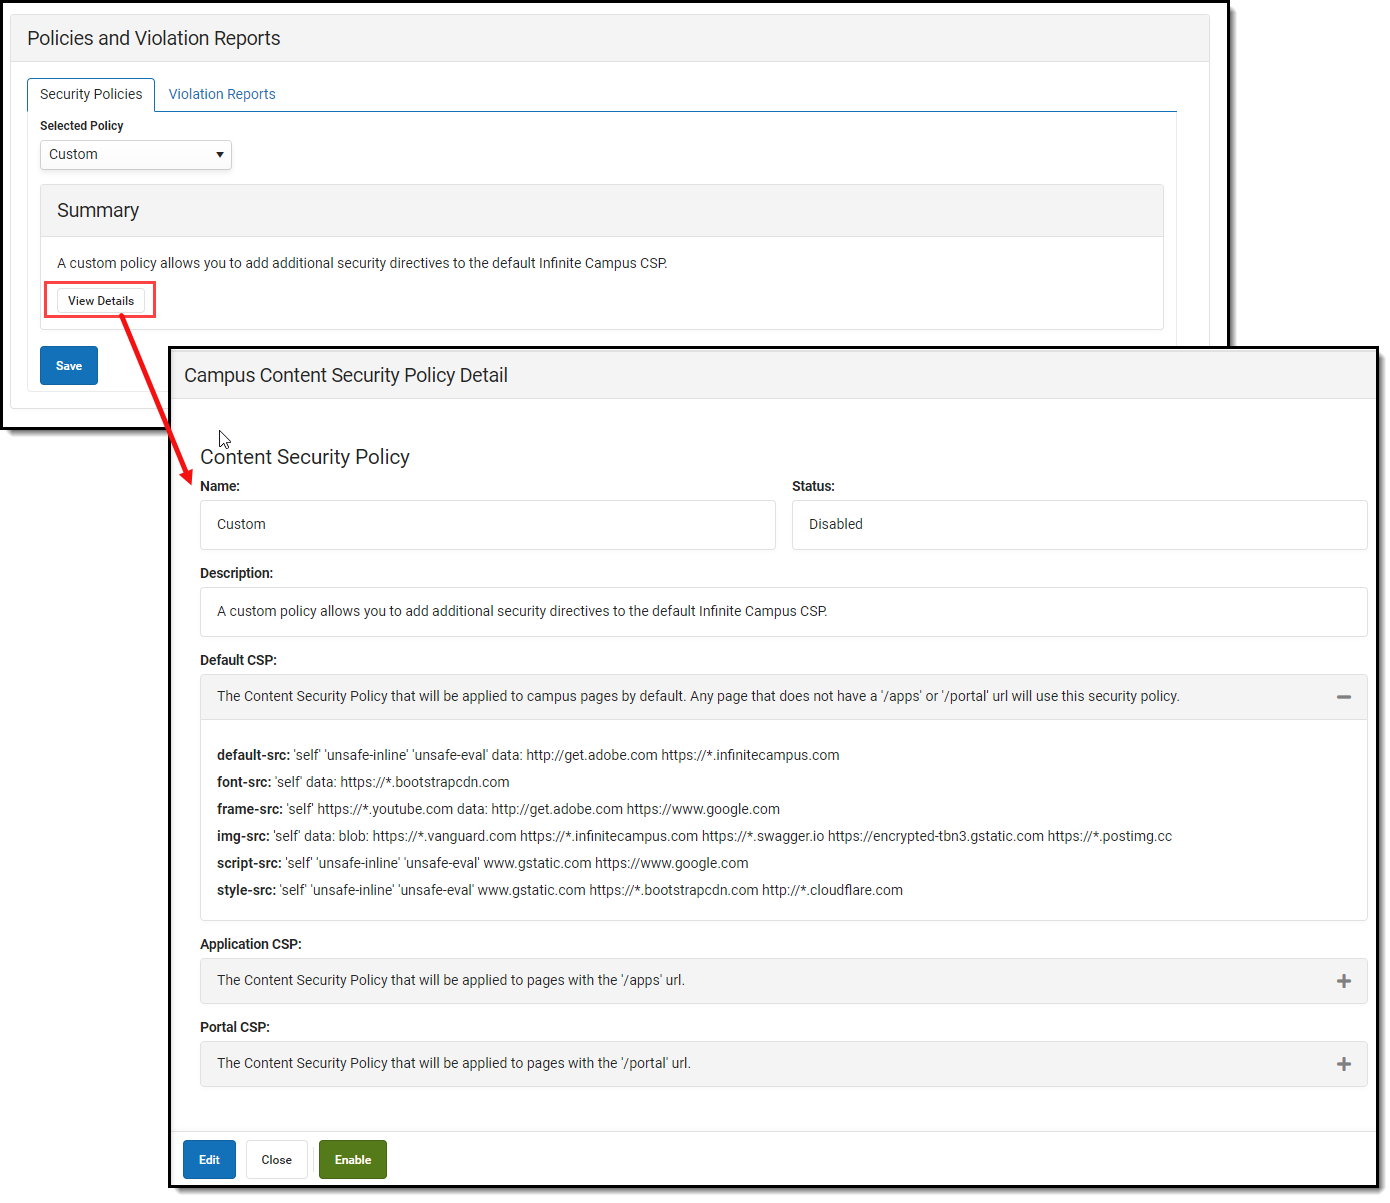
The Custom policy is everything contained within the Basic policy (all directives necessary for all Infinite Campus-created products) with the ability to build on top of it with your own AllowListed applications.
To view and modify the policy, select 'Custom' in the Selected Policy dropdown list and click View Details. An editor will appear, detailing everything contained within the policy. To edit and add to the policy, click the Edit button (Image 5).
👁 screenshot of viewing the details of a custom policy
Image 5: Viewing and Editing the Custom Policy
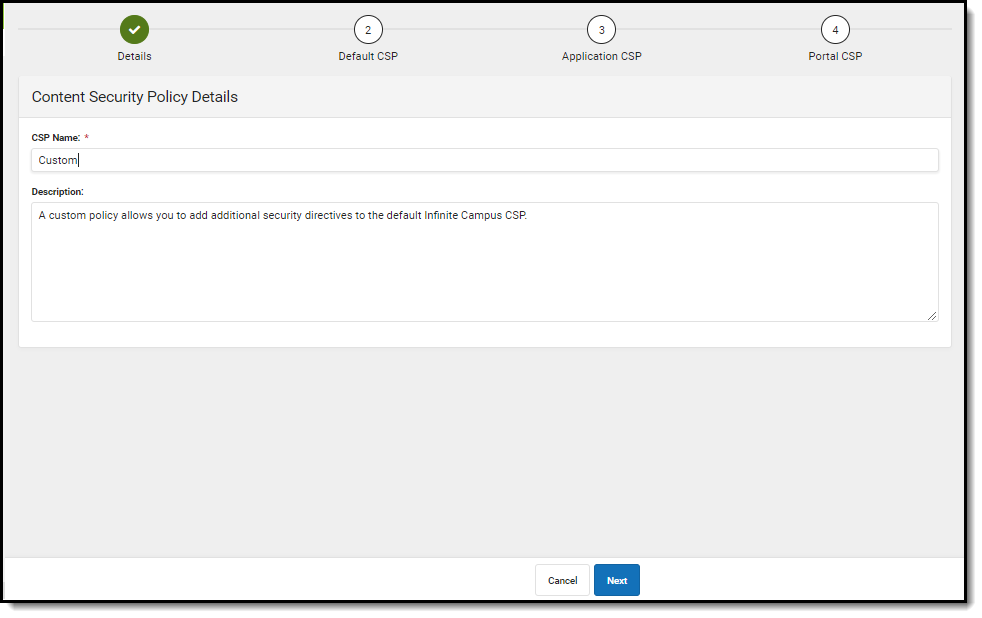
The first screen allows you to edit the CSP Name and Description of the policy. Once complete, select Next (Image 6).
👁 screenshot of enter the custom policy name and description
Image 6: Modifying the Custom CSP Name and Description
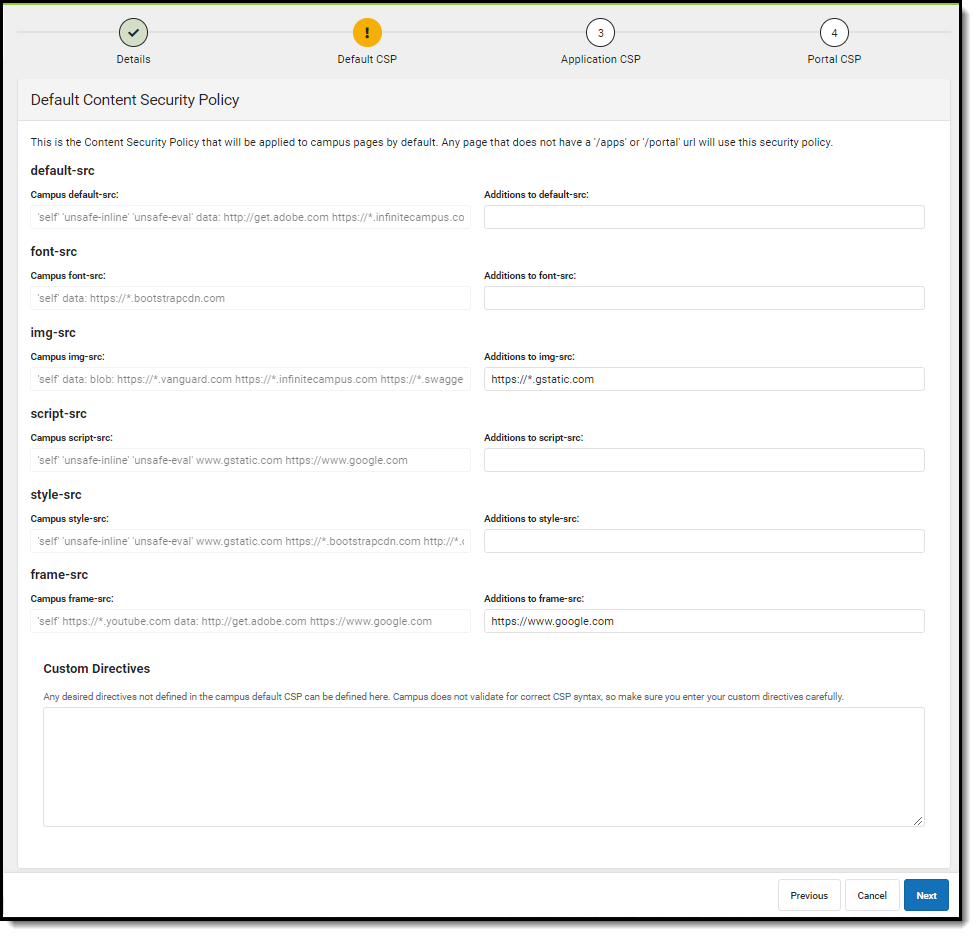
This second editor contains the default CSP used for Campus pages. Add any additional pages as needed. Once complete, select Next (Image 7).
👁 screenshot of modifying the existing content security policy
Image 7: Adding to the Default CSP
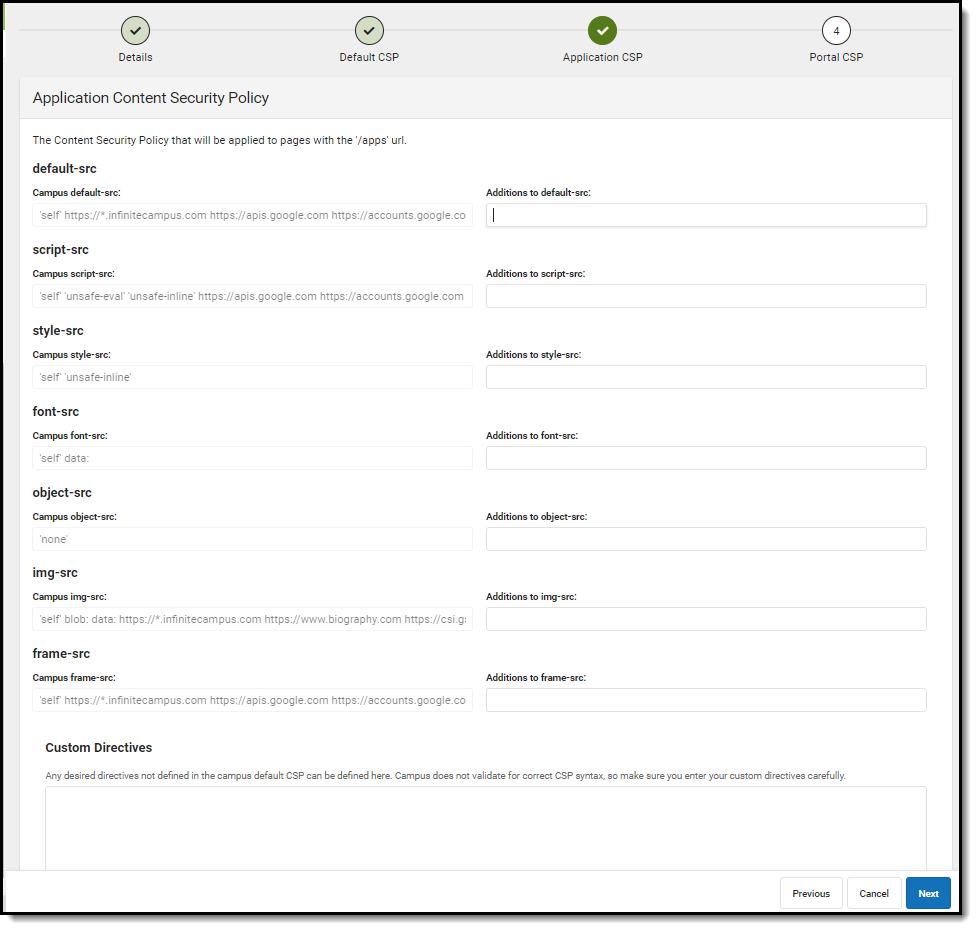
The third editor contains all Campus apps contained within the CSP. Add any additional applications as needed. Once complete, select Next (Image 8).
👁 screenshot of adding to the application content security policy
Image 8: Adding to the Application CSP
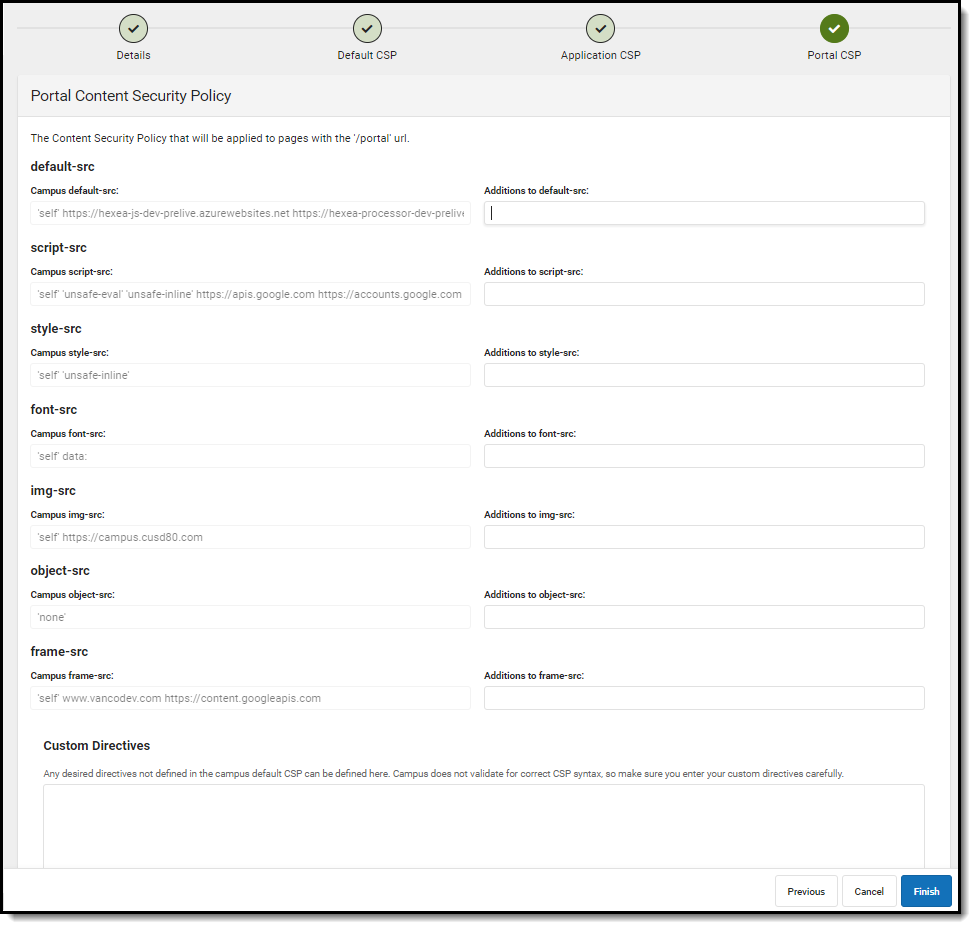
The fourth editor is all Campus Portal pages included in the CSP. Add any additional pages as needed. Once complete, select Finish and then select Save near the bottom of the Content Security Policy tool. The policy is now saved and set to Disabled by default. To begin using CSP functionality, Infinite Campus suggest setting it to Report Only and using the Violations Reports to audit any CSP violations prior to enforcing the policy.
👁 screenshot of adding to portal content security policy
Image 9: Adding to the Portal CSP and Finishing the Custom CSP Process
Once you have selected and saved a policy, you need to set whether to have it report violations or be enforced.
By default, Disabled is selected. It is best practice to first set the value to Report Only and audit CSP violations prior to enforcing the CSP.
👁 screenshot of setting the content security policy to disabled, report only, or enforce
Image 10: Enforcing, Reporting, or Disabling the CSP
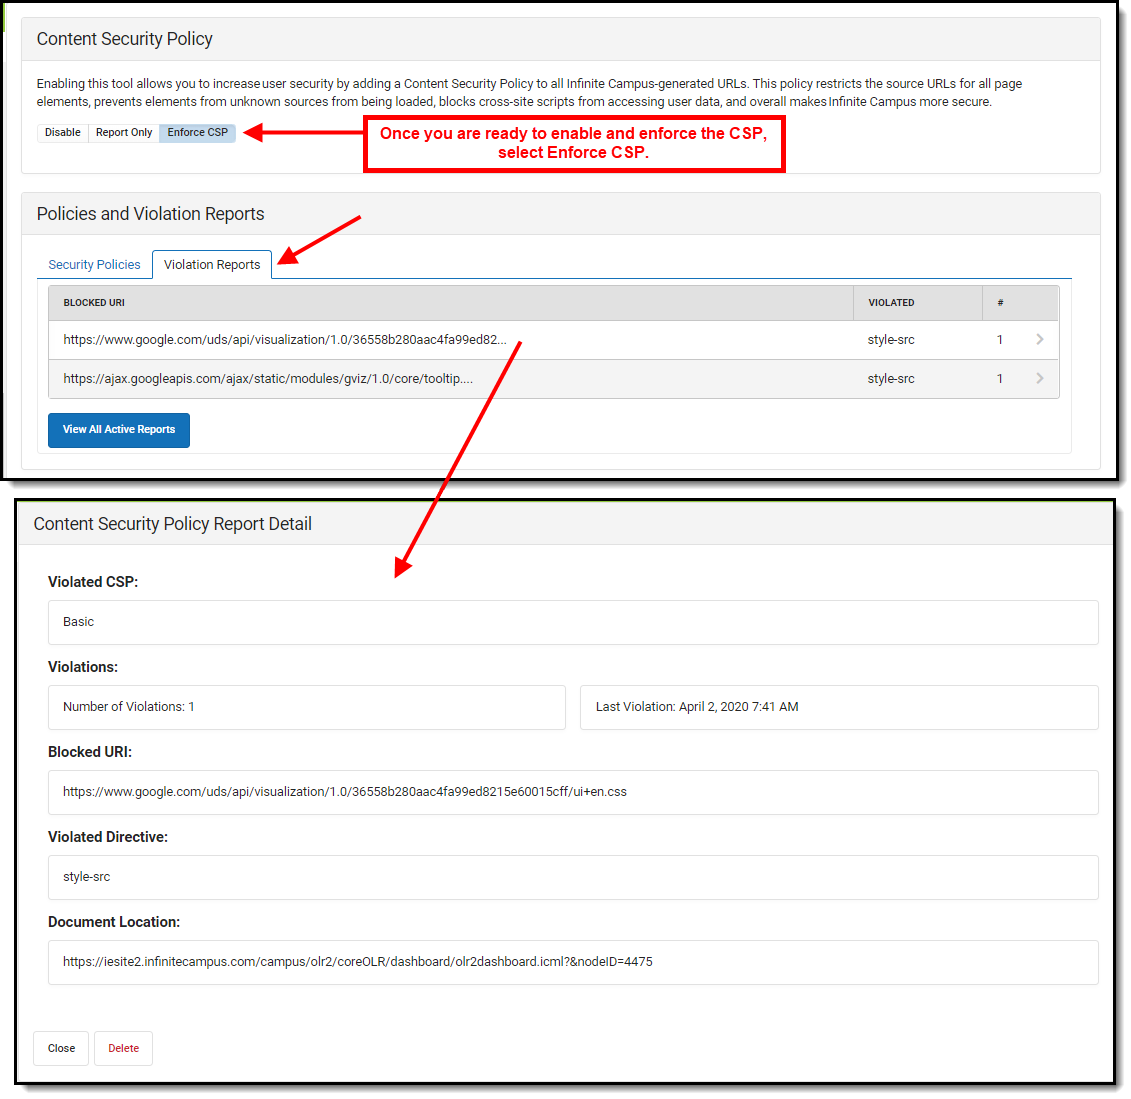
Once a policy has been selected and saved, any violations of the CSP will be reported and detailed in the Violation Reports tab (Image 11). For detailed information about a violation, select it from the list.
Review and audit violations to ensure the policy is not blocking or breaking any intended functionality and if using a Custom policy, adjust the policy to account for these violations.
Once you have thoroughly reviewed violations, made any adjustments to the policy as needed, and feel the CSP is ready to be enforced. select Enforce CSP. The CSP is now actively enforcing the policy and any violations are blocked in real time.
👁 screenshot of enforcing the content security policy and viewing any violations
Image 11: Reviewing CSP Violations