 |
VOOZH | about |
|
VOOZH | about |
Jira is a tool used by the developer's family to make the development process smooth. Jira provides lots of facilities that make it an eye-catching tool in the developer's eye. One of the prominent features of Jira is Sprint. Creating a sprint in Jira is an essential step for Agile teams looking to efficiently manage their projects. Jira offers robust features that streamline the sprint planning process and enhance team collaboration.
This article explores the steps and best practices involved in setting up a sprint in Jira, empowering teams to deliver iterative and impactful results while maintaining flexibility and transparency throughout the development cycle
Sprint refers to a fixed time period during which a team works on a set of tasks or user stories, typically lasting between one to four weeks. Sprints are a core concept in Agile methodologies, enabling teams to plan, execute, and deliver incremental updates to software or projects. Sprint denotes the work that needs to be completed within weeks.
Sprint goal is a concise statement that defines the objective or purpose of a sprint. It serves as a guiding principle for the team, outlining what they aim to achieve by the end of the sprint. Sprint goal refers to a brief explanation of the goal the team needs to achieve during the Sprint.
The prerequisite for creating Sprint in Jira is to have a Jira account. If you want to know how to create a Jira Account for Free Click Here.
This step involves creating a new sprint in Jira.
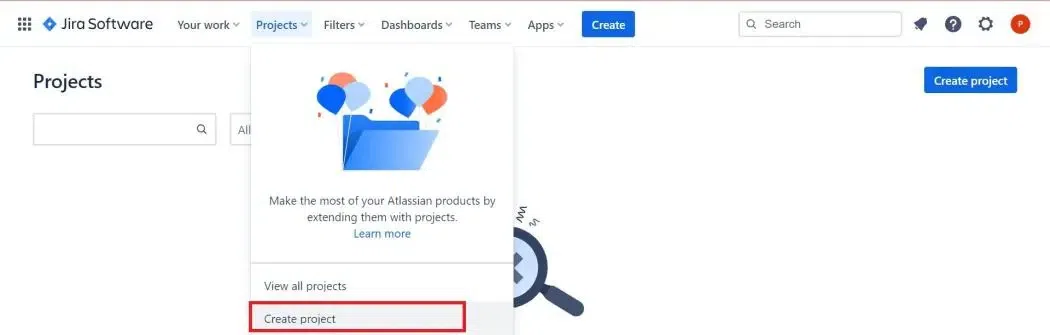
1. Log in to your Jira Account.
2. Under the Project tag click on Create Project.
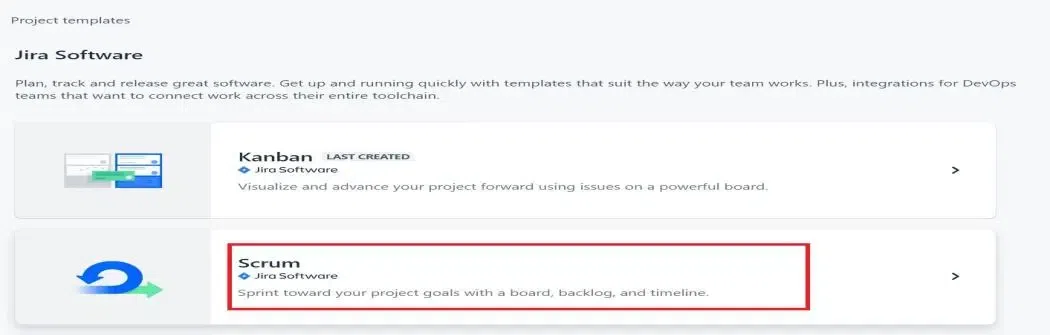
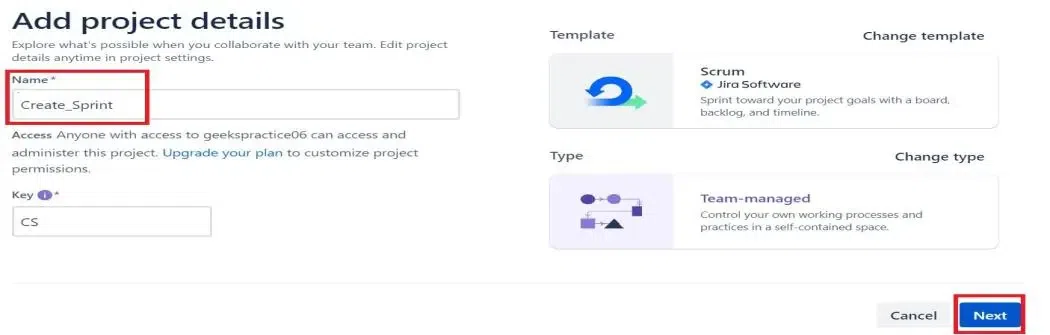
3. You have different project templates to choose you can choose any. But, for this, we are going with Scrum.
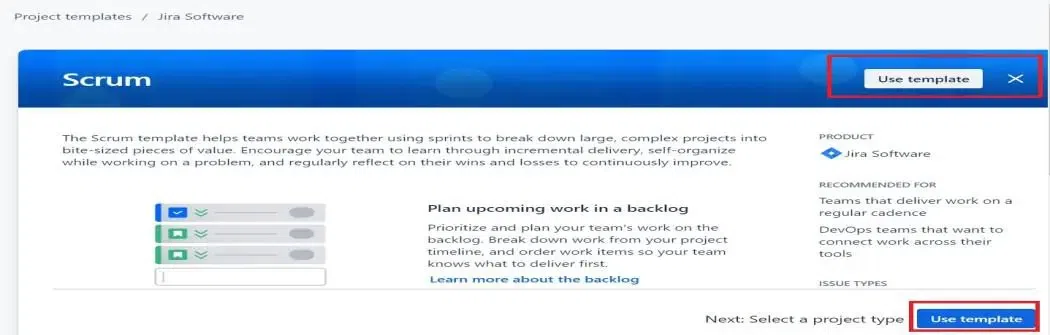
4. Click on Use Template.
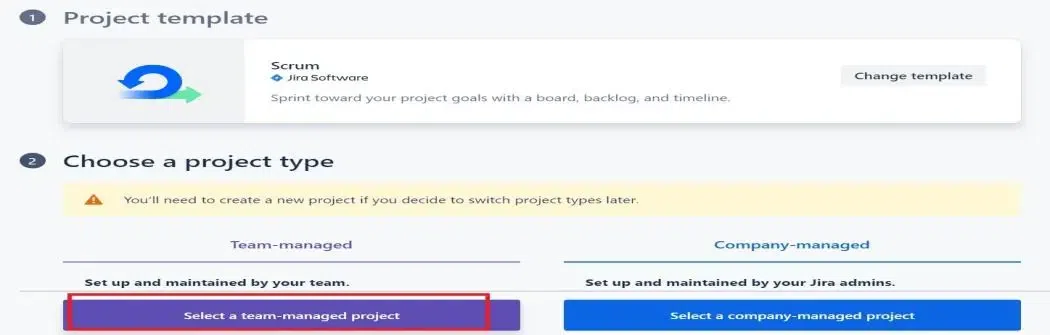
5. Select the Team Managed Project as Company Managed requires a premium account.
6. Give Project name as per your need, or you can follow the below and hit Next.
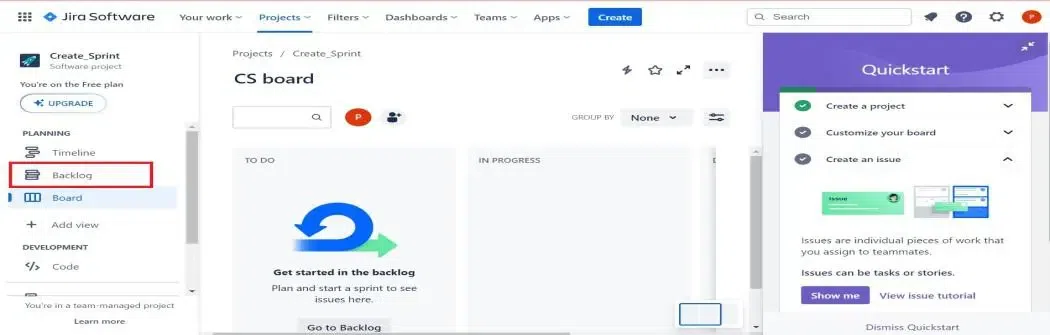
Once the sprint is created and selected. You can start adding work from the Backlog. Organize a meeting with the team and discuss the work they will commit to in completing task for the upcoming sprint.
Dashboard will be opened, Click on Backlog on the left panel.
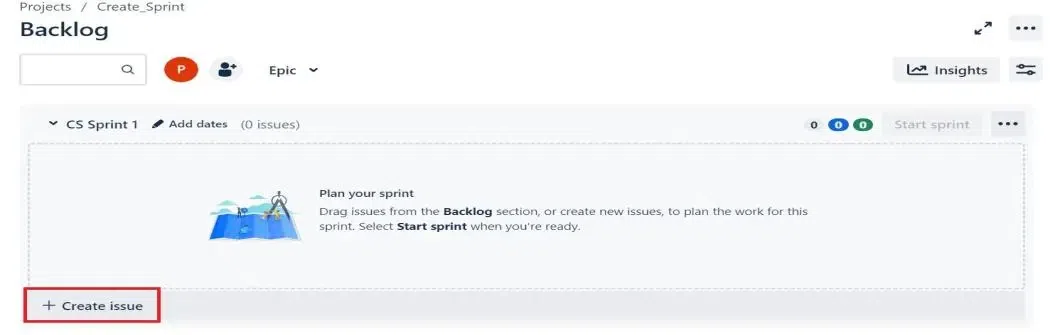
Next step is to navigate to the sprint pane and add issues to the sprint.
1. Click on Create Issue as shown in the below image.
2. Write some issue as per your choice or you can write the issue shown below.
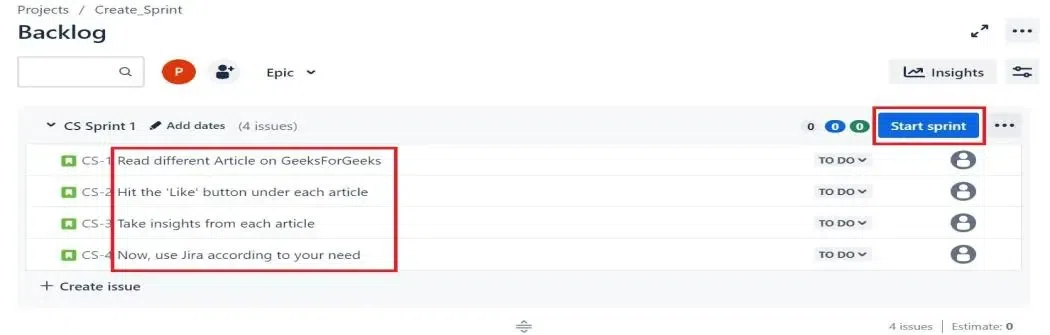
Start the sprint after all the issues are added and team can begin working on them. A new sprint can only be started when the previous sprint is completed and closed. Parallel Sprint feature in Jira allows to have more than one active sprint running simultaneously in Jira.
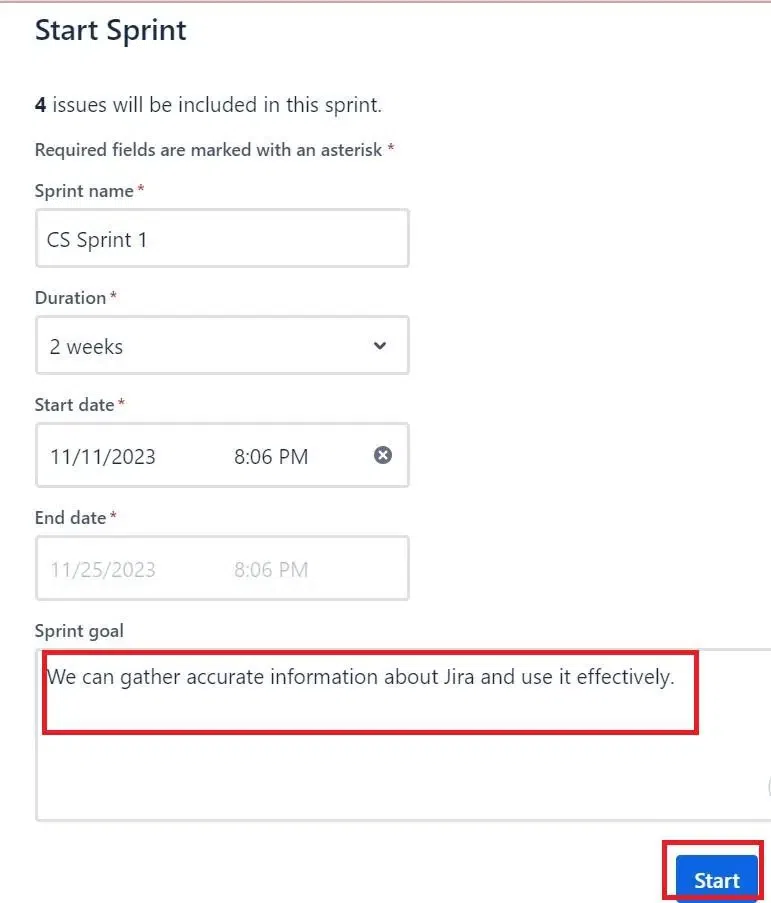
1. After creating an issue, click on Start Sprint.
2. Leave everything default if you feel, you can write Sprint Goal and click on Start.
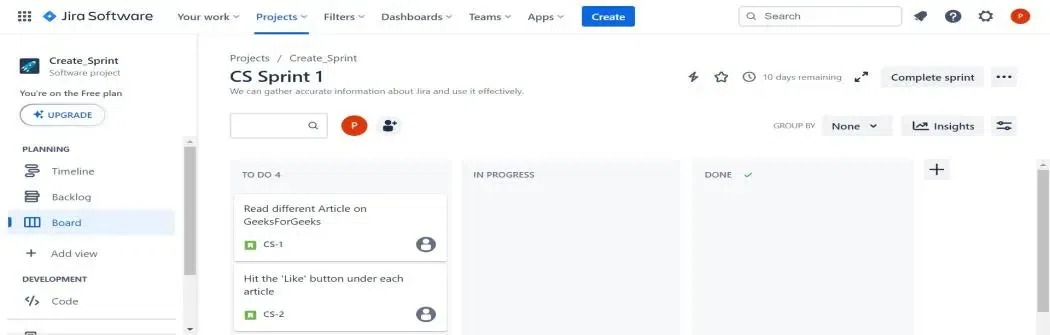
3. You will be automatically directed to the Jira Board where you can work on the Issue under this Sprint.
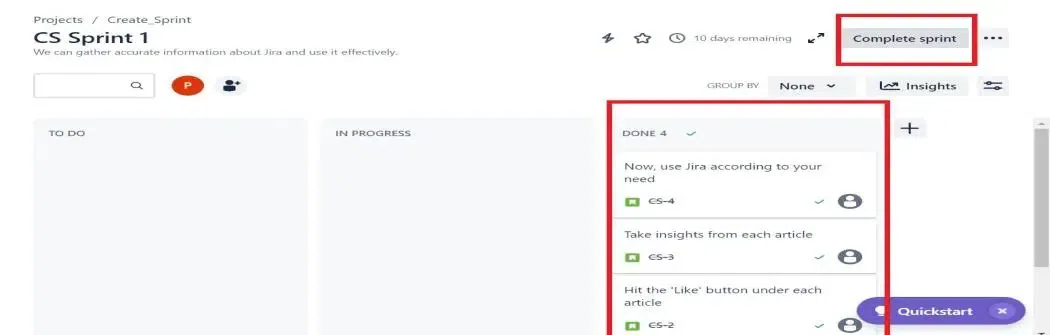
4. Work on your Issue and move them forward. If they are done. Here for demonstration purposes, I am shifting every Process to the Stage Done.
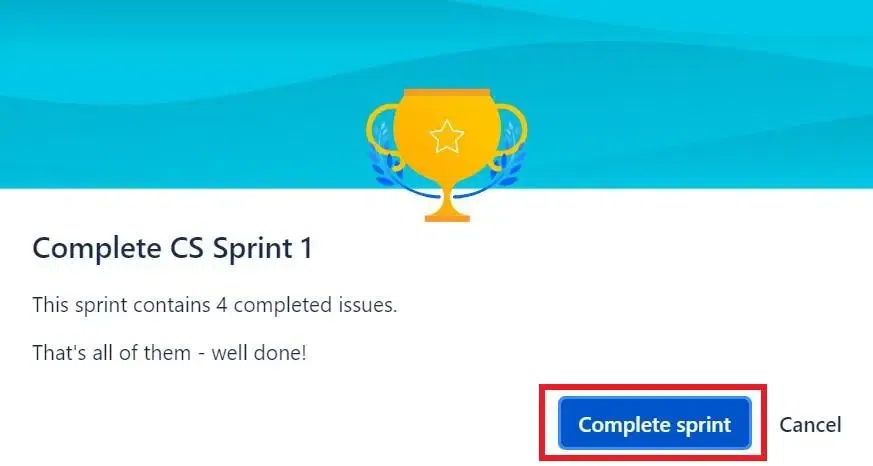
5. Now, Click on Complete Sprint.
6. You can again create another sprint by following the above same process and complete your project by taking small steps.
Team standup meetings are important to keep track of what everyone is working on or specific issues about the timelines and the goals associated with the individual tasks.
Choose the sprint to close from the Scrum board's Active sprints section.
Creating Sprint in Jira is essential for Project Management. By following the best practices of Sprint in Jira you can use Sprint at its best.
Sprint in Jira is essential for delivering high-quality products. By following the best practices stated above tames can utilize the sprint at its best. Through careful sprint planning, effective communication, and continuous improvement in the sprint, the team can meet their objective and also, build trust and collaboration with the stakeholders.