 |
VOOZH | about |
|
VOOZH | about |
JWT authentication in Spring Boot 3.0 enables secure and stateless communication for REST APIs. By integrating Spring Security with JWT and MySQL, applications can efficiently handle user authentication without relying on server-side sessions. This approach improves scalability and security in modern distributed systems.
In this project, we will build a Spring Boot 3.0 application that integrates Spring Security with JWT and connects to a MySQL database for user management.
Create a Spring Boot Project in Spring Initializr. For this project, choose the following options:
Please choose the following dependencies while creating the project.
Additionally, we have added dependencies for JWT also. Below are the dependencies
<dependency>
<groupId>io.jsonwebtoken</groupId>
<artifactId>jjwt-api</artifactId>
<version>0.11.5</version>
</dependency>
<dependency>
<groupId>io.jsonwebtoken</groupId>
<artifactId>jjwt-impl</artifactId>
<version>0.11.5</version>
</dependency>
<dependency>
<groupId>io.jsonwebtoken</groupId>
<artifactId>jjwt-jackson</artifactId>
<version>0.11.5</version>
</dependency>
Below is the complete pom.xml file. Please cross-verify if you have missed some dependencies.
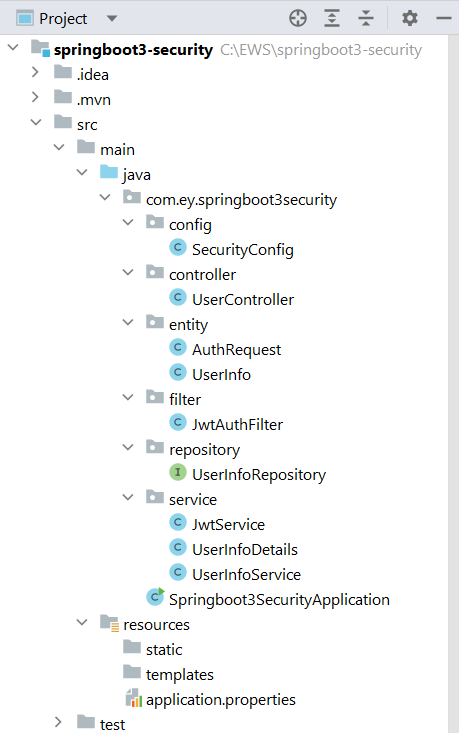
Project Structure:
Before moving to the project here is the complete project structure.
Go to the src -> main -> java -> controller and create a class UserController and put the below code. In this, we have created a simple REST API in our controller class.
UserController.java:
Go to the src -> main -> java -> config and create a class SecurityConfig and put the below code. This is the new changes brought in Spring Boot 3.0.
Go to the src -> main -> java -> entity and create a class UserInfo and put the below code.
Similarly, create a class AuthRequest and put the below code.
Go to the src -> main -> java -> filter and create a class JwtAuthFilter and put the below code.
Go to the src -> main -> java -> repository and create an interface UserInfoRepository and put the below code.
Go to the src -> main -> java -> service and create a class JwtService and put the below code.
Similarly, create a class UserInfoDetails and put the below code.
Similarly, create a class UserInfoService and put the below code.
Make the following changes in the application.properties file:
spring.datasource.driver-class-name=com.mysql.cj.jdbc.Driver
spring.datasource.url = jdbc:mysql://localhost:3306/university
spring.datasource.username = root
spring.datasource.password = 143@Arpilu
spring.jpa.hibernate.ddl-auto = update
spring.jpa.properties.hibernate.dialect = org.hibernate.dialect.MySQLDialect
spring.jpa.hibernate.naming.physical-strategy=org.hibernate.boot.model.naming.PhysicalNamingStrategyStandardImpl
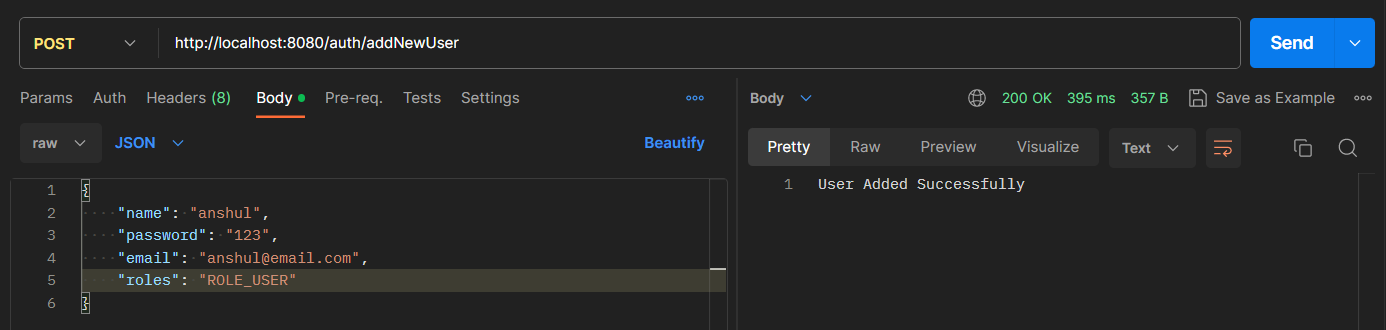
Now run your application and test it out. Hit the following URL:
http://localhost:8080/auth/addNewUser
It will add the user to the database.
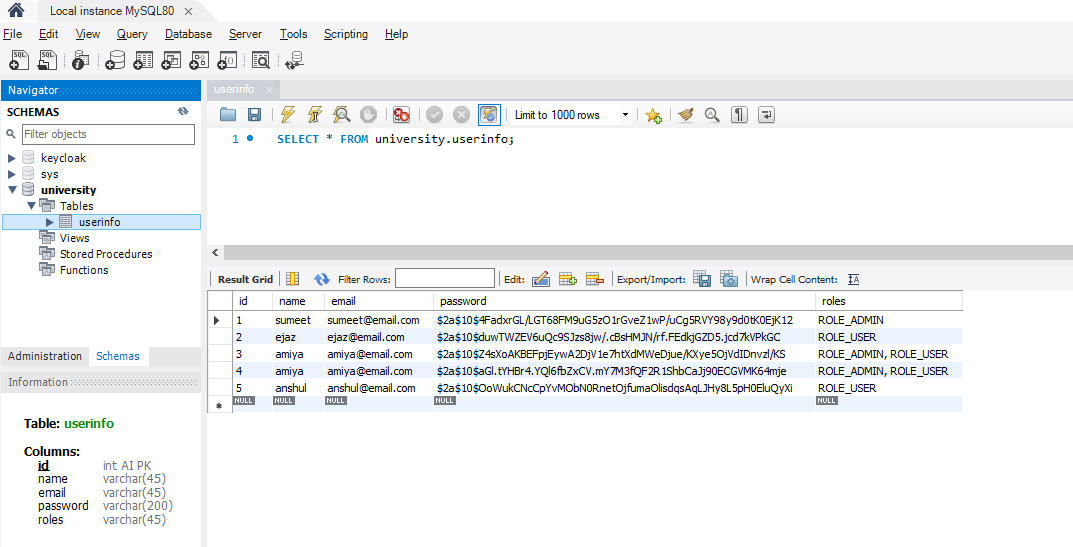
Below is our database screenshot.
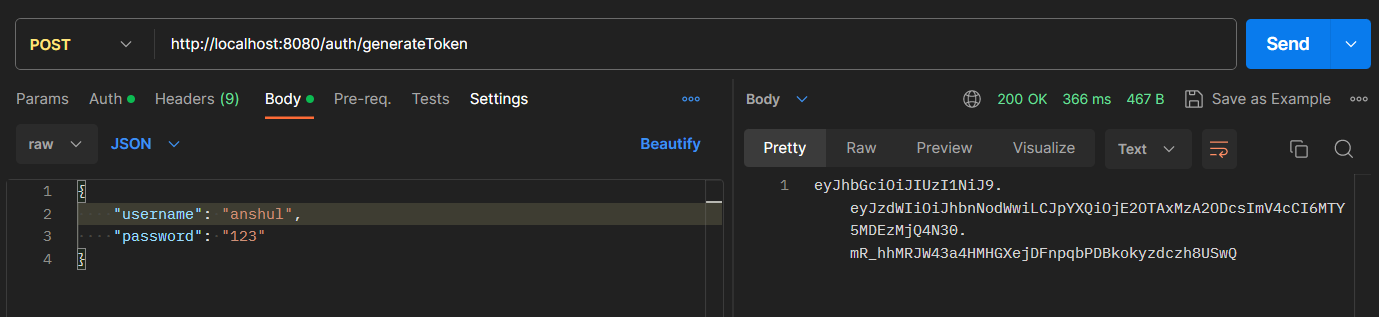
Now, hit the following URL to generate the token.
http://localhost:8080/auth/generateToken
It will generate the token.
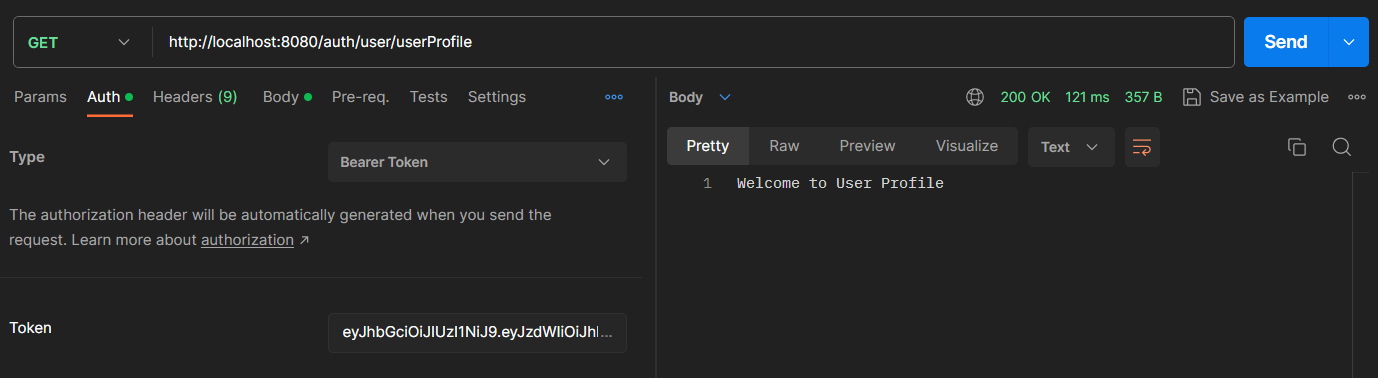
Now using this take we can access our endpoint according to the ROLE. Hit the following URL and put the Bearer token.
http://localhost:8080/auth/user/userProfile
Refer to the screenshot below.