Spring Data JPA simplifies database access by providing ready-to-use repositories for CRUD (Create, Read, Update, Delete) operations, reducing boilerplate code. In this article, we’ll demonstrate how to connect a database with a Spring Boot application using Spring Data JPA.
Step-by-Step Implementation Step 1: Create a Spring Boot project 1. Go to Spring Initializr.
Project: Maven Language : Java Spring Boot Version: (latest stable) 2. Dependencies:
Spring Web -> To build REST APIs Spring Data JPA -> For database access MySQL Driver -> To connect with the MySQL database Download the project and import it into your IDE (Eclipse/IntelliJ/STS).
Step 2: Configure Database Connection Open the application.properties (or application.yml) file and configure the MySQL database connection:
Key Points:
Replace database_name with your actual database. ddl-auto=update will create/update tables based on entity classes. show-sql=true logs SQL queries in the console. Step 3: Define the Entity Class Now, create a model class Company that maps to the database table.
Company.java:
Key Points:
The @Entity annotation marks this class as a JPA entity. The @Id annotation specifies the primary key. The @GeneratedValue(strategy = GenerationType.AUTO) annotation auto-generates the primary key value. Step 4: Create the Repository Interface Spring Data JPA provides repositories that reduce boilerplate CRUD code.
CompanyRepository.java:
Key Points:
The @Repository annotation marks this interface as a Spring Data repository. CrudRepository<Company, Long> provides built-in methods like save(), findById(), findAll() and deleteById(). Step 5: Create REST Controller Now, we will create REST APIs to perform CRUD operations on the Company entity.
CompanyController.java:
Key Points:
The @RestController annotation marks this class as a controller for handling REST requests. The @RequestMapping ("/companies") annotation maps all endpoints in this class to the /companies path. The @Autowired annotation injects the CompanyRepository bean. Step 6: Run & Test the Application Start MySQL and create DB:
CREATE DATABASE database_name;
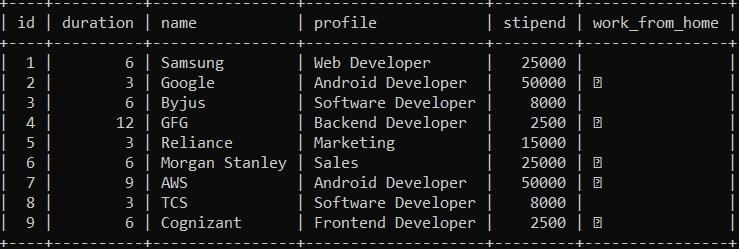
👁 database Run the Spring Boot App DemoApplication.java:
Now, we can run the spring boot application. we can test the REST APIs using Postman to verify that the application is functioning as expected
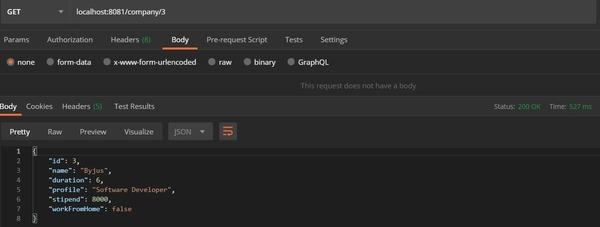
Testing with the POSTMAN collection http://localhost:8080/companies/3
👁 Testing Testing with the POSTMAN Related Article 