Cat & Dog Classification using Convolutional Neural Network in Python
Last Updated : 8 Oct, 2025
Convolutional Neural Networks (CNNs) are a type of deep learning model specifically designed for processing images. Unlike traditional neural networks CNNs uses convolutional layers to automatically and efficiently extract features such as edges, textures and patterns from images. This makes them highly effective for tasks like image classification, object detection and segmentation. In this article we will build a CNN-based classifier to distinguish between images of cats and dogs.
Implementing Cat and Dog Classification using CNN
By following these steps we will gain insights into how CNNs work, how to preprocess image data and how to train an efficient classification model with high accuracy.
We will be using Kaggle dataset for this which is in the format of a zip file containing 2 folders : Cat and Dog. Further each folder contains 12500 images of respective animals. So to import and unzip the file and we can run the below code.
The ZipFile module extracts dataset files from the zip archive.
Extracted data is stored in the 'dog-vs-cat-classification' folder.
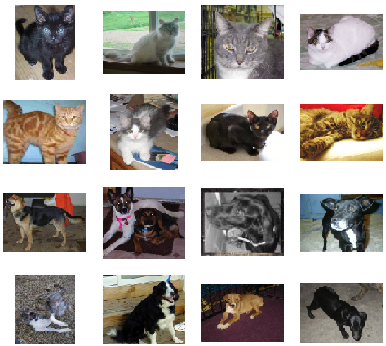
3. Visualizating the Data
We will try to understand and visualize some images which have been provided to us to build the classifier for each class. We extract image paths and loads them using Matplotlib and plot grid visualization using subplot().
fig = plt.gcf() gets the current figure.
fig.set_size_inches(16, 16) sets the figure size.
cat_dir and dog_dir define paths to the cat and dog image directories.
cat_names and dog_names list the image files in each directory.
cat_images and dog_images select images based on pic_index.
plt.subplot(4, 4, i+1) creates a 4x4 grid for images.
sp.axis('Off') hides the axis.
mpimg.imread(img_path) reads each image and plt.imshow(img) displays it.
Now we will compile and train our model. We used Binary Crossentropy Loss Function for binary classification problems with Adam optimizer.
model.compile(loss='binary_crossentropy', optimizer='adam', metrics=['accuracy']) compiles the model with binary cross-entropy loss, Adam optimizer and accuracy as the metric.
history = model.fit(train_datagen, epochs=10, validation_data=test_datagen) trains the model for 10 epochs using the training data and validates it using the test data.
The loss graph shows fluctuating training and validation losses with a spike in validation loss around epoch 3 showing potential overfitting. The accuracy graph reveals that training accuracy improves steadily. Validation accuracy fluctuates indicating that the model may not be generalizing well.
8. Model Testing and Prediction
Let's check the model for random images.
img = image.load_img(image_path, target_size=(200, 200)) loads the image and resizes it to 200x200 pixels.
plt.imshow(img) displays the image.
img = image.img_to_array(img) converts the image to a NumPy array.
img = np.expand_dims(img, axis=0) adds an extra dimension for batch processing.
result = model.predict(img) makes a prediction using the model.
We can see that our model is able to predict images correctly, hence our CNN model to predict cats and dogs in images is working fine. For better performance we can use Transfer Learning and perform hyperparameter tuning.
