 |
VOOZH | about |
|
VOOZH | about |
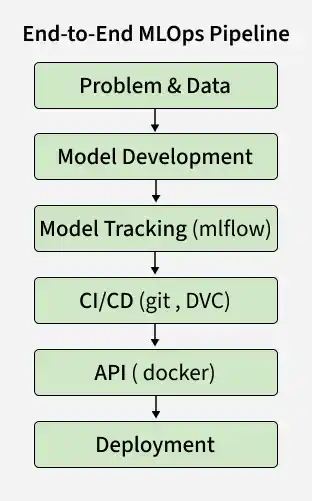
Machine Learning Operations (MLOps) is a set of practices for deploying and maintaining machine learning models in production. It combines DevOps with machine learning to ensure a scalable and reliable lifecycle from development to deployment.
This project focuses on building an end to end MLOps pipeline to show how ML systems work in real world scenarios, from data to deployment.
This project focuses on building an end to end pipeline for predicting student academic risk, covering key stages from data processing to deployment.
The objective of this project is to predict academic risk in higher education to identify students facing performance challenges. It is based on a real world Kaggle competition making it practical for applying MLOps concepts.
The dataset comes from a higher education institution and includes student details and academic performance across various programs.
1. Data
2. Target
3. Overview
4. Key Insights
You can download the dataset by clicking over here.
Data preprocessing prepares the dataset for modeling by ensuring it is clean, consistent and in a machine readable format. These steps help improve model performance and reliability.
Step 1: Import required libraries
We will import libraries like pandas, numpy and scikit learn
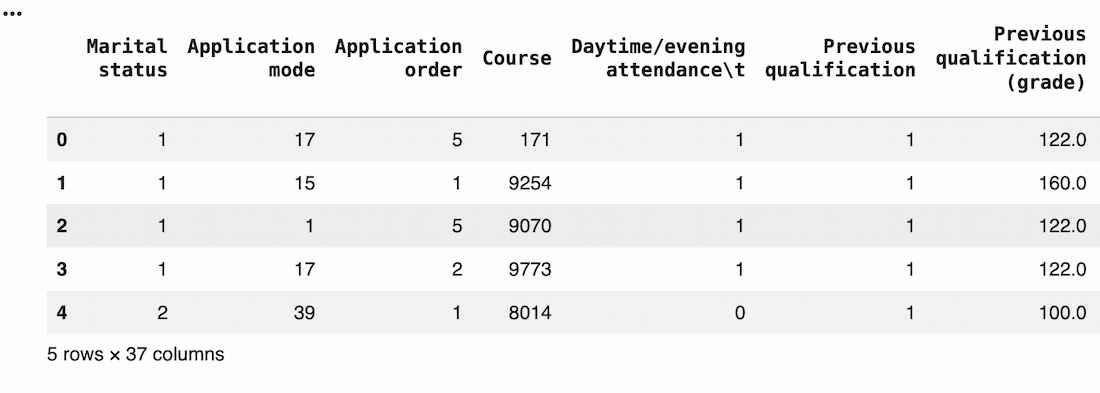
Step 2: Load the Dataset
Read the dataset with the correct separator to ensure proper structure.
Output:
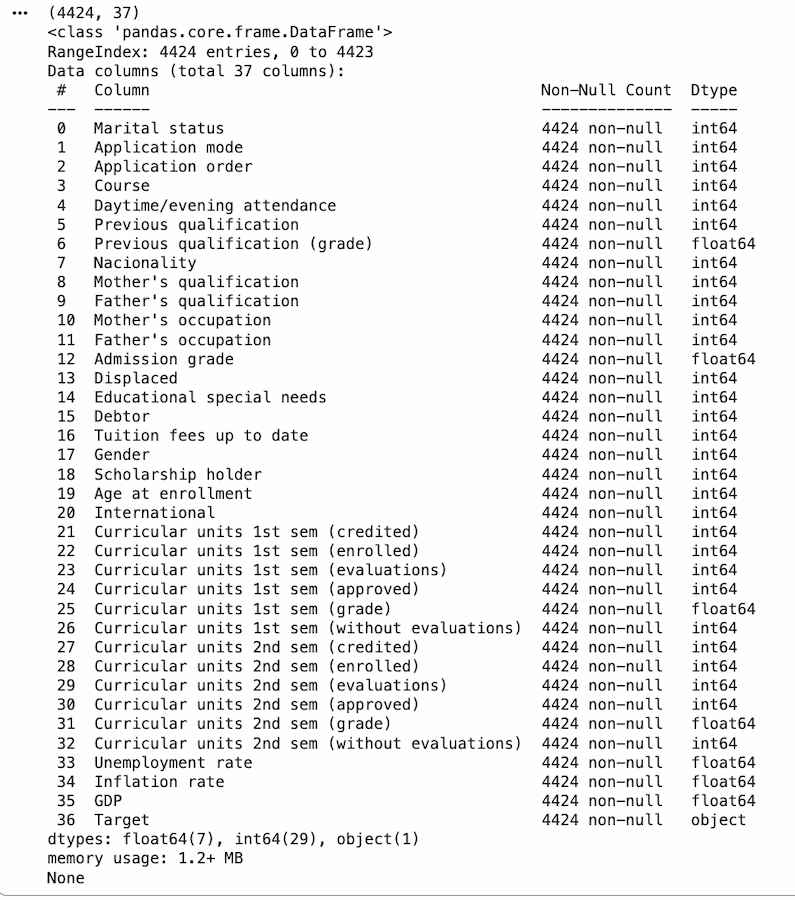
Step 3: Basic Exploration
Understand the structure and data types.
Output:
Step 4: Handle Missing Values
Check and confirm missing values.
No missing values found, so no further preprocessing required to handle missing values.
Step 5: Drop Irrelevant Features
Remove columns that do not contribute to prediction.
Step 6: Separate Features and Target
Split dataset into input (X) and output (y).
Step 7: Encode Target Variable
Convert target labels into numerical form.
Step 8: Feature Encoding
Step 9: Feature Scaling
Normalize numerical features for better model performance.
Step 10: Train-Test Split
Split data for training and evaluation.
Step 11: Handle Imbalance data
Class imbalance can be addressed using techniques like SMOTE
Step 12: Train a Model
Start with a simple and reliable model like Random Forest.
Step 13: Make Predictions
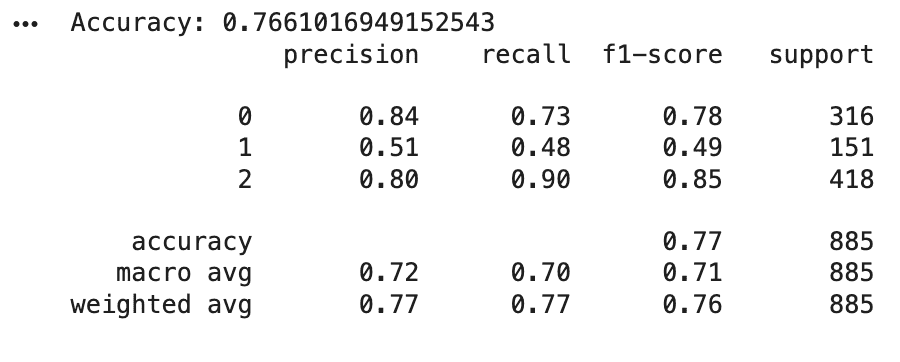
Step 14: Evaluate the Model
Use multiple metrics for better understanding.
Output:
After training the initial model, the next step is to optimize its performance by tuning hyperparameters. This helps find the best configuration for better accuracy and generalization in predicting student academic risk.
Step 1: Set Up MLflow for Experiment Tracking
MLflow is used to track experiments, compare models and log parameters, metrics and results.
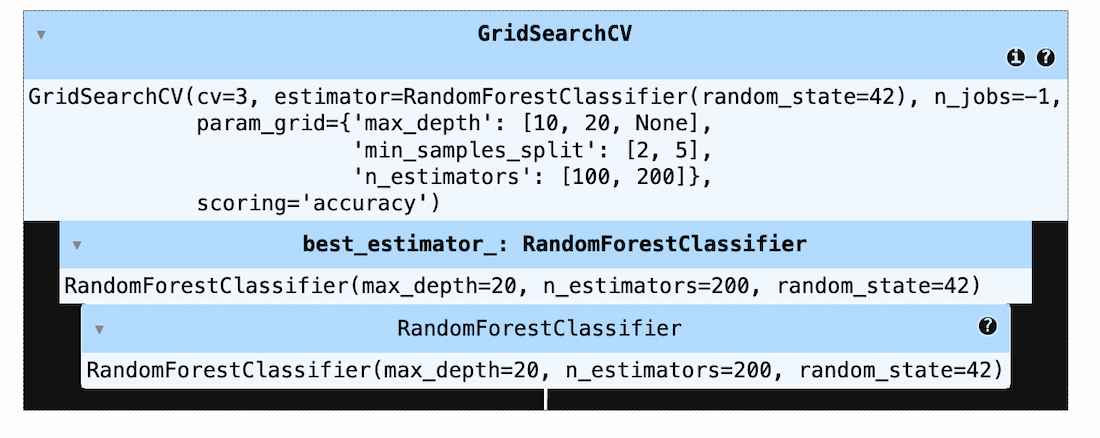
Step 2: Perform Hyperparameter Tuning
Use GridSearchCV to find the best parameters for the model.
Output:
Step 3: Log Results with MLflow
Track best parameters and performance.
After hyperparameter tuning, the best model is evaluated to ensure it performs well on unseen data. This step validates model performance and prepares it for real world use.
Step 1: Load the Best Model
Load the model selected during hyperparameter tuning.
Step 2: Make Predictions
Use the model to generate predictions on test data.
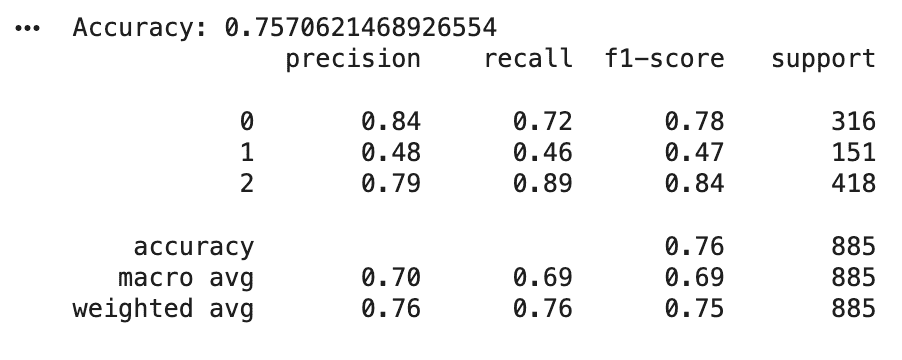
Step 3: Evaluate Performance
Measure how well the model performs using key metrics.
Output:
Step 4: Serialize the trained model
Download full code from here
CI/CD automates model training, evaluation, reporting and deployment whenever changes are pushed to the repository. In this project, GitHub Actions and CML are used to track performance and simulate deployment of the student risk prediction model.
Step 1: Workflow Overview
After training and evaluating the model, the final step is deployment to enable real time predictions. FastAPI is used to build a high performance API for the student risk prediction model.
Step 1: Initialize FastAPI App
Initialize the application and serve static files for the frontend.
Step 2: Load Trained Model
Step 3: Define Prediction Endpoint
This endpoint accepts input data and returns predicted student risk.
Step 4: Run the API
Step 5: Test the API
Docker is used to containerize the FastAPI application, making the model portable, consistent and easy to deploy across environments.
Step 1: Dockerfile Configuration
The Dockerfile defines the environment and dependencies required to run the API.
Step 2: Build and Run Container
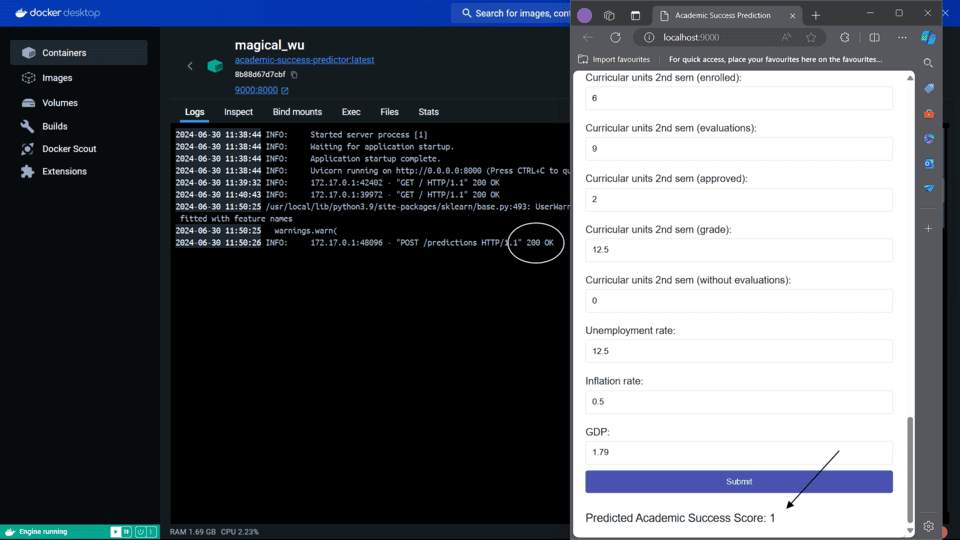
Step 3: Live Application Output
Step 4: Logs and API Activity
Docker logs confirm: