 |
VOOZH | about |
|
VOOZH | about |
Spring Tool Suite (STS) is a dedicated IDE for building Spring and Spring Boot applications efficiently with minimal setup. It provides built-in tools that simplify development and improve productivity. In this article, we will learn how to run your first Spring Boot application using STS. it is a free, open-source, and powered by VMware.
- Java Development Kit (JDK 11 or higher) installed
- Basic knowledge of Java and Maven
- Internet connection (to download dependencies)
Follow these Steps to run a SpringBoot Application on Spring Tool Suite Ide.
Download and install the latest version of Spring Tool Suite from the official website.
Note: Make sure the installation is completed successfully before proceeding.
Open Spring Tool Suite (STS).
Go to :
👁 ImageFile -> New -> Spring Starter Project
This will open the Spring Starter Project configuration window.
In the pop-up window, enter the required details:
👁 Image
- Service URL: Default
- Name: Your Project Name
- Type: Maven Project
- Java Version: 11 or greater than 11
- Packaging: As your need
- Language: As your need
- Group: A unique base name of the company or group that created the project
- Artifact: A unique name of the project
- Version: Default
- Description: As your need
- Package: Your package name
After filling in the details, click Next.
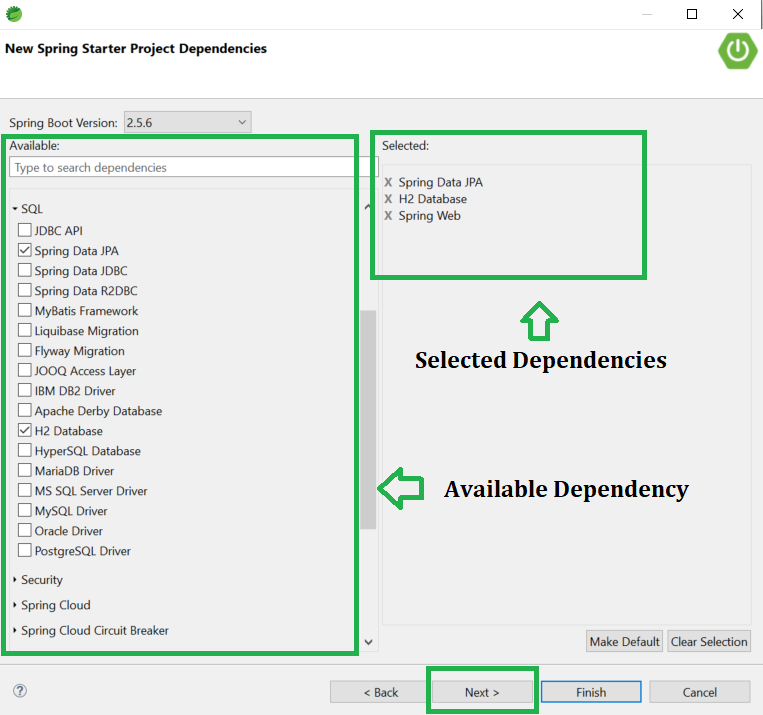
Select the required Spring Boot version (choose the latest stable version). Select dependencies according to your project needs, such as:
After selecting dependencies, click Next.
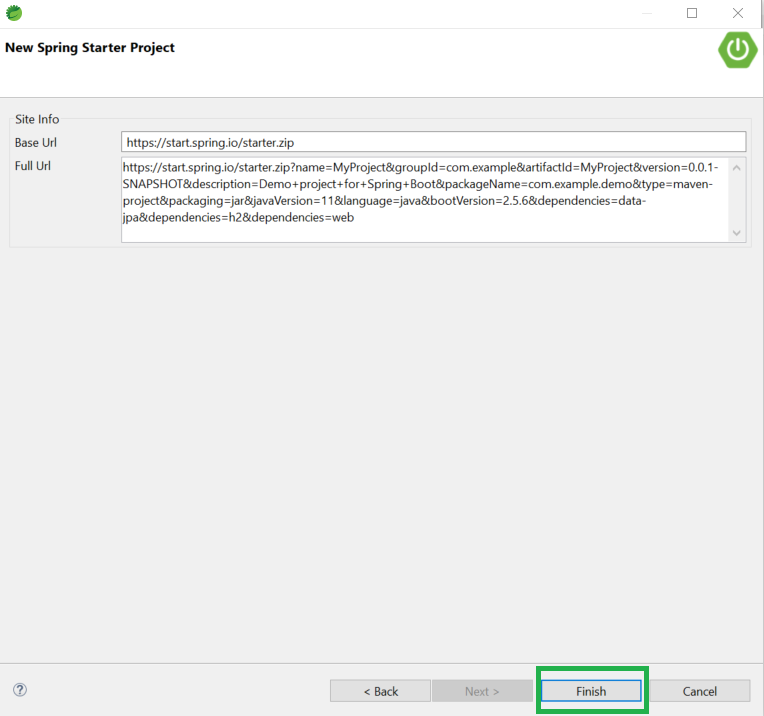
Click the Finish button.
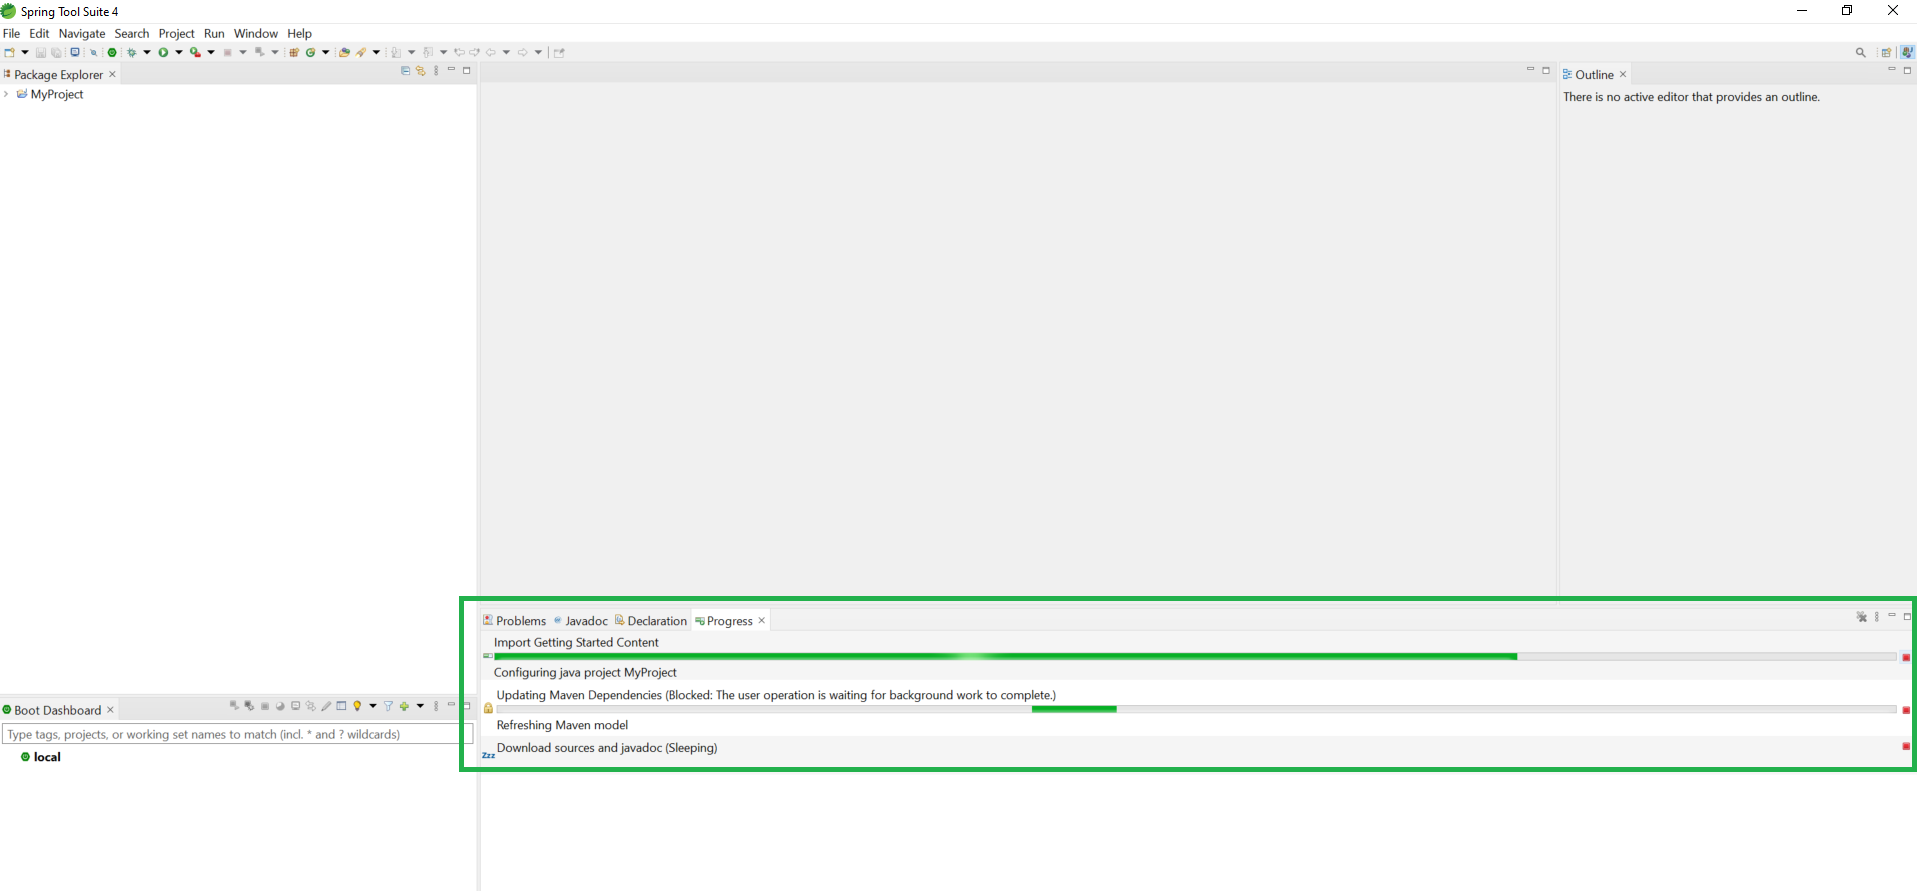
👁 ImageNow, wait for a few moments while STS downloads all required dependencies and sets up the project.
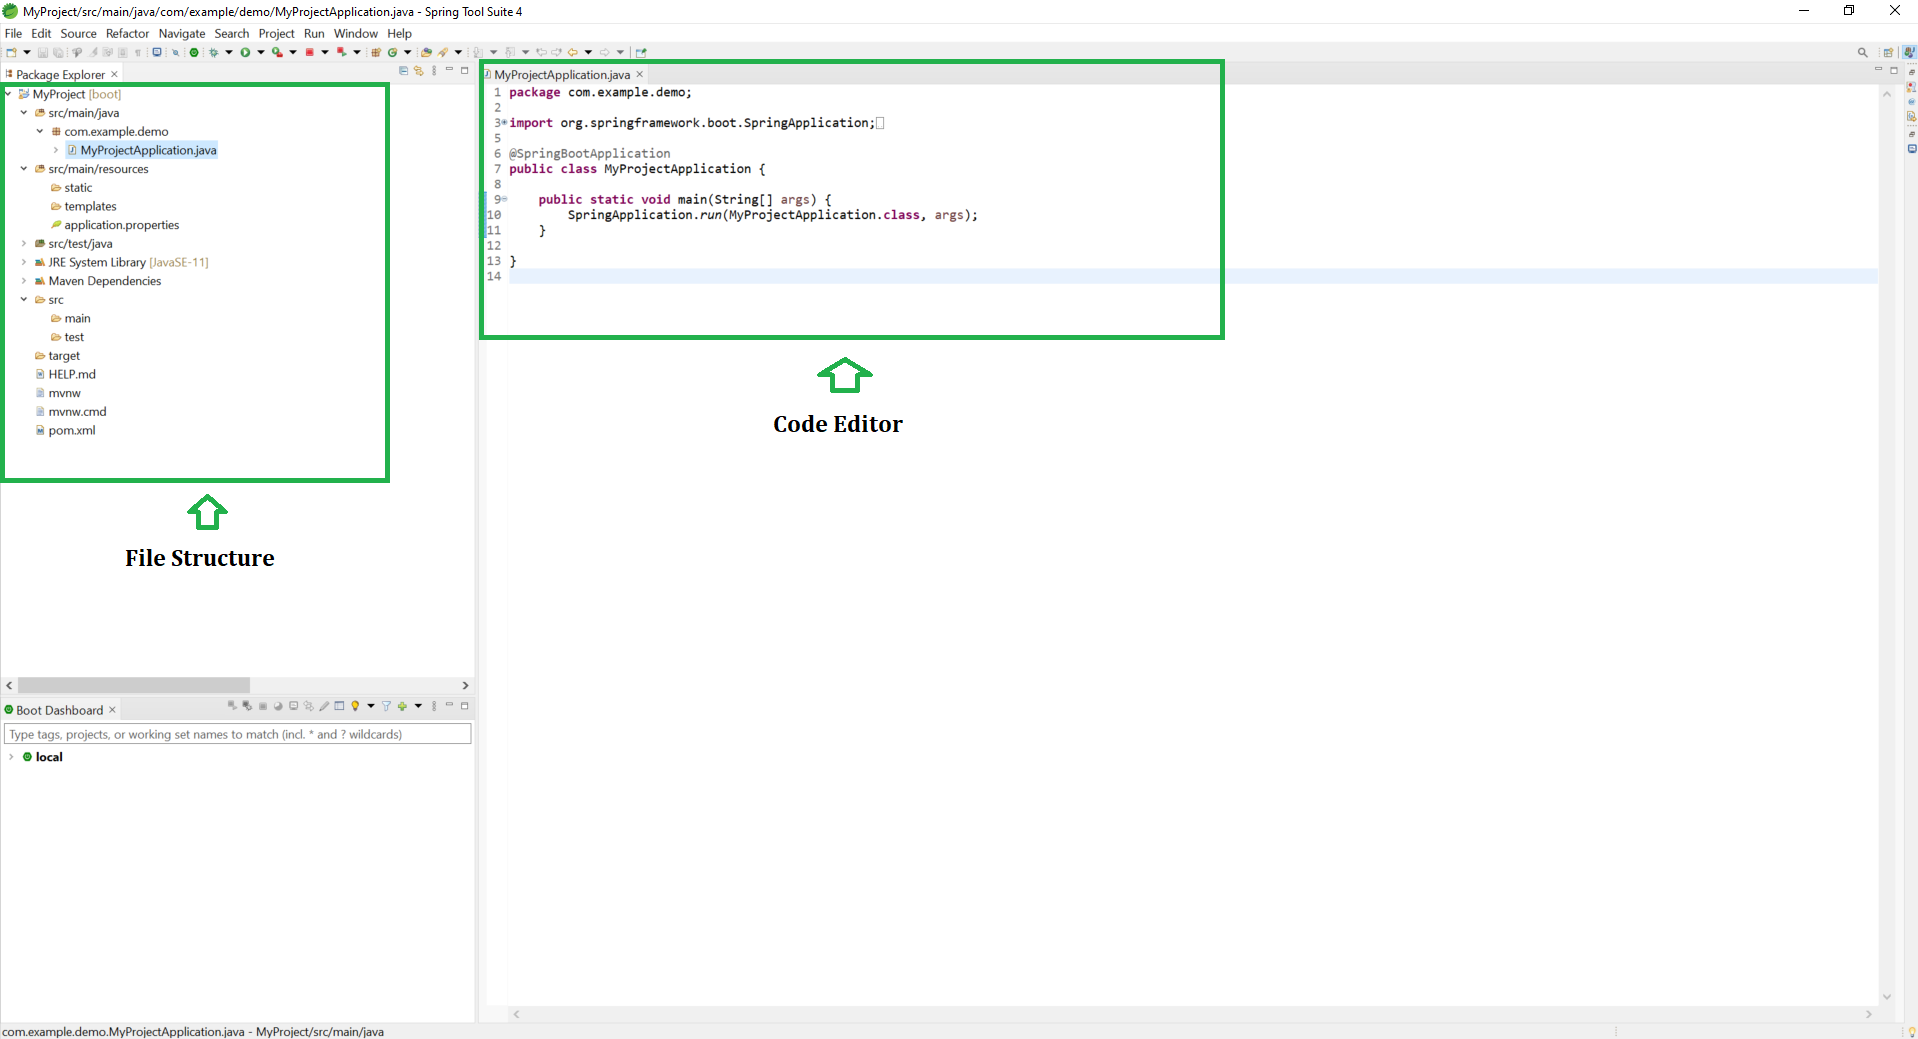
👁 ImageAfter successful setup, your project structure will look like this:
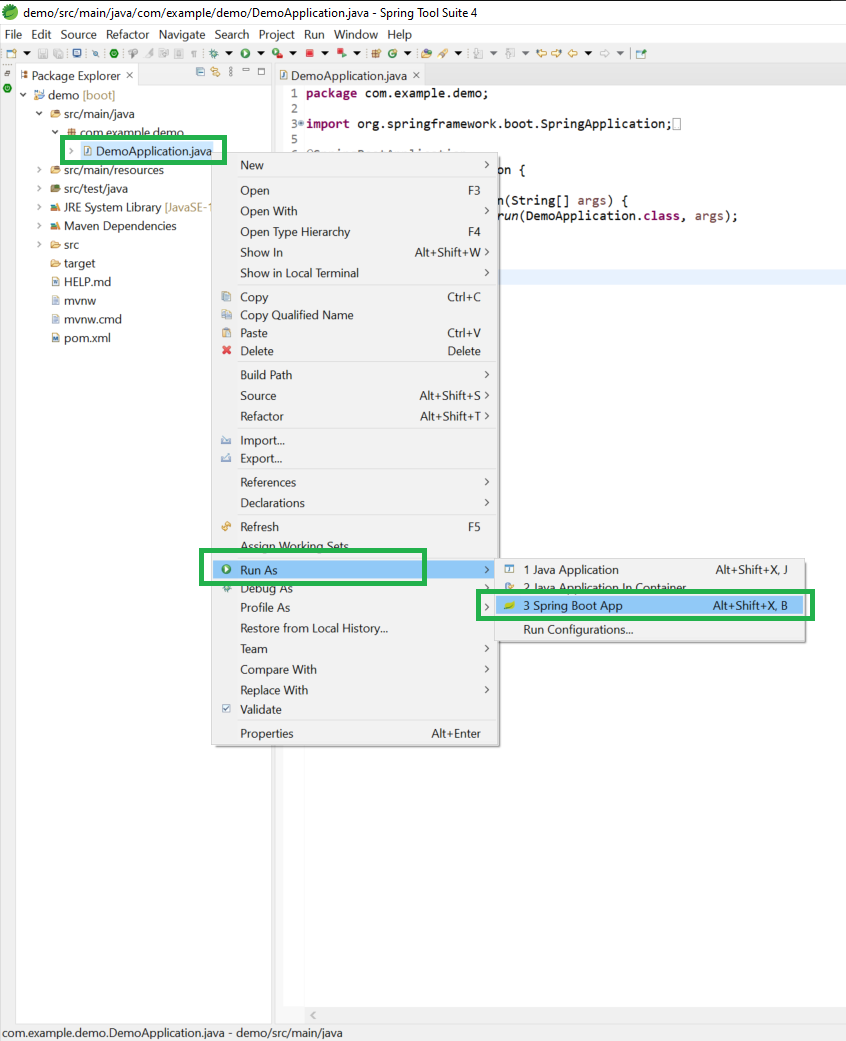
In order to run this application now, Right-click on the DemoApplication.java > Run As > Spring Boot App as shown in the below image.
👁 LightboxAfter successfully running the application you can see the console where the Tomcat server starts on default port number 8080 as shown in the below image.
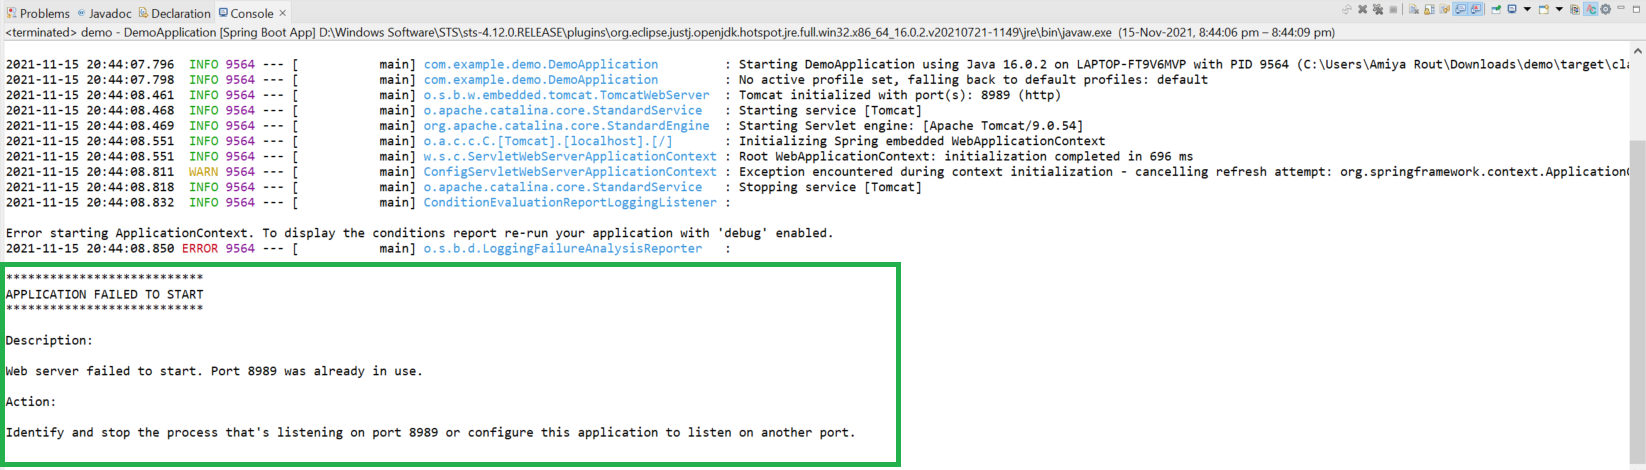
👁 ImageNow geeks you must be wondering about what if we do not want it to be run on the default port number that is the default port of the Tomcat server is 8080. We can change the port number in the application.properties file by using the following line of code as follows:
server.port=8989
Now re-run the application again and you can see Your Tomcat server started on the port that you have given like the below image.
👁 Image👁 ImageNote: If you are encountered with the following error then it is highly recommended that you should change your port number.
Note: You can access the output screen in the URL: http://localhost:8080/. Note that at last provide your port number.