 |
VOOZH | about |
|
VOOZH | about |
ZeroCode is an automated testing framework used to test REST APIs in Spring Boot applications. It allows developers to write API test scenarios in JSON format and execute them automatically.
The ZeroCode framework supports multiple types of automated testing for modern applications.
Create a Spring Boot Maven project that will contain the REST API and testing setup.
Project Structure:
Add the ZeroCode dependency in the pom.xml file.
pom.xml
Create a model class GeekUser.java that represents the user data.
GeekUser.java
Create GeekUserZerocodeApplication class .
GeekUserZerocodeApplication.java
We have to write a scenario to test the same->
{
"scenarioName": "geek test user creation endpoint",
"steps": [ // Array of JSON objects, as much we want we can store
{
"name": "geek_test_successful_creation",
"url": "/api/users", // Relative URL
"method": "POST",
"request": {
"body": { // We have to specify whole bean class parameter and its values
"firstName": "Rachel",
"lastName": "Green",
"departmentName":"IT",
"salary":100000.0
}
},
"verify": { // expected part containing status and body
"status": 201, // status code for a given HTTP call
"body": { // Resultant body from the call
"id": "$NOT.NULL",
"firstName": "Rachel",
"lastName": "Green",
"departmentName":"IT",
"salary":100000.0
}
}
}
}
The above one is a success call that creates a user. Similarly, we can do for validation part as well
{
"name": "test_firstname_validation",
"url": "/api/users",
"method": "POST",
"request": {
"body": {
"firstName": "",
"lastName": "Bing",
"departmentName":"IT",
"salary":100000.0
}
},
"assertions": {
"status": 400,
"rawBody": "firstName can't be empty!"
}
},
{
"name": "test_lastname_validation",
"url": "/api/users",
"method": "POST",
"request": {
"body": {
"firstName": "Monica",
"lastName": "",
"departmentName":"Chef",
"salary":100000.0
}
},
"assertions": {
"status": 400,
"rawBody": "lastName can't be empty!"
}
},
{
"name": "test_departmentname_validation",
"url": "/api/users",
"method": "POST",
"request": {
"body": {
"firstName": "Phoebe",
"lastName": "Buffe",
"departmentName":"",
"salary":50000.0
}
},
"assertions": {
"status": 400,
"rawBody": "DeparmentName can't be empty!"
}
}
We can combine everything together and keep it under the test/resources folder. Basically, it is a JSON file and combines all the entries that are getting tested. Now coming to the test file part
GeekUserEndpointIT.java
rest_api.properties
web.application.endpoint.host=http://localhost/ # In case of changes they need to be modified appropriately web.application.endpoint.port=8080
web.application.endpoint.context=
For the execution of tests, in pom.xml necessary dependencies are added
We can run the project in the command line by using
URL:
mvn verify -Dskip.it=false
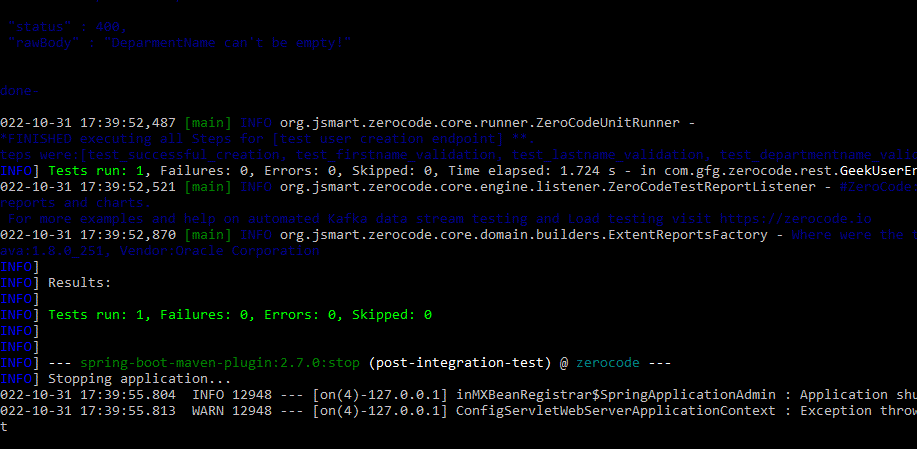
Under the target folder of the directory, we can see multiple files that help to understand different layers of testing
Similarly whatever testing scenarios given are validated against Zerocode.