 |
VOOZH | about |
|
VOOZH | about |
Power BI allows us to create data models by establishing relationships between tables which is important for creating insightful reports and visualizations. Relationships are established between tables to connect them via attribute and the tables can be considered as one whole table for further process and analysis. However in many cases Power BI creates relationships on its own. In this article, we will learn more about creating table relationships in Power BI Desktop.
In Power BI relationships are used to define how tables are linked to each other which helps us to analyze and visualize data across multiple tables seamlessly. There are several types of relationships:
When creating relationships, it's important to use descriptive and unique column names and organize tables in a logical hierarchy to manage relationships between multiple tables effectively.
Creating relationships in Power BI defines how tables are connected with each other which allows us to analyze and visualize data from multiple sources seamlessly. Power BI provides two methods to create relationships:
Lets see how to use both methods:
With auto-detect feature users can establish relationships between tables based on field name and can interconnect the data model for reports, visualization and analysis. Lets see steps-by-steps:
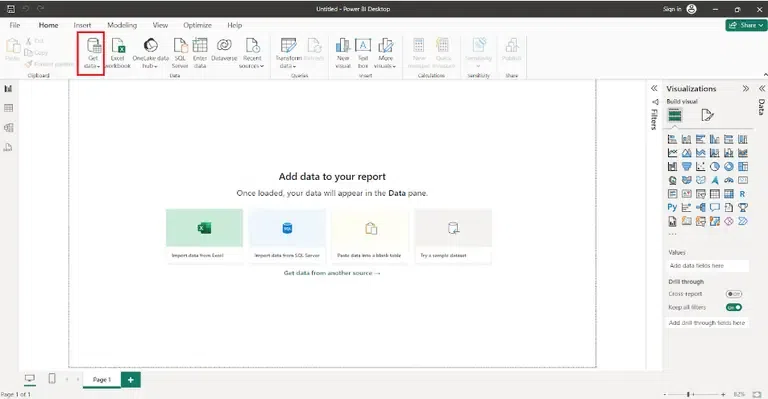
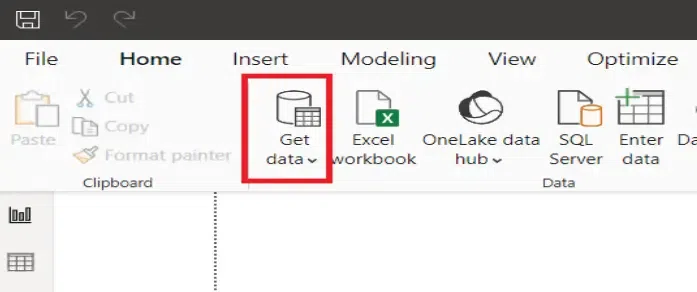
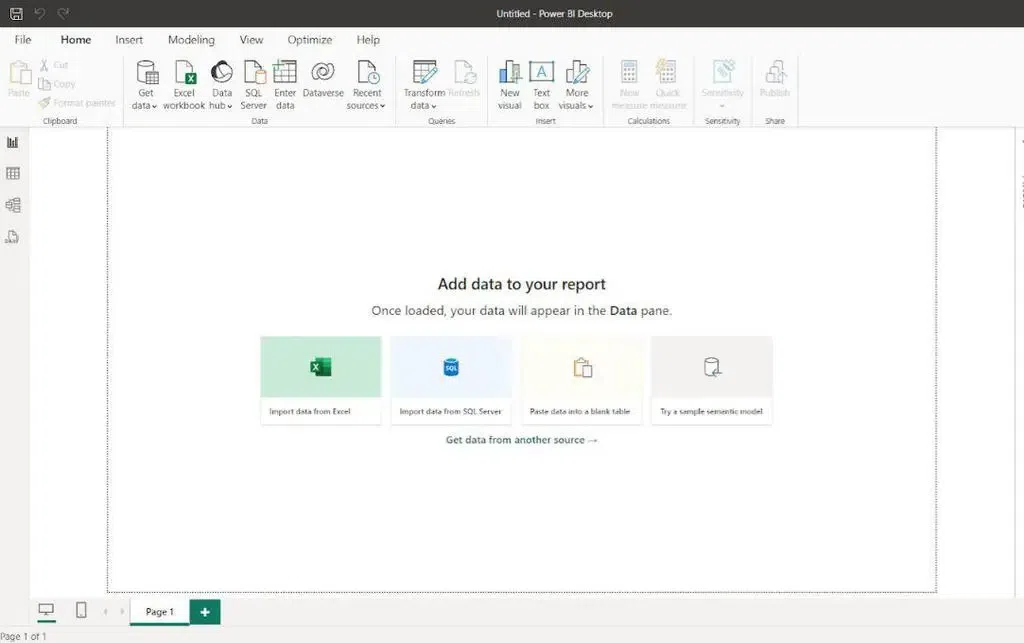
Step 1: Load the data into Power BI by selecting Get Data under the Home tab.
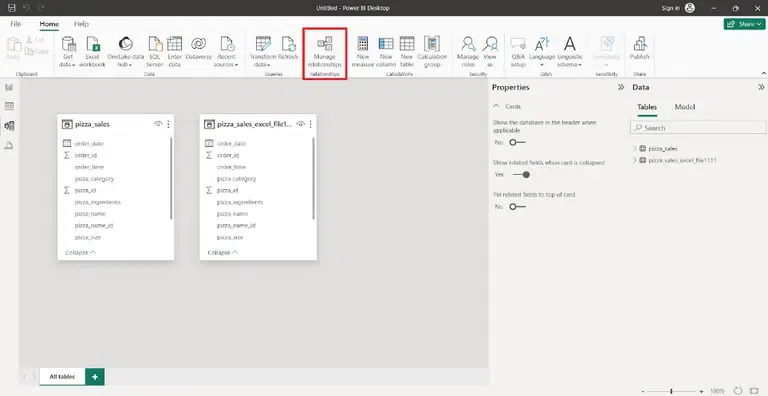
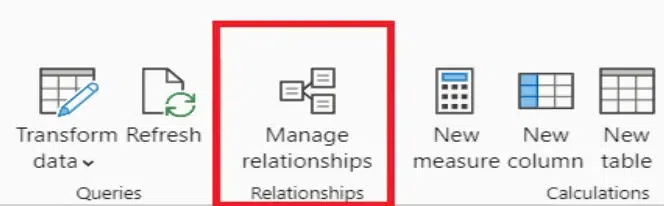
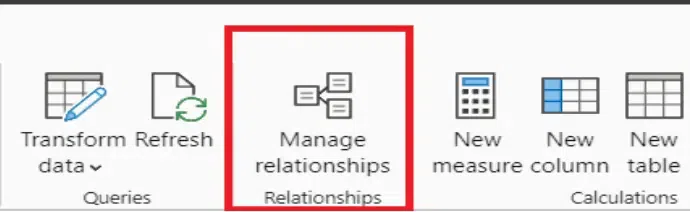
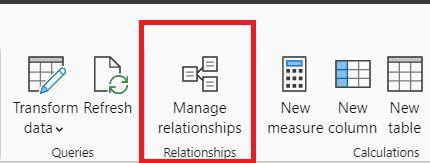
Step 2: In the Modeling view, click on Manage Relationships.
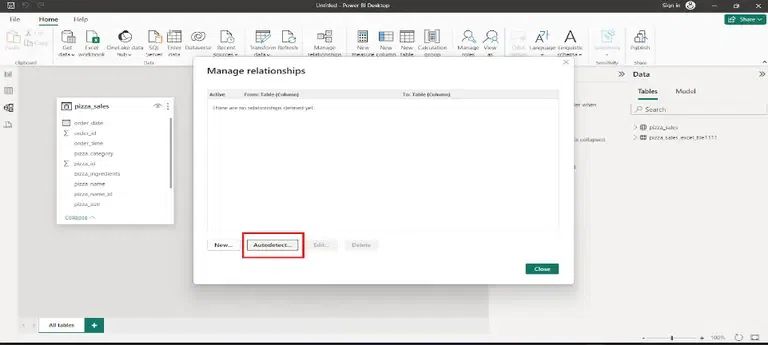
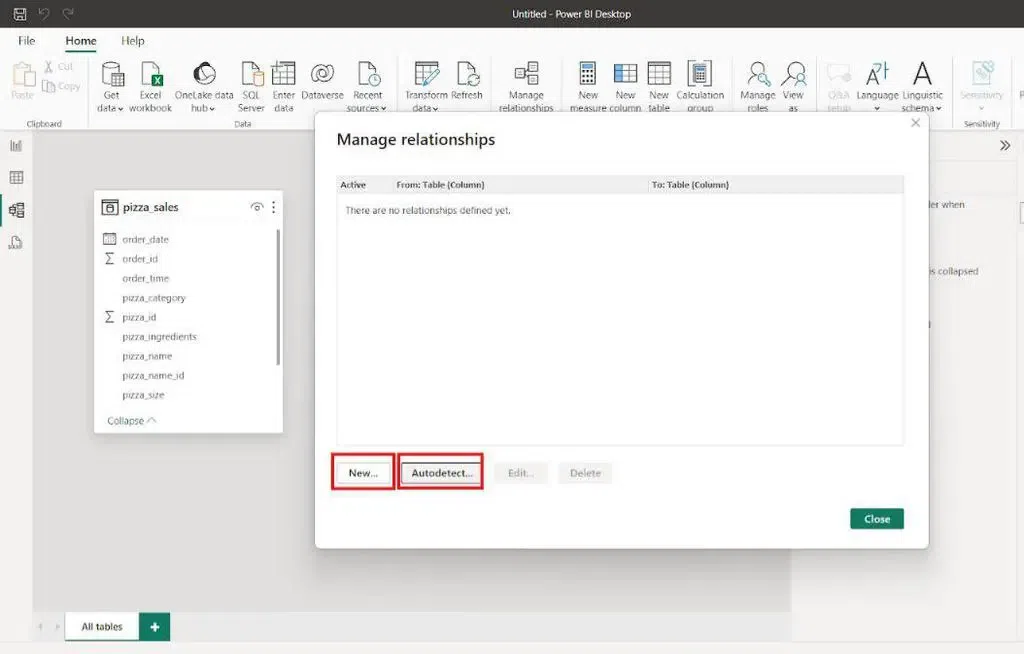
Step 3: In the Manage Relationships window, select the Autodetect option.
Step 4: Click OK. Power BI will automatically detect and create relationships based on matching column names between tables.
In Power BI we can create table relationships manually. Cardinality and cross-filter direction are automatically set during creation but we can edit them as required. By manually creating relationships in Power BI users have greater control and are able to customize the relationships between two tables that are interconnected to each other. Lets see steps-by-steps:
Step 1: Load the data into Power BI by selecting Get Data under the Home tab.
Step 2: Navigate to Modeling View and click on Manage Relationships.
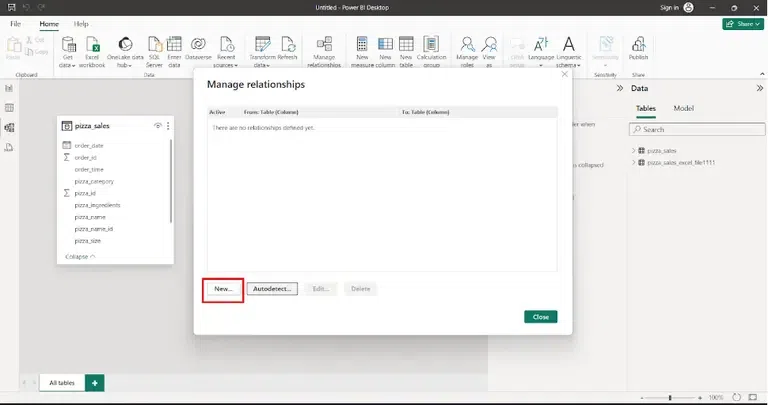
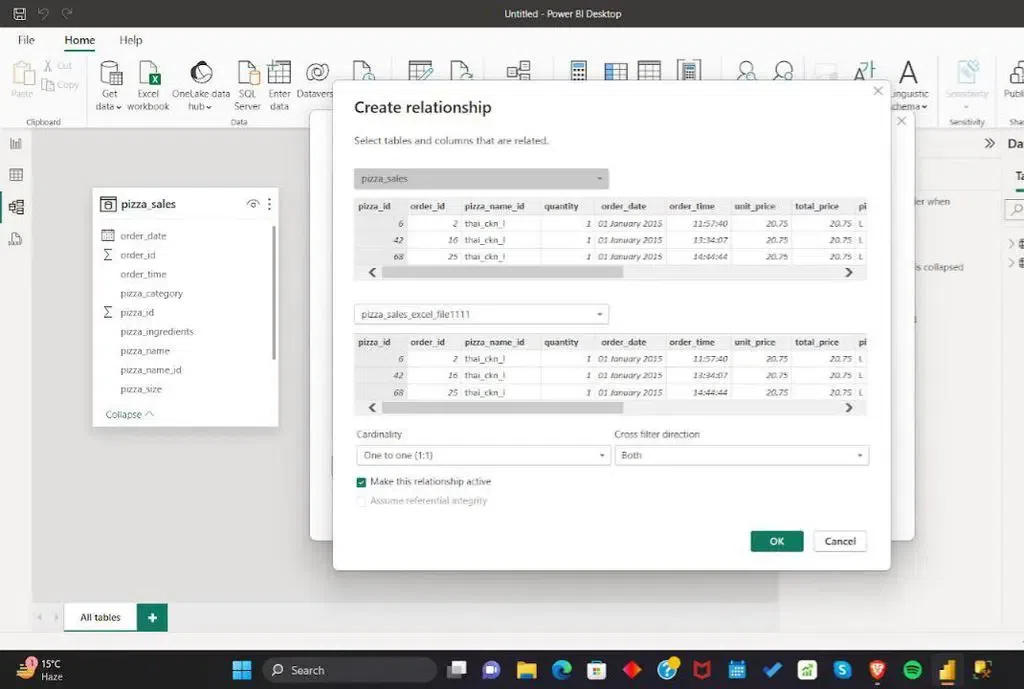
Step 3: Click New to create a new relationship. Choose the first table and the column we want to use for the relationship. Select the second table and its corresponding column to establish the link.
Step 4: Choose the relationship type like One-to-One, Many-to-One, etc.
Step 5: Click OK to create the relationship.
Power BI allows us to edit relationships using different methods:
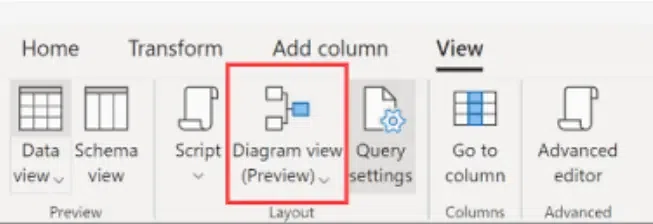
Open the "Diagram View". Drag and drop fields between related tables to modify relationships including adjusting cardinality and cross-filter direction.
To manage the relationship Go to Manage Relationships to select existing relationships and modify them as needed.
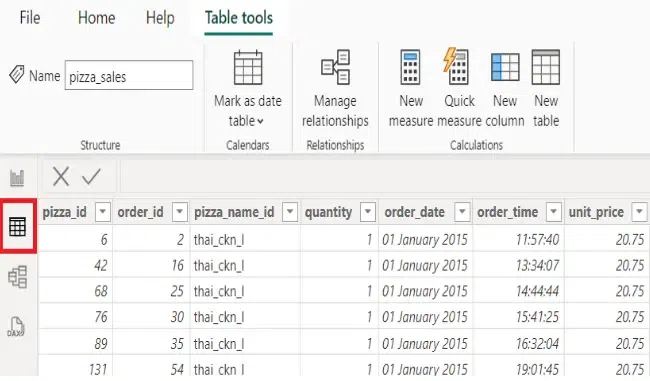
Open "Data View." Click on the relationship icon next to the field to edit relationships and then modify related fields and cardinality as required.
Once our tables are interconnected with each other it is very important to edit relationships. Editing relationship adjust the properties of an existing relationship or modifying the relationships type. Here we'll see two aspects:
Cardinality defines the nature of relationships between tables. It specifies how rows from one table are related to rows from another. Properly setting cardinality ensures accurate data analysis and reporting.
The cross-filter direction defines how filters propagate between related tables and there are two options:
To build effective data models in Power BI, follow these steps:
1. Get Data: Connect to data sources and import relevant datasets.
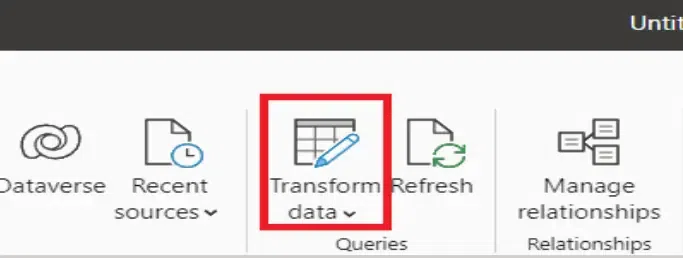
2. Transform Data: Use Power Query Editor to clean, transform and shape the data as needed.
3. Manage Relationships: Define relationships between tables based on common fields.
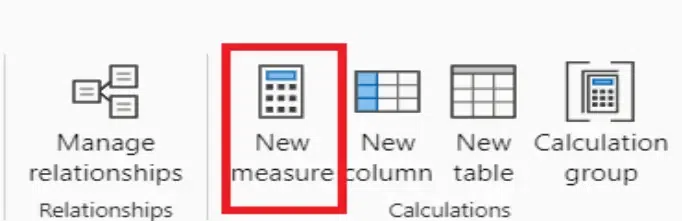
4. New Measures: Use DAX (Data Analysis Expressions) to create custom calculations and measures.
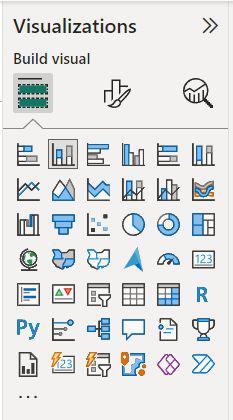
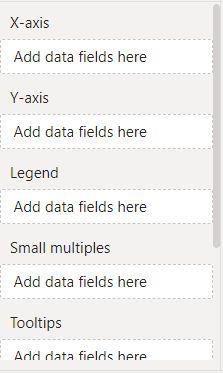
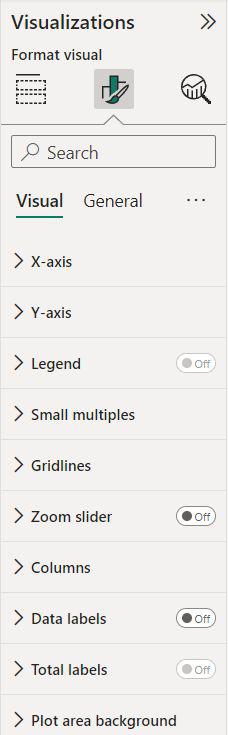
5. Building Visualizations: Creating visualizations in Power BI turns data into meaningful insights. Follow these steps to build effective visuals:
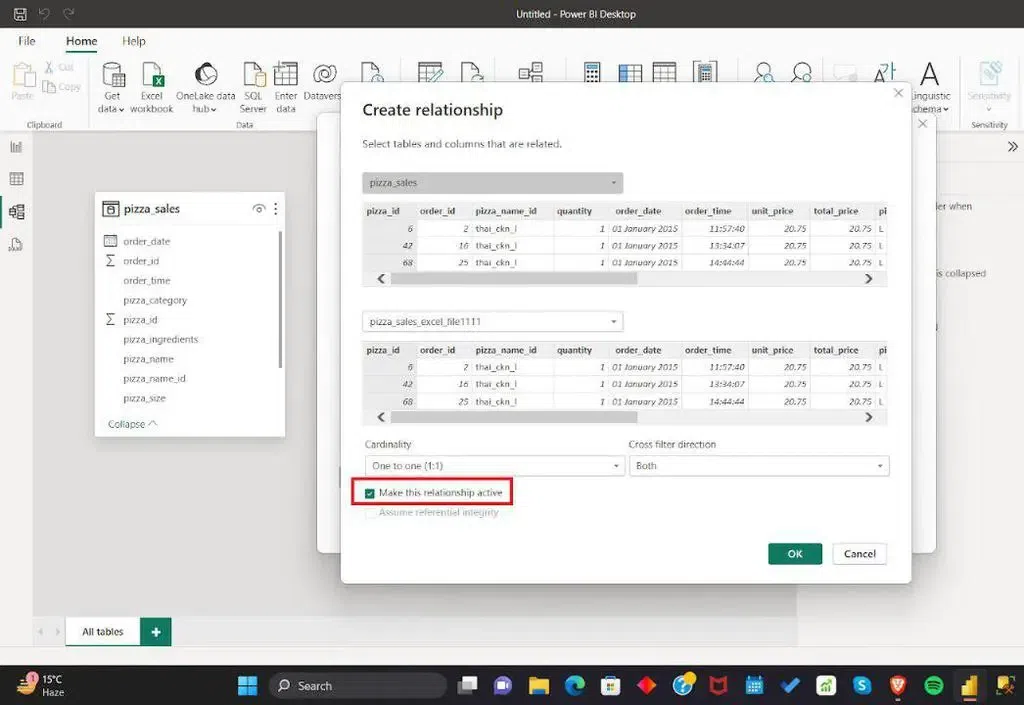
To activate a relationship in Power BI follow below steps:
1. Open Power BI Desktop: Launch Power BI Desktop and open the Power BI project.
2. Navigate to "Relationships" View: Go to the "Model" view by clicking on the "Model" icon on the left side of the screen.
3. Identify the Relationship: Locate the relationship we want to activate between two tables.
4. Edit Relationship: Right-click on the relationship line and choose "Edit Relationship" from the context menu.
5. Configure Relationship Options: In the "Edit Relationship" dialog, ensure that the "Active" option is checked.
By mastering these steps, we can create impactful visualizations in Power BI that effectively communicate data insights helps in better decisions and enhancing the overall analysis process.