 |
VOOZH | about |
|
VOOZH | about |
👁 Web App Using Netlify
HalGatewood.com on Unsplash
Prerequisites: Basic machine learning (ML) and basic web development.
All the resources used in this article can be downloaded here. However, I encourage you to re-type or re-build your own model so that you’ll get more understanding. “Learning by doing”, they said.
Deploying an ML model is actually the main reason an ML model is built. Getting a high-accuracy model is not the finish line. Accuracy is not the goal, it’s just a number to evaluate the performance of our model.
Our model is supposed to be useful for people, and we don’t expect people will use Jupiter-Notebook or Python command line to do a prediction. Therefore we need to deploy our model into something that can be easily used by many people.
The model that we will deploy in this article is specifically a model based on Tensorflow. We will build a model that classifies whether or not a patient has heart disease. The dataset along with the description can be downloaded on Kaggle.
The dataset is originated from the UCI machine learning repository. It’s in structured/tabular format. It’s consists of thirteen attributes that correspond to the medical condition of the patient, and one column corresponds to the label of the data.
These are the codes of our model
import tensorflow as tf
from sklearn.model_selection import train_test_split
import pandas as pd
df = pd.read_csv("heart_cleveland_upload.csv", sep="," )
X = df.iloc[:,0:13]
Y = df.iloc[:,13]
x_train,x_test,y_train,y_test=train_test_split(X, Y, test_size=0.3, random_state=1)
model = tf.keras.models.Sequential()
model.add(tf.keras.layers.Dense(8, input_shape=(13,), activation=tf.nn.relu))
model.add(tf.keras.layers.Dropout(0.5))
model.add(tf.keras.layers.Dense(1, activation=tf.nn.sigmoid))
model.compile(optimizer="adam", loss="binary_crossentropy", metrics=["accuracy"])
history = model.fit(x=x_train, y=y_train, epochs=150,
 validation_data=(x_test, y_test), verbose=0)
val_loss, val_acc = model.evaluate(x=x_test, y=y_test)
themodel = "./heart_ann.h5"
model.save(themodel)
The code from the penultimate rows will save the model into a Hierarchical Data Format version 5 (HDF5).
TensorFlow.js is a library for ML in JavaScript which enables us to develop ML models in JavaScript and use ML directly in the browser.
To use TensorFlow.JS, we need to convert our h5 model into JSON and binary format. We can do it easily using tensorflowjs converter.
First, we need to install it
pip install tensorflowjs
and then convert the model using this line
!tensorflowjs_converter --input_format=keras {themodel} ./
The code above assuming that you do it in the Jupyter Notebook continued with the previous code. If you use the console, then you can do it like this
tensorflowjs_converter --input_format=keras ./heart_ann.h5 ./
This will generate a .json file and a .bin file. These two files are the model that we will use in the web app.
We will need a basic HTML input form to get the input from the user. You can use the index.html from the downloadable project files to see the whole code. The most important part is in the javascript. The inference/prediction is done in the javascript.
We need to include the tensorflow.js inside the <head> tag
<script src="https://cdn.jsdelivr.net/npm/@tensorflow/tfjs@latest"></script>
and then we add the script to collect the input from the user, and then predict the result via model.predict(input) function.
<script>
 async function run() {
 event.preventDefault();
 const MODEL_URL = "./heart-model.json";
 const model = await tf.loadLayersModel(MODEL_URL);
 console.log("model loaded");
 const age = Number(document.getElementById("age").value);
 const sex = Number(document.getElementById("sex").value);
 const cp = Number(document.getElementById("cp").value);
 const trestbps = Number(document.getElementById("trestbps").value);
 const chol = Number(document.getElementById("chol").value);
 const fbs = Number(document.getElementById("fbs").value);
 const restecg = Number(document.getElementById("restecg").value);
 const thalach = Number(document.getElementById("thalach").value);
 const exang = Number(document.getElementById("exang").value);
 const oldpeak = Number(document.getElementById("oldpeak").value);
 const slope = Number(document.getElementById("slope").value);
 const ca = Number(document.getElementById("ca").value);
 const thal = Number(document.getElementById("thal").value);
 const input = tf.tensor2d([
 [age,sex,cp,trestbps,chol,fbs,restecg,thalach,exang,oldpeak,slope,ca,thal],
 ]);
 const result = model.predict(input).arraySync()[0];
 var rslt = "<p>The result:</p>";
 if (result >= 0.5) {
 rslt +=
 "<div class='alert alert-danger' role='alert'><strong>Positive</strong> ";
 } else {
 rslt +=
 "<div class='alert alert-success' role='alert'><strong>Negative</strong> ";
 }
 const prsn = result * 100;
 rslt += "Probability: " + prsn.toFixed(2) + "% </div>";
 document.getElementById("rslt-text").innerHTML = rslt;
 }
</script>
In the Analyze button, we call the run() function to trigger the prediction on click.
<button class="w-100 btn btn-primary btn-lg" onclick="run()" type="submit">
 Analyze <i class="bi bi-search"></i>
</button>
Netlify is the platform that we will use to instantly build and deploy our model into a web app. It’s easy to use and free. You can access and create a Netlify account here.
Deploying an ML model into Netlify is so easy. We can just drag and drop our files and that’s it. The model will be ready to use in the browser.
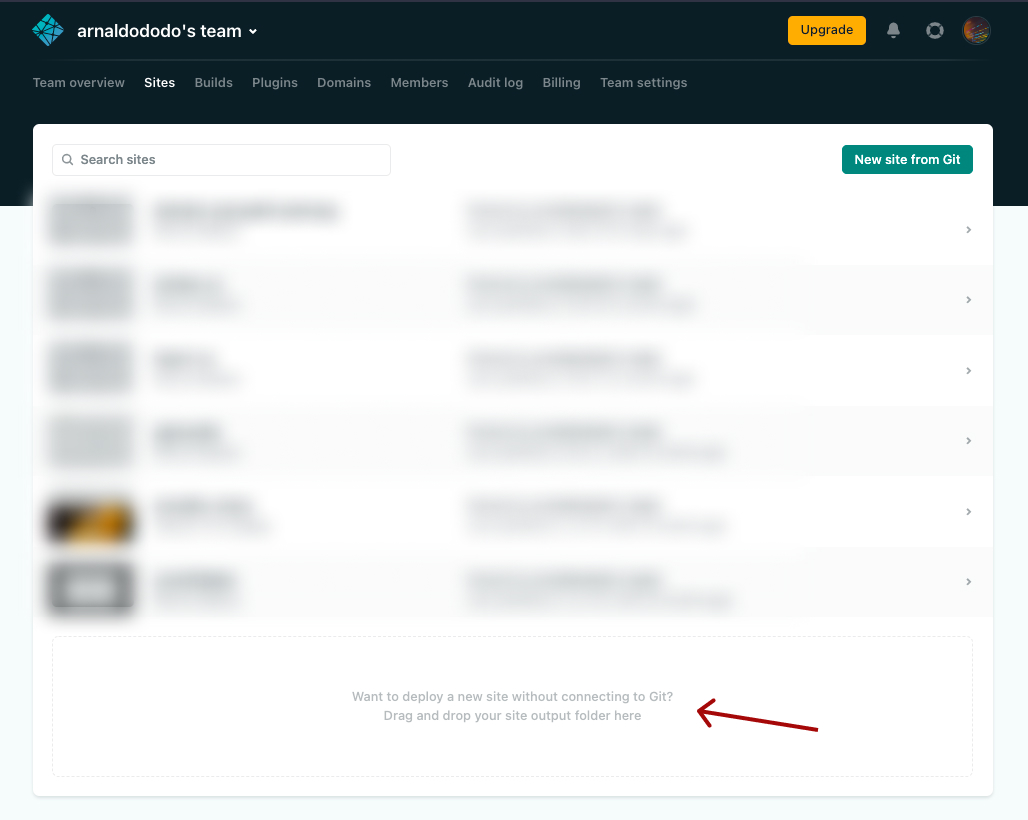
On your Netlify account, open the Sites menu
Then drag and drop the files into the placeholder, marked with the red arrow. The files should be in a folder, containing index.html file, along with the converted model in a JSON and a bin file.
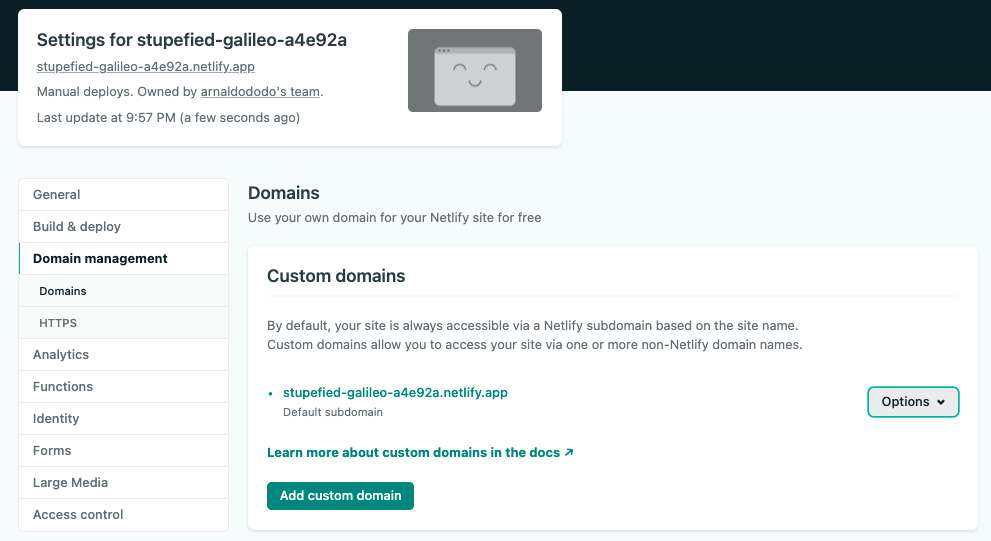
Once the files successfully uploaded, you’ll see this notification with a random domain name.
You can also change it with a custom name, by clicking the Domain settings button.
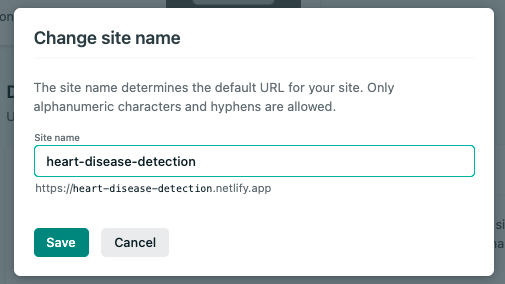
You’ll see this screen, and click on the Options button, and click on the Edit site name.
Type any domain name that you like, and then save the changes. Done.
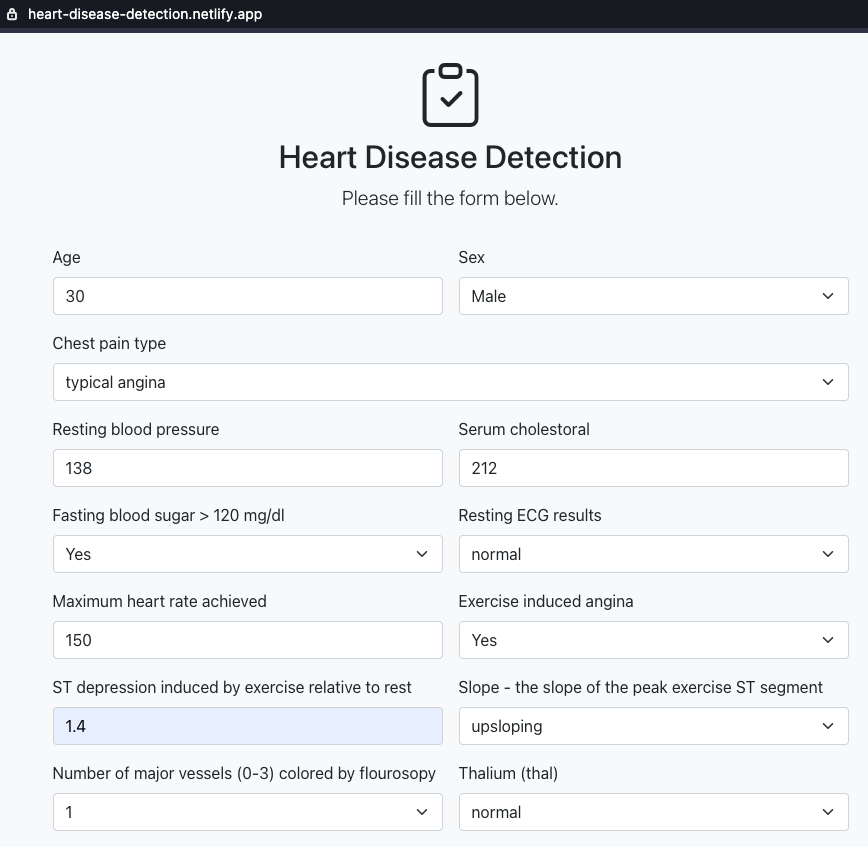
Now you can access your model via the given URL.
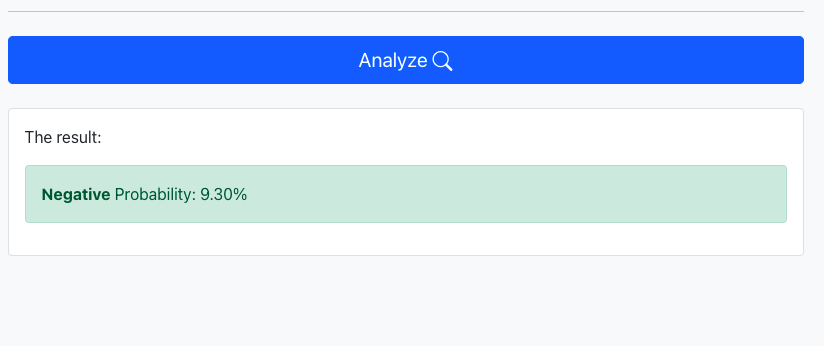
Let’s access the model that has been deployed in this URL https://heart-disease-detection.netlify.app/, or you can access your own model. This is how it looks like.
Let’s fill in some data, and click on the Analyze button.
The model successfully predicts the given data. The result is Negative heart disease with a probability of 9.30%.
My name is Muhammad Arnaldo, a machine learning and data science enthusiast. Currently a master’s student of computer science in Indonesia.
The media shown in this article are not owned by Analytics Vidhya and is used at the Author’s discretion.
My name is Muhammad Arnaldo, a machine learning and data science enthusiast. Currently a master’s student of computer science in Indonesia.
GPT-4 vs. Llama 3.1 – Which Model is Better?
Llama-3.1-Storm-8B: The 8B LLM Powerhouse Surpa...
A Comprehensive Guide to Building Agentic RAG S...
Top 10 Machine Learning Algorithms in 2026
45 Questions to Test a Data Scientist on Basics...
90+ Python Interview Questions and Answers (202...
8 Easy Ways to Access ChatGPT for Free
Prompt Engineering: Definition, Examples, Tips ...
What is LangChain?
What is Retrieval-Augmented Generation (RAG)?
Edit
Resend OTP
Resend OTP in 45s