VOOZH about

URL: https://www.geeksforgeeks.org/nextjs/how-to-create-a-pricing-table-in-tailwind-css-and-next-js/

⇱ How To Create A Pricing Table in Tailwind CSS and Next.js? - GeeksforGeeks


  • Courses
  • Tutorials
  • Interview Prep

How To Create A Pricing Table in Tailwind CSS and Next.js?

Last Updated : 23 Jul, 2025

A pricing table is an essential part of any product or service-based website to show different plans or packages for users to choose from. In this article, we will help you implement a simple, responsive pricing table with three plans: Basic, Advanced, and Premium.

Output Preview: Let us have a look at how the final output will look like

👁 file
Project Preview

Prerequisites

Approach to Create Pricing Table

  • Set up the Next.js project with Tailwind CSS for styling.
  • Create a reusable component PricingTable.js inside the components folder.
  • The component will take a plans prop, which will be an array of objects representing different pricing plans. Each object will include details like plan name, price, features, and button text.
  • In the parent component (e.g., index.js), create an array of plans where each object represents a pricing plan.
  • Pass this plans array to the PricingTable component as props.
  • Use Tailwind CSS to structure the pricing table in a responsive grid format. Each pricing plan will be displayed as a card containing a title, price, list of features, and a "Buy Now" button.
  • Tailwind CSS utility classes will be used to handle layout, spacing, colors, borders, and hover effects.

Steps To Create The Pricing Table

Step 1: Create the NextJs App using the following command.

npx create-next-app@latest pricing-table
cd pricing-table

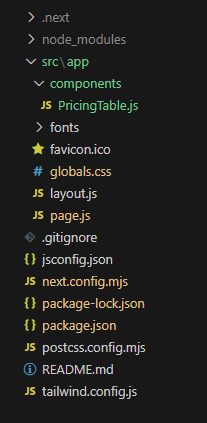
Configuration which you should follow while creating the App :

√ Would you like to use TypeScript? ... No / Yes
√ Would you like to use ESLint? ... No / Yes
√ Would you like to use Tailwind CSS? ... No / Yes
√ Would you like to use `src/` directory? ... No / Yes
√ Would you like to use App Router? (recommended) ... No / Yes
√ Would you like to customize the default import alias (@/*)? ... No / Yes

Project Structure

👁 file
Project Structure

Updated Dependencies

"dependencies": {
"next": "14.2.14",
"react": "^18",
"react-dom": "^18",
},
"devDependencies": {
"postcss": "^8",
"tailwindcss": "^3.4.1"
}
}

Example: In this example, we will write the following code in different files(The name of the files is mentioned in the first line of each code block).


To run your project use the below command.

npm run dev

Output:

👁 a2
Create A Pricing Table in Tailwind CSS and Next.js
Comment
Article Tags:

Explore