The R magick package is a comprehensive image processing and manipulation tool. It serves as an interface to the ImageMagick library, a robust software suite widely used for handling bitmap images. The package allows R users to perform a variety of tasks on images, such as reading, writing, editing and transforming them, making it an essential tool for anyone needing advanced image processing capabilities in R Programming Language.
Key Features of the Magick Package
Some of the main features are available for the Magick Package.
Reading and Writing Images: Supports a wide range of image formats (e.g., PNG, JPEG, TIFF, GIF). Easy reading and writing of images.
First, we need to ensure that the magick package is installed and loaded into our R environment.
install.packages(): Installs the specified packages in the our R environment
library(): Loads the installed package in the R environment.
Basic Functions of magick Package
We will learn some basic functions that of magick packages that we will use for advance image manipulation.
1. Defining Image Path
We define the path to our image and where we want to save the processed image.
2. Reading the Images
We use the image_read() function to read the image from the specified path.
image_read(): reads an image from a given path and stores it as an R object.
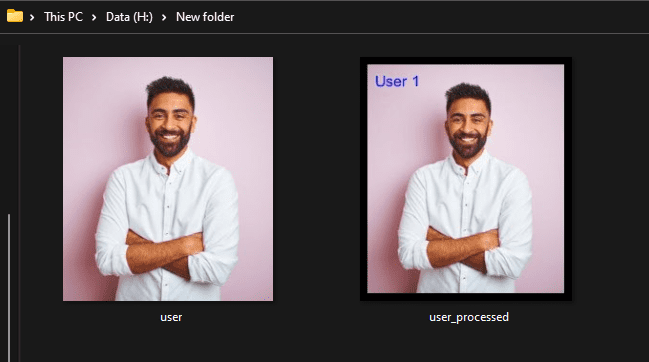
3. Performing Transformations
We can now perform various transformations on the image such as resizing, adding borders and annotating with text.
image_resize(): This function resizes the image to the specified dimensions. The string "300x300" indicates the target width and height.
image_border(): Adds a border around the image. The color argument specifies the border color and the geometry argument defines the border size in pixels.
image_annotate(): This function adds text to the image. The arguments include the text itself ("User 1"), the size of the text, the color of the text and the location, which specifies where to position the text within the image (in this case, 20px from the top-left corner).
4. Saving the Processed Image
We can save it using the image_write() function.
image_write(): Saves the image to the specified file path.
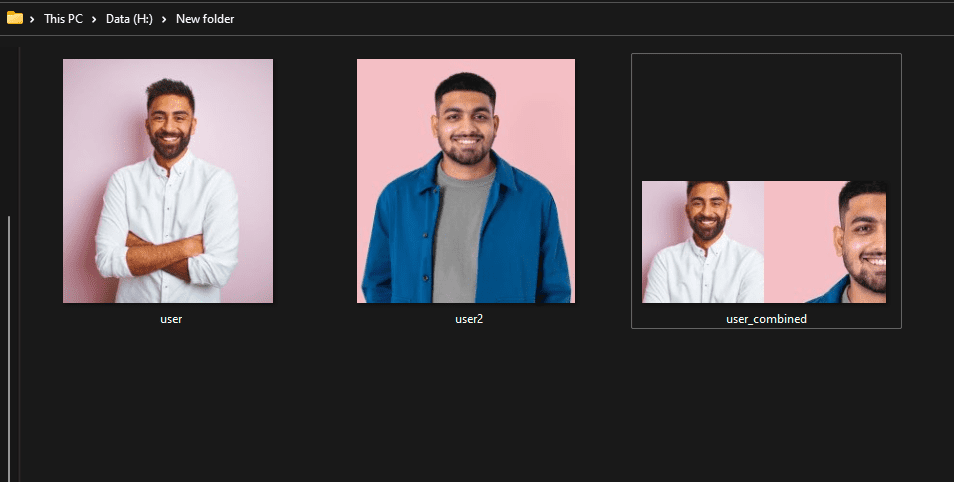
2. Advanced Transformations: Cropping and Combining
We can also crop and combine images with magick using:
image_crop(): Crops the image to the specified size and position. The geometry "200x200+50+50" means cropping a 200x200 pixel region starting 50 pixels from the top-left corner.
image_append(): Combines two images horizontally or vertically.
The magick package can be used to create and manipulate animations, including animated GIFs
1. Creating an Animated GIF
To create an animated GIF, we use a series of images and combine them into a single animation. Here’s an example of how to create an animated GIF from two images:
image_animate(): Creates an animated GIF from a series of images. The fps argument controls the frame rate (frames per second).

.png)