 |
VOOZH | about |
|
VOOZH | about |
In Mongoose, a Schema acts as your blueprint and defines what each document in MongoDB should look like including fields, types, defaults and rules. A Model acts as your builder and allows you to create, read, update and delete documents in the database with ease.
To demonstrate how to create a model using Mongoose, follow these steps to set up the environment:
First, we need to create a Node.js project if you haven't done so already. Run the following command in your terminal:
npm init -yThis will generate a package.json file, which will manage the project's dependencies.
"start": "node app.js" We can start the developement server using the below command.
npm startNote: The above command will not do anything right now since we have not written any code in our JavaScript file.
We need to install the required modules to use in our project. Run the following command to install MongoDB and Mongoose as dependencies.
npm install mongodb mongooseapp.js FileNow, create an app.js file where you will define the Mongoose schema and model and connect to MongoDB. Start by connecting to your MongoDB instance:
To create a schema and model in Mongoose, define a schema with fields like name, power type, gold, health, and mana for a "Mage." Use mongoose.Schema() to set up the structure, ensuring required fields. Then, use mongoose.model() to create a model based on this schema, enabling interaction with the database.
Once the schema is defined, create a model using mongoose.model(). This model will provide an interface to interact with the mages collection in the MongoDB database.
const Mage = mongoose.model('Mage', mageSchema);To create and save a model in Mongoose, instantiate an object from the model class using the new keyword, then call the save() method on this object to create a document in the corresponding MongoDB collection.
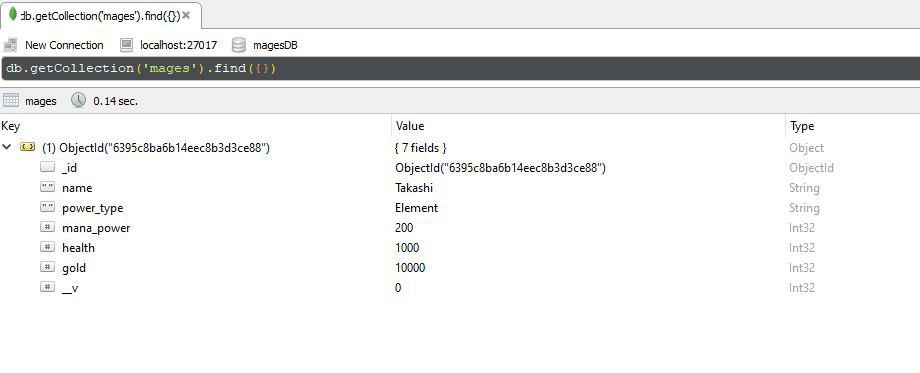
We can view the saved model and document by opening up the Studio 3T desktop application, clicking on connect, and then going through the following hierarchy and double click on the mode collection name.
This is what you will see when you double-click on the collection name. Notice that it has been given an _id field automatically.
We can create as many objects from the Mage class as you want, and call the save() method on them to create a document for each of them in the mages collection.
Re-start the server:
npm startOutput: