MongoDB is an open-source document-oriented database designed to store a large scale of data and allows you to work with that data very efficiently. It is categorized under the NoSQL (Not only SQL) database because the storage and retrieval of data in the MongoDB are not in the form of tables.
Heroku
Heroku is a platform as a service (PaaS) that enables developers to build, run, and operate applications entirely in the cloud.
In this article, we're going to create a simple NodeJS ToDo application that we connect to MongoDB Cluster and Deploy into Heroku.
This article is divided into 3 steps to Deploy MongoDB App to Heroku.
Steps to Deploy MongoDB App on Heroku:
Create MongoDB Atlas Cluster
Create NodeJS ToDo App
Installation of Heroku and Deployment
Step 1:- MongoDB Atlas Cluster
MongoDB Atlas Cluster is a NoSQL Database-as-a-Service offering in the public cloud (available in Microsoft Azure, Google Cloud Platform, and Amazon Web Services).
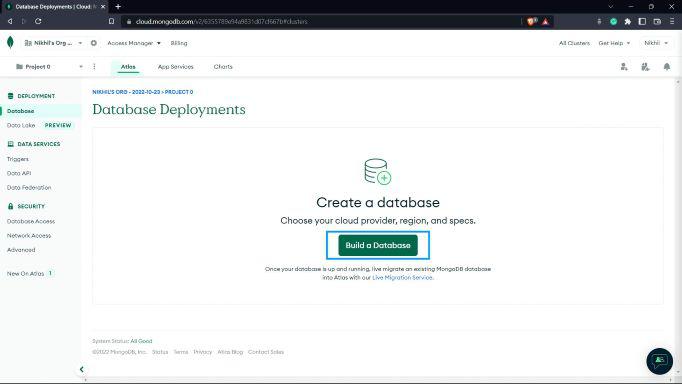
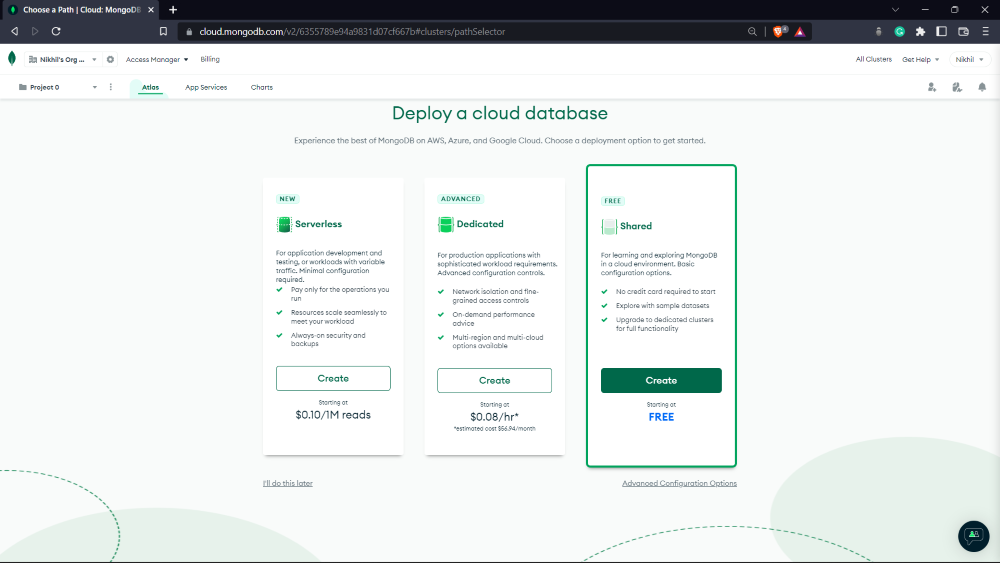
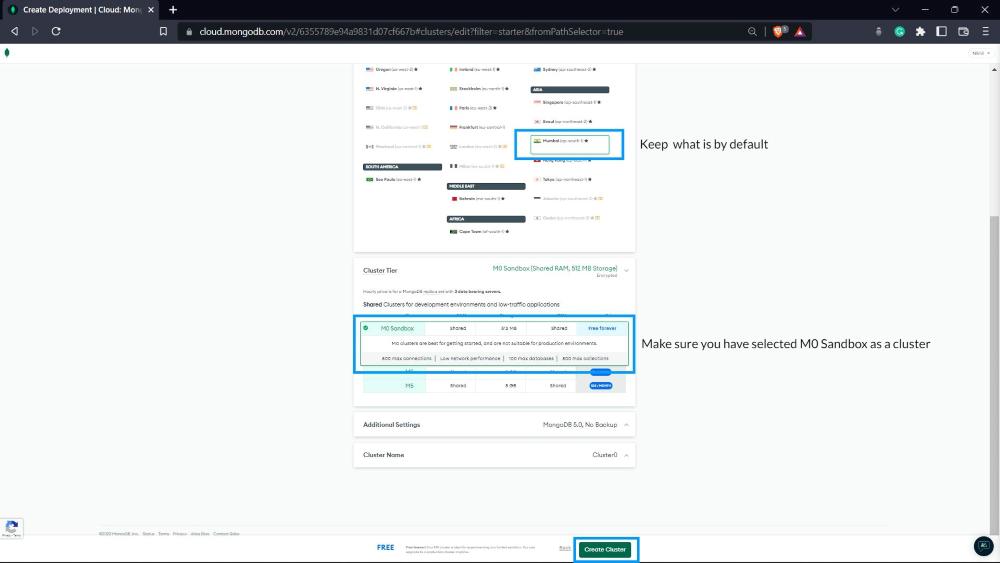
Below are the steps to create a free MongoDB Cluster(a shared cluster)
Open the MongoDB Atlas website, and goes toward the first step of creating a Cluster.
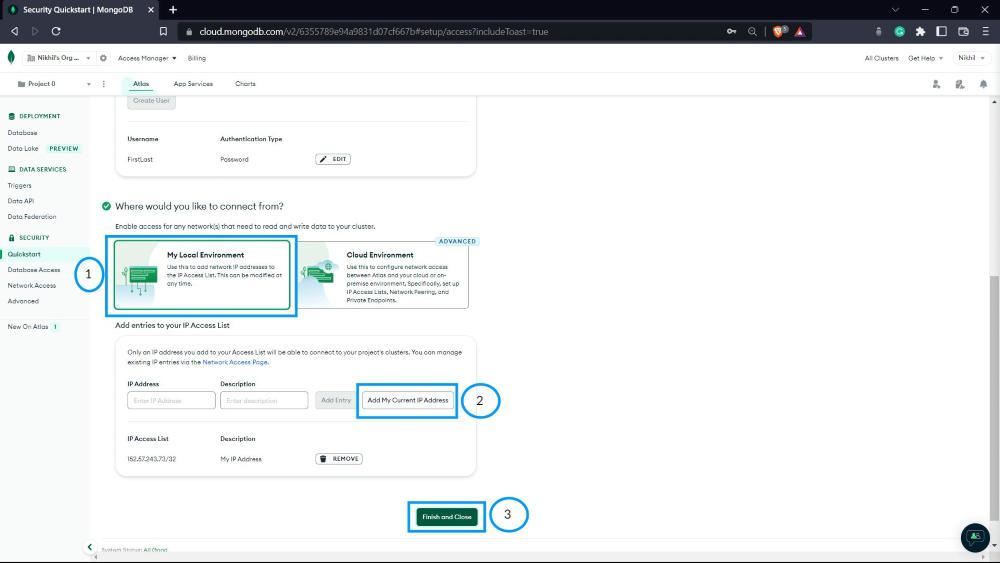
Click on a button, Start Free as shown below. Sign Up if you haven't Signed Up yet or Sign In.
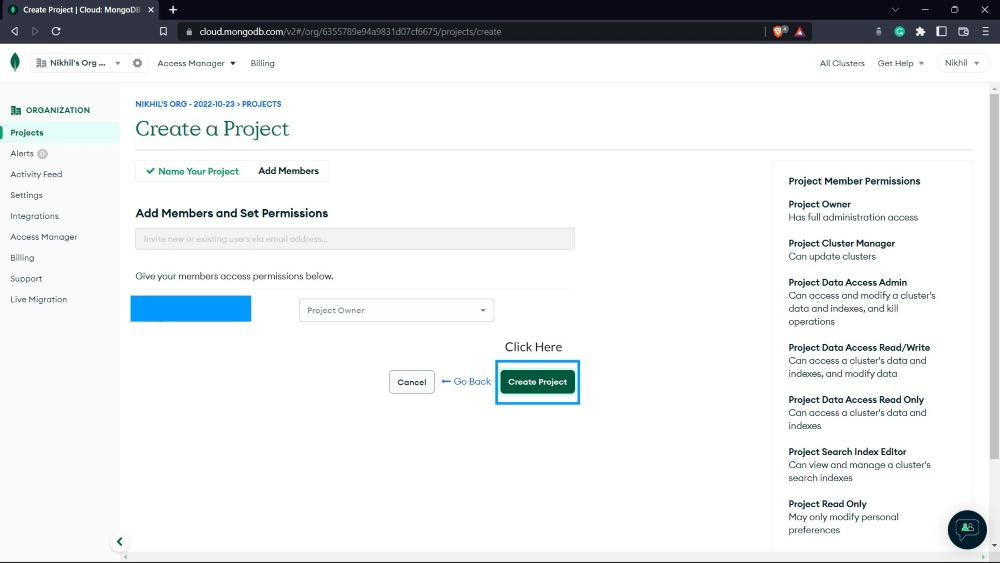
Give a name to the Database and Collection and click on Create Button. The database name is important while manipulating with database in the application.
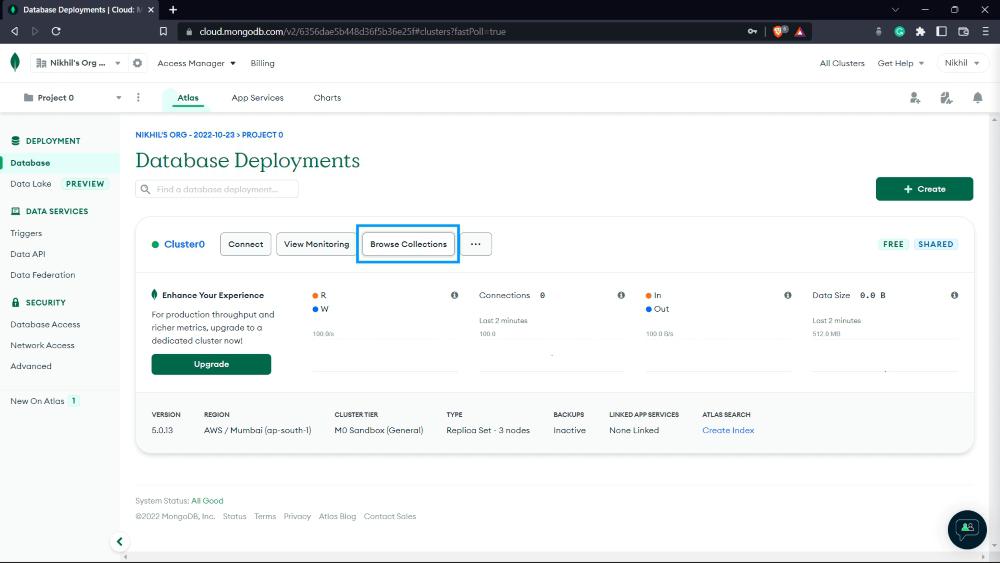
So now, we have set up our MongoDB Atlas Cluster, and we're ready to move toward the To-Do NodeJS application.
Step 2: NodeJs
Node.js is an open-source and cross-platform runtime environment built on Chrome’s V8 JavaScript engine for executing JavaScript code outside of a browser. You need to recollect that NodeJS isn’t a framework, and it’s not a programming language. It provides an event-driven, non-blocking (asynchronous) I/O and cross-platform runtime environment for building highly scalable server-side applications using JavaScript.
For Downloading And Installation of NodeJS, use this link.
Now follow the steps below after installing.
Create a folder called ToDO Project
Open the PowerShell window on that ToDo Project folder.
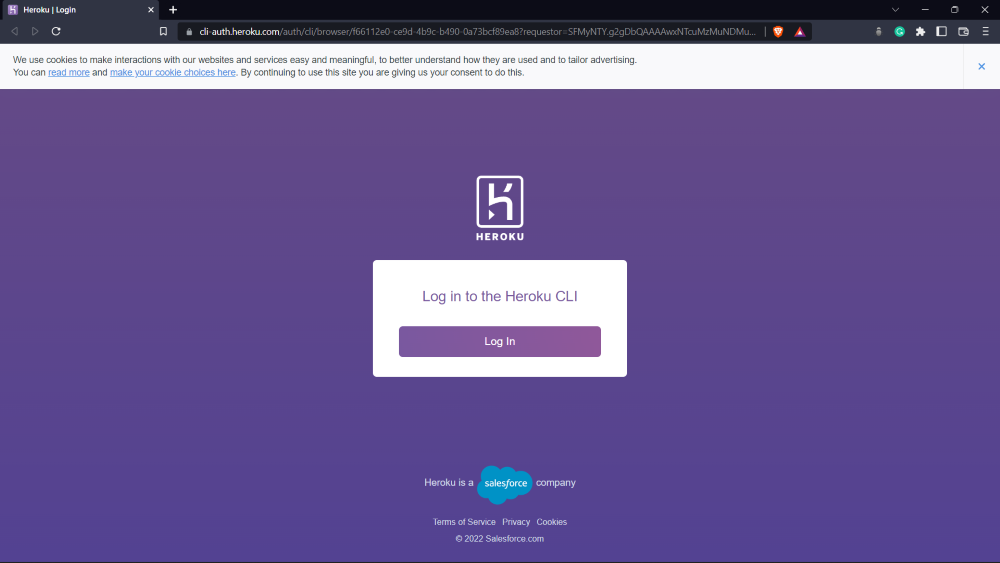
Step 3: UseHeroku. It is a cloud-based application deployment and management service. For downloading and installation of Heroku, click here. So considering that you have installed Heroku CLI on your machine. Go to the official website of Heroku. Sign up if you haven't yet, or Sign In.
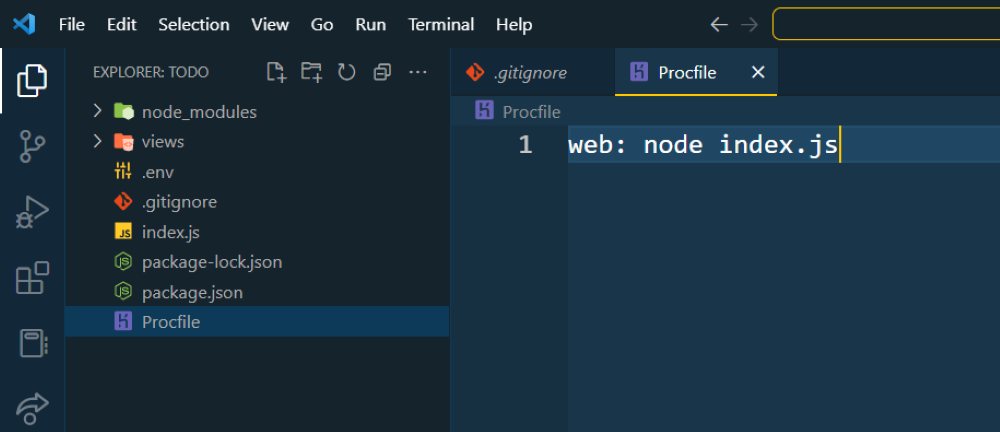
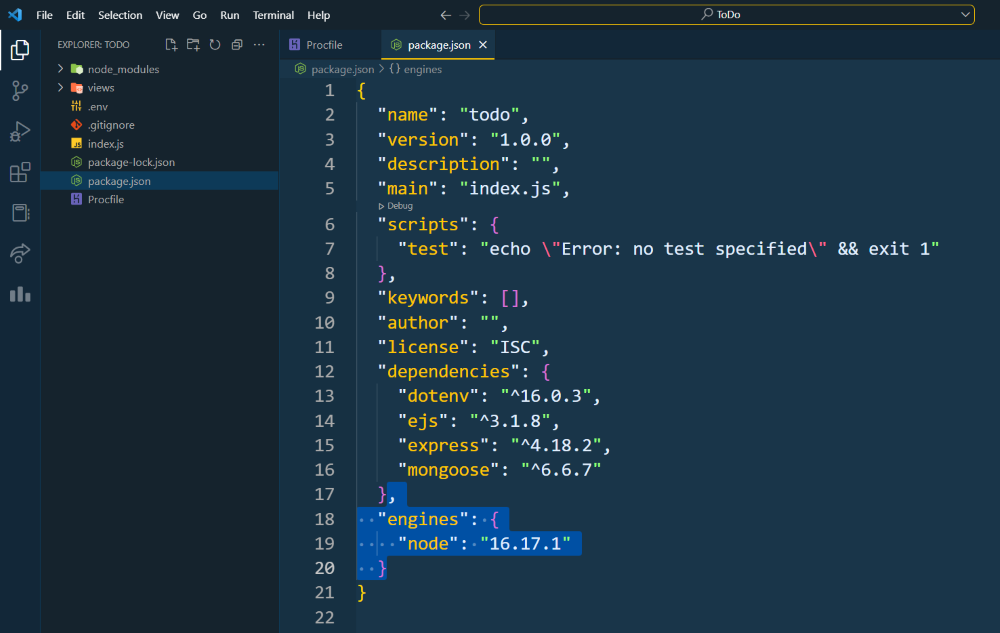
We're very close to see our application running on the cloud, next step is to Track our codebase in repository and push it onto Heroku to do this run the commands
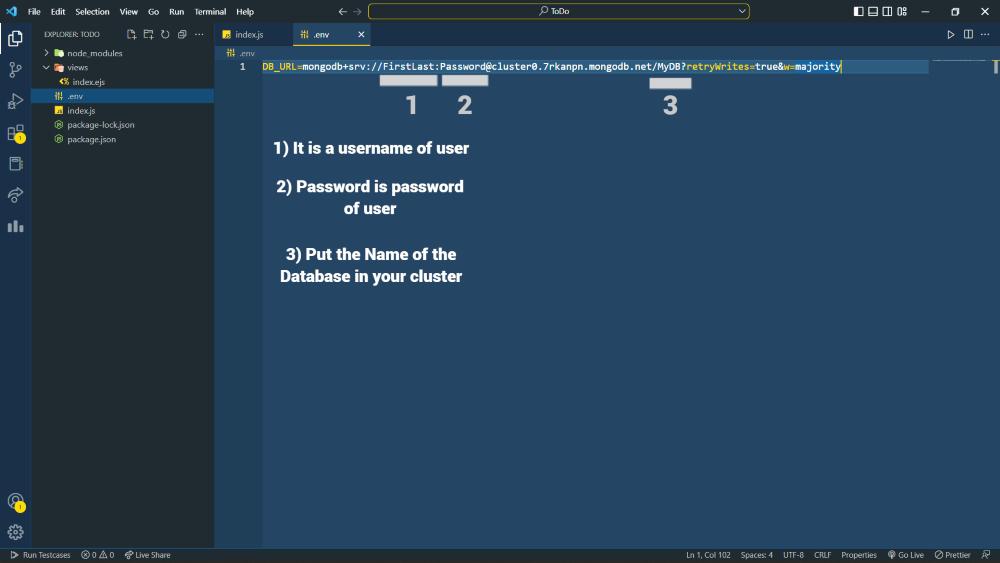
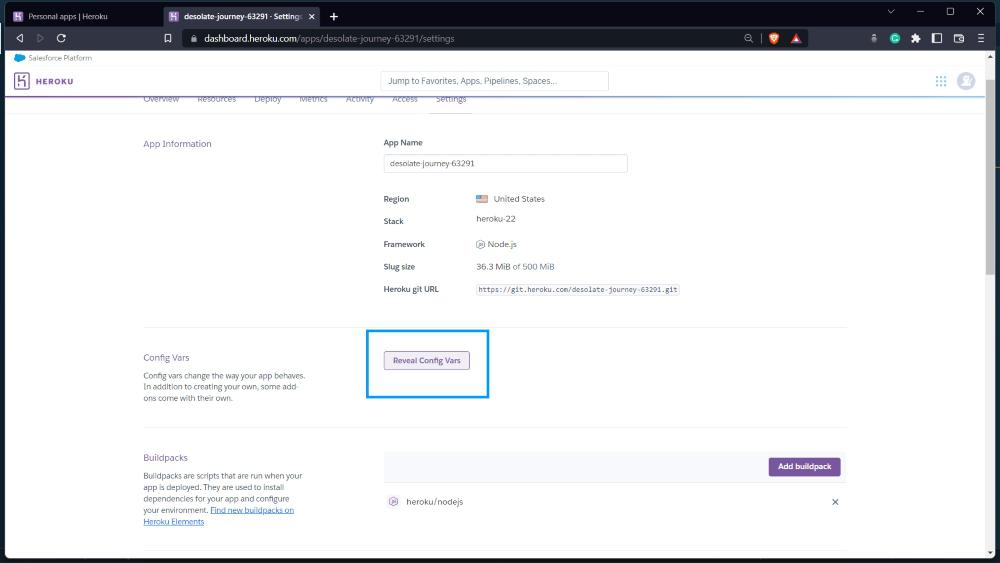
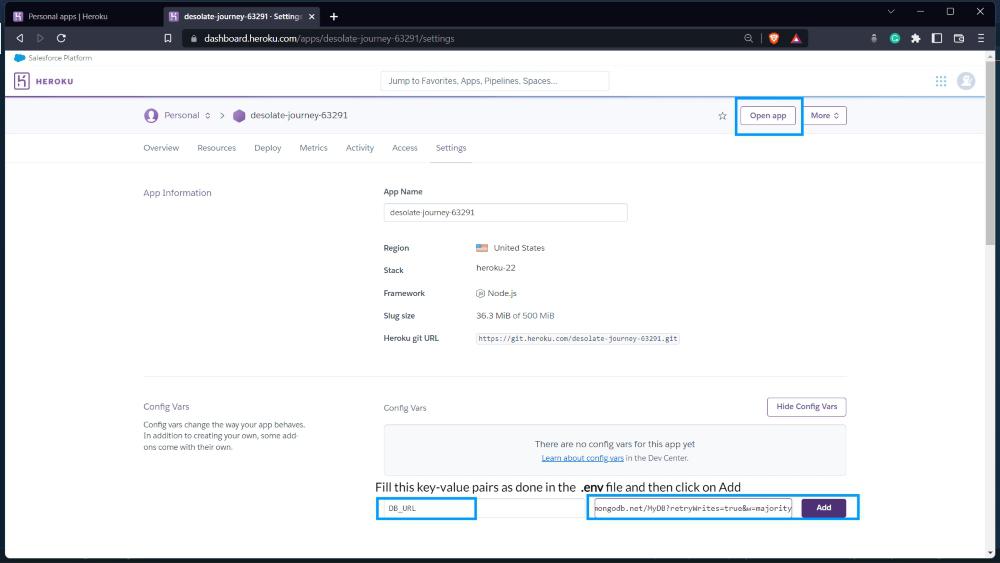
Now we have to set up our environment variable, the key-value pairs inside the .env file, a Database URL in our case. We can set up environment variable in the Heroku site.
