 |
VOOZH | about |
|
VOOZH | about |
We have seen adding markers to Google Maps in Android. Along with that, we have also added multiple markers on Google Maps in Android. Many apps use a dynamic feature to add a marker on the Google Maps and update them according to requirements. In this article, we will take a look at adding markers to Google Map from in Android.
We will be building a simple application in which we will be displaying a map with a simple marker and we will add a marker to it from Firebase. We have to add markers from Firebase Firestore to our map. A sample video is given below to get an idea about what we are going to do in this article. Note that we are going to implement this project using the Java language.
Step 1: Create a New Project
To create a new project in Android Studio please refer to . Note that select Java as the programming language. Make sure to select Maps Activity while creating a new Project.
Step 2: Generating an API key for using Google Maps
To generate the API key for Maps you may refer to . After generating your API key for Google Maps. We have to add this key to our Project. For adding this key in our app navigate to the values folder > google_maps_api.xml file and at line 23 you have to add your API key in the place of YOUR_API_KEY.
Step 3: Connecting your app with the Firebase
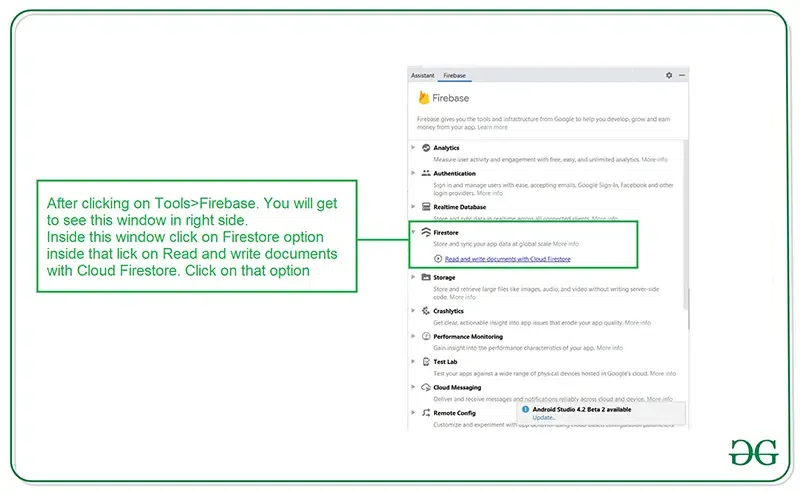
After creating a new project and adding a key for Google Maps. Navigate to the Tools option on the top bar. Inside that click on Firebase. After clicking on Firebase, you can get to see the right column mentioned below in the screenshot.
Inside that column Navigate to Firebase Cloud Firestore. Click on that option and you will get to see two options on Connect app to Firebase and Add Cloud Firestore to your app. Click on Connect now option and your app will be connected to Firebase. After that click on the second option and now your App is connected to Firebase. After connecting your app to Firebase you will get to see the below screen.
After that verify that dependency for the Firebase Firestore database has been added to our Gradle file. Navigate to the app > Gradle Scripts inside that file. Check whether the below dependency is added or not. If the below dependency is not present in your build.gradle file. Add the below dependency in the dependencies section.
implementation ‘com.google.firebase:firebase-firestore:22.0.1’
After adding this dependency sync your project and now we are ready for creating our app. If you want to know more about connecting your app to Firebase. Refer to this article to get in detail about How to add Firebase to Android App.
Step 4: Working with the AndroidManifest.xml file
For adding data to Firebase we should have to give permissions for accessing the internet. For adding these permissions navigate to the app > AndroidManifest.xml. Inside that file add the below permissions to it.
Step 5: Working with the MapsActivity.java file
Go to the MapsActivity.java file and refer to the following code. Below is the code for the MapsActivity.java file. Comments are added inside the code to understand the code in more detail.
Step 6: Adding data to Firebase Firestore in Android
Go to the browser and open Firebase in your browser. After opening Firebase you will get to see the below page and on this page Click on Go to Console option in the top right corner.
After clicking on this screen you will get to see the below screen with your all project inside that select your project.
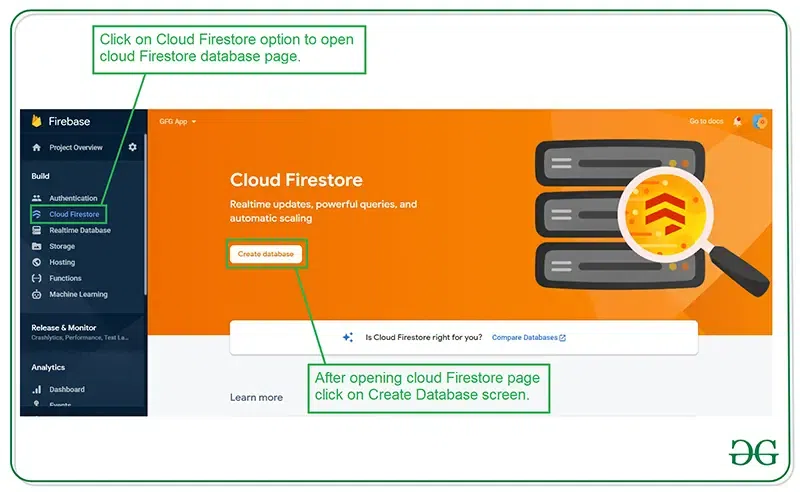
Inside that screen click in Firebase Firestore Database in the left window.
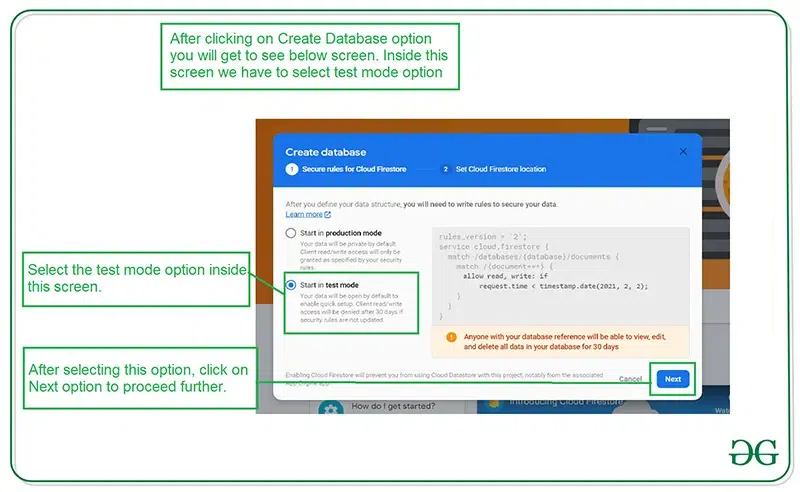
After clicking on the Create Database option you will get to see the below screen.
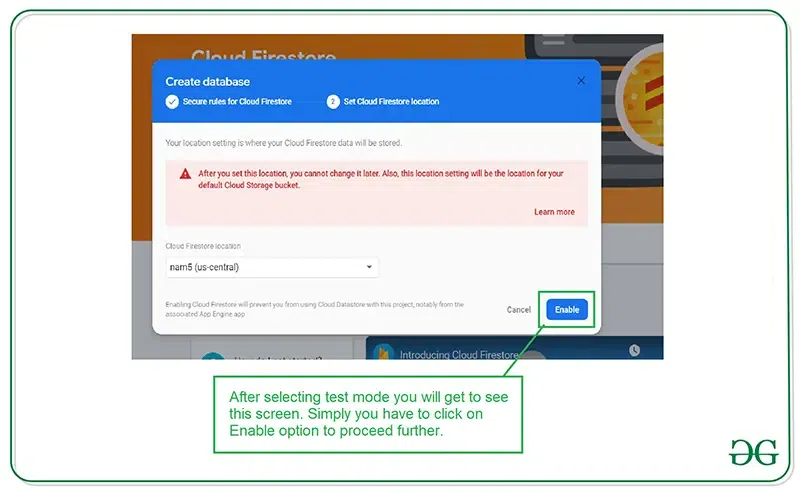
Inside this screen, we have to select the Start in test mode option. We are using test mode because we are not setting authentication inside our app. So we are selecting Start in test mode. After selecting test mode click on the Next option and you will get to see the below screen.
Inside this screen, we just have to click on the Enable button to enable our Firebase Firestore database. After completing this process we just have to run our application and add data inside our app and click on the submit button. To add data just click on the Start Collection button and provide the Collection ID as MapsData. After that provide the Document ID as 7QWDor9vozLaHdFYV9kh and inside the Field write down geoPoint, and select type as geopoint, and enter the Latitude and Longitude of the desired location. At last click on the Save button.
After adding the data to Firebase. Now run your app and see the output of the app. You can change the value in the geopoint with your latitude and longitude field and you can get to see the real-time updates on your maps with added Markers.