 |
VOOZH | about |
|
VOOZH | about |
Android DatePicker is a user interface control that is used to select the date by day, month, and year in the android application. DatePicker is used to ensure that the users will select a valid date. In android DatePicker having two modes, the first one shows the complete calendar and the second one shows the dates in the spinner view. One can create a DatePicker control in two ways either manually in the XML file or create it in the Activity file programmatically. We are going to do it programmatically by using Java.
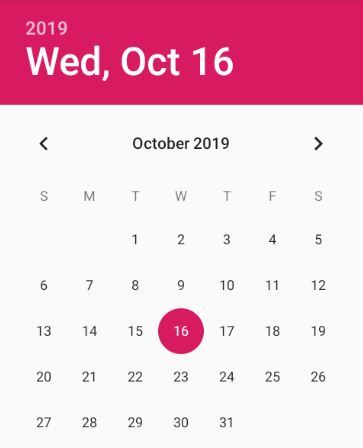
👁 calendar modeNote: To implement DatePicker using Kotlin please refer to this.
Step 1: Create a New Project
To create a new project in Android Studio please refer to How to Create/Start a New Project in Android Studio. Note that select Java as the programming language.
Step 2: Working with activity_main.xml file
In the activity_main.xml file add only a TextView to display the selected date and a Button to select the date from the DatePickerDialog. Below is the complete code for the activity_main.xml file.
Step 3: Create a new class and names as DatePicker
Now create a new class by going to the package and right-click on it and select new and then Java Class. Name the class as DatePicker and its superclass as DialogFragment (androidx.fragment.app.DialogFragment) and click OK.
👁 ImageNow override a method onCreateDialog and instead of returning super.onCreateDialog return an instance of DatePickerDialog.
@NonNull
@Override
public Dialog onCreateDialog(@Nullable Bundle savedInstanceState) {
return new DatePickerDialog();
}
Now pass parameters to the constructor of DatePickerDialog which requires context, OnDateSetListener, year, month, dayOfMonth.
@NonNull
@Override
public Dialog
onCreateDialog(@Nullable Bundle savedInstanceState)
{
Calendar mCalendar = Calendar.getInstance();
int year = mCalendar.get(Calendar.YEAR);
int month = mCalendar.get(Calendar.MONTH);
int dayOfMonth = mCalendar.get(Calendar.DAY_OF_MONTH);
return new DatePickerDialog(
getActivity(),
(DatePickerDialog.OnDateSetListener)getActivity(),
year, month, dayOfMonth);
}
The complete code for the DatePicker.java class is given below.
Step 4: Working with MainActivity.java file
Now In the MainActivity.java file, create an object of both TextView and Button and map the components(TextView and Button) with their ids.
TextView tvDate;
Button btPickDate;
tvDate = findViewById(R.id.tvDate);
btPickDate = findViewById(R.id.btPickDate);
Implement OnDateSetListener of DatePickerDialog class and override onDateSet() method. The onDateSet() method will set the date after selection in the tvDate TextView.
@Override
public void onDateSet(DatePicker view, int year, int month, int dayOfMonth)
{
// Create a Calendar instance
Calendar mCalendar = Calendar.getInstance();
// Set static variables of Calendar instance
mCalendar.set(Calendar.YEAR,year);
mCalendar.set(Calendar.MONTH,month);
mCalendar.set(Calendar.DAY_OF_MONTH,dayOfMonth);
// Get the date in form of string
String selectedDate = DateFormat.getDateInstance(DateFormat.FULL).format(mCalendar.getTime());
// Set the textview to the selectedDate String
tvDate.setText(selectedDate);
}
In the onClick() method implement setOnClickListener of btPickDate. Create an instance of DatePicker(our class). Use the show method of the instance and pass getSupportFragmentManager() and a Tag. The complete code for the MainActivity.java file is given below.
Output: Run on Emulator