 |
VOOZH | about |
|
VOOZH | about |
The Navigation Architecture Component simplifies navigation implementation while also assisting you in visualizing your app's navigation flow. The library offers a variety of advantages, including:
The Navigation Component consists of three primary parts:
Add the following dependencies by navigating to Gradle Scripts > build.gradle.kts (Module :app) and paste the following code at the end of the file under the dependencies {} tag.
dependencies {
 ...
 implementation ("androidx.navigation:navigation-fragment-ktx:2.8.8")
 implementation ("androidx.navigation:navigation-ui-ktx:2.8.8")
}
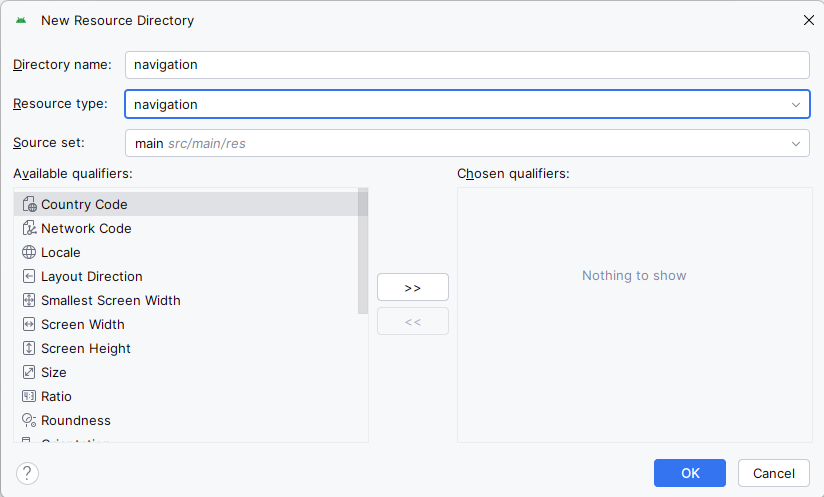
Navigate to app > res, right click on the folder and select New > Android Resource Directory and set the name and resource type as navigation.
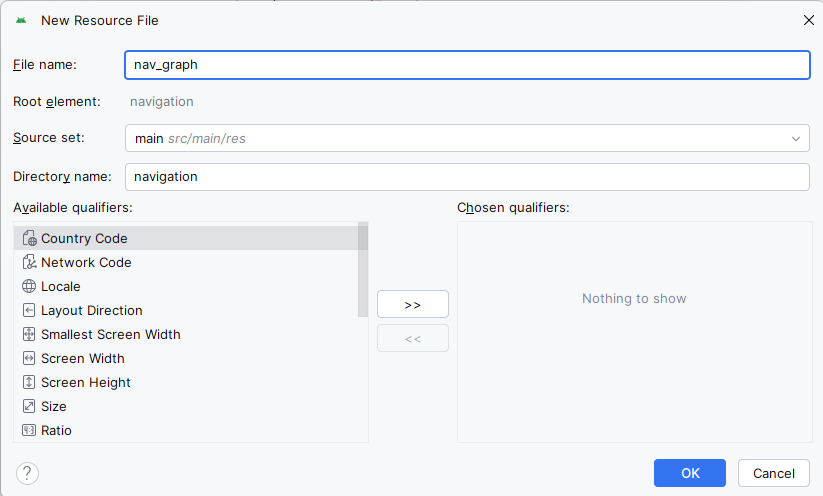
Navigate to app > res > navigation, right click on the folder and select New > Navigation Resource File. Set the name as nav_graph.
For demonstration purposes, we have created a sample app with two fragments named FirstFragment and SecondFragment. We will navigate to the SecondFragment by clicking the button in the FirstFragment. In the navigation graph, we define these fragments as follows.
nav_graph.xml:
The root tag navigation contains a parameter called app:startDestination, which contains the id of our first fragment. This specifies that the first fragment will be loaded automatically into the NavHostFragment. The concept of a destination is introduced in the Navigation Component. A destination is any location in your app that you can navigate to, typically a fragment or an activity. These are supported by default, but you can also create your own custom destination types if necessary. Take note that we defined an action with the following attributes for the first fragment:
android:id="@+id/action_first_to_second"
app:destination="@id/second"
Each action should have a distinct id that we will use to navigate to the desired destination.
The destination here points to the id of the second fragment defined in the nav graph, indicating that we will navigate to the second fragment with this action.
You can navigate between fragments using the NavController using Destination ID. Write the below code inside FirstFragment.kt:
findNavController().navigate(R.id.action_first_to_second)The final step is to define the NavHostFragment. It is a special widget that displays the various destinations defined in the navigation graph. Copy and paste the following code into the layout of the activity where we want to load our FirstFragment.
MainActivity.kt:
The NavHostFragment used by NavController is defined by the android:name="androidx.navigation.fragment.NavHostFragment" attribute.
That's all. The Navigation Component is now operational. In the following section, we'll go over how to safely navigate to fragments while passing arguments.
Safe args is a Gradle plugin that generates simple object and builder classes for type-safe access to arguments specified for destinations and actions in the navigation component. The safe args plugin is now enabled in your project. We will add two arguments to the FirstFragment that will be passed to the SecondFragment. In the navigation graph, we will define arguments as follows.
The first argument, arg1, is of type Integer and has the default value of 0. Similarly, the second argument, arg2, is of type String and has the default value "default." Gradle will generate a class named SecondFragmentArgs after we define these arguments, which can be used in SecondFragment to retrieve the arguments in the following manner:
val username = arguments?.getString("gfgCouseName")
val username = args.username
That's all that's needed to pass arguments in a type-safe way. Aside from the built-in types, you can define your own custom types of arguments by creating a Parcelable class.