VOOZH about

URL: https://www.geeksforgeeks.org/android/step-by-step-guide-to-creating-a-custom-spinner-in-kotlin-for-android/

⇱ Step-by-Step Guide to Creating a Custom Spinner in Kotlin for Android - GeeksforGeeks


  • Courses
  • Tutorials
  • Interview Prep

Step-by-Step Guide to Creating a Custom Spinner in Kotlin for Android

Last Updated : 23 Jul, 2025

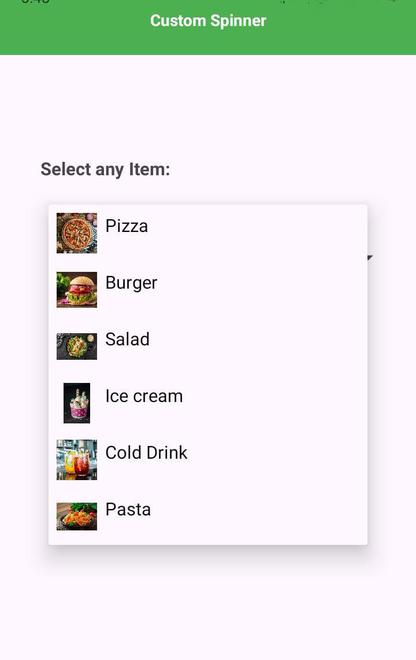
In Android development, a Spinner allows users to select an item from a dropdown menu. While the default ArrayAdapter provides basic functionality, customizing a Spinner can enhance its appearance and usability. This article will guide you through creating a custom Spinner using Kotlin. You'll learn how to design a unique item layout, implement a custom adapter, and integrate it into your activity. By following these steps, you'll be able to replace the standard ArrayAdapter with your custom adapter to display both images and text in your Spinner items.

👁 spinner_output
Custom spinner to select any item


1. Create a Layout for Spinner Items

We need a layout file that defines how each item in the spinner will look. This layout includes an ImageView and a TextView.

Step-by-Step:

  • Navigate to your res/layout directory.
  • Create a new XML file named item_spinner.xml.
  • Add the following XML code to define the layout for spinner items:


2. Create a Model Class

Define a Kotlin data class to represent each item in the spinner. This class will hold the data such as the icon resource ID and the algorithm name.

Step-by-Step:

  • Create a new Kotlin file named Item.kt.
  • Add the following code to define the model class:

File: Item.kt


3. Create a Custom Adapter

Implement a custom adapter that binds data to the spinner using the custom layout. This adapter will map each item to its corresponding view.

Step-by-Step:

  • Create a new Kotlin file named ItemAdapter.kt.
  • Add the following code to define the custom adapter:


4. Update Your Layout File

Add a Spinner to your activity layout file where you want the spinner to appear.

Step-by-Step:

  • Open your activity layout XML file (e.g., activity_main.xml).
  • Add the following XML code to include the spinner:

File: res/layout/activity_main.xml


5. Initialize the Spinner in Your Activity

Set up the spinner in your activity by creating an instance of the custom adapter and attaching it to the spinner. Handle item selections to display a toast message.

Step-by-Step:

  • Open your activity Kotlin file (e.g., MainActivity.kt).
  • Add the following code to initialize the spinner and handle item selections:

File: MainActivity.kt

Output:

👁 demo_image
Output the above code


Git Link for the Application : Click Here to check whole Application

Comment

Explore