 |
VOOZH | about |
|
VOOZH | about |
JavascriptInterface Annotation provides the facility to create any method as the javascript Interface which means that method can be used by web components to communicate with Android. For example:
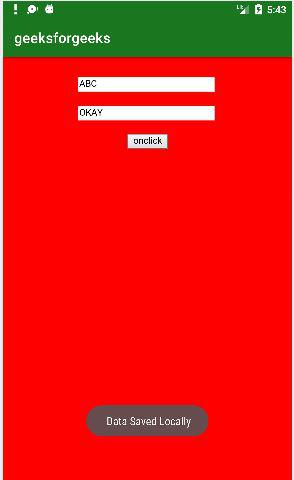
So to understand this concept let's create a small project where the user would be entering the basic details and that details would be shown in Android's Dialog box. For this article, we will be using the concept of WebView.
Step 1: Create a New Project in Android Studio
To create a new project in Android Studio please refer to How to Create/Start a New Project in Android Studio. Note that select Java as the programming language.
Step 2: Working with the activity_main.xml file
Navigate to app > res > layout > activity_main.xml and add the below code to it. Comments are added in the code to get to know in detail.
Here we have added WebView to our layout file. now we need to load a URL in this WebView, so here we are creating a simple HTML file that would be locally stored in the Assets folder of the Android project.
Step 3: Creating a HTML file
test.html
Step 4: Working with the MainActivity file
Navigate to app > java > your app's package name > MainActivity file and add the below code to it. Comments are added in the code to get to know in detail. In this Java file, we need to enable JavaScript for the WebView and to add the javascript interface we need to provide the class name as we are adding this in the same file so we are using "webView.addJavascriptInterface(this, "Dialog");"
So here when the user clicks on the button of the webpage it will call the showMsg() of Android and from that method dialog box would be shown to the user. here we can save the details in the local database or we can perform various tasks by accessing the web content in android this can be done in a more dynamic way. as per the requirement.
Output: