 |
VOOZH | about |
|
VOOZH | about |
In Android for recording audio or video, there is a built-in class called MediaRecorder. This class in Android helps to easily record video and audio files. The Android multimedia framework provides built-in support for capturing and encoding common audio and video formats. In android for recording audio, we will use a device microphone along with MediaRecorder Class and for recording video, we will use the user's device Camera and MediaRecorder Class. Now in this article, we will see the implementation of an audio recorder in Android.
Method | Description |
|---|---|
| setAudioSource() | This method will specify the source of the audio to be recorded. |
| setAudioEncoder() | This method is used to specify the audio encoder. |
| setOutputFormat() | This method is used to specify the output format of our audio. |
| setOutputFile() | This method is used to specify the path of recorded audio files that are to be stored. |
| stop() | This method is used to stop the recording process. |
| start() | This method is used to start the recording process. |
| release() | This method is used to release the resource that is associated with the Media recorder class. |
To create a new project in Android Studio please refer to How to Create/Start a New Project in Android Studio.
Navigate to app > manifests > AndroidManifest.xml and add the following permission under the <manifest/> tag.
<uses-permission android:name="android.permission.RECORD_AUDIO"/>In the same file, under the <application/> tag add the following lines of code for FileProvider.
<provider
 android:name="androidx.core.content.FileProvider"
 android:authorities="${applicationId}.provider"
 android:exported="false"
 android:grantUriPermissions="true">
 <meta-data
 android:name="android.support.FILE_PROVIDER_PATHS"
 android:resource="@xml/file_paths" />
</provider>
Navigate to app > res > xml, right click and select New > XML Resource File and set the name as file_paths.xml and add the following code to the file.
<?xml version="1.0" encoding="utf-8"?>
<paths>
 <external-files-path
 name="external_files"
 path="." />
</paths>Navigate to Gradle Scripts > build.gradle.kts (Module :app) and add the following dependencies
dependencies {
 ...
 implementation ("com.github.massoudss:waveformSeekBar:5.0.2")
 implementation ("com.github.lincollincol:amplituda:2.2.2")
}
Refer to the this repo to read the documentation for the dependencies.
Navigate to Gradle Scripts > settings.gradle.kts and add the following line under repositories {}
dependencyResolutionManagement {
 ...
 repositories {
 ...
 maven { setUrl("https://jitpack.io/") }
 }
}Navigate to app > res > drawables, right click on the folder and select New Drawable Resource file and add the following drawables.
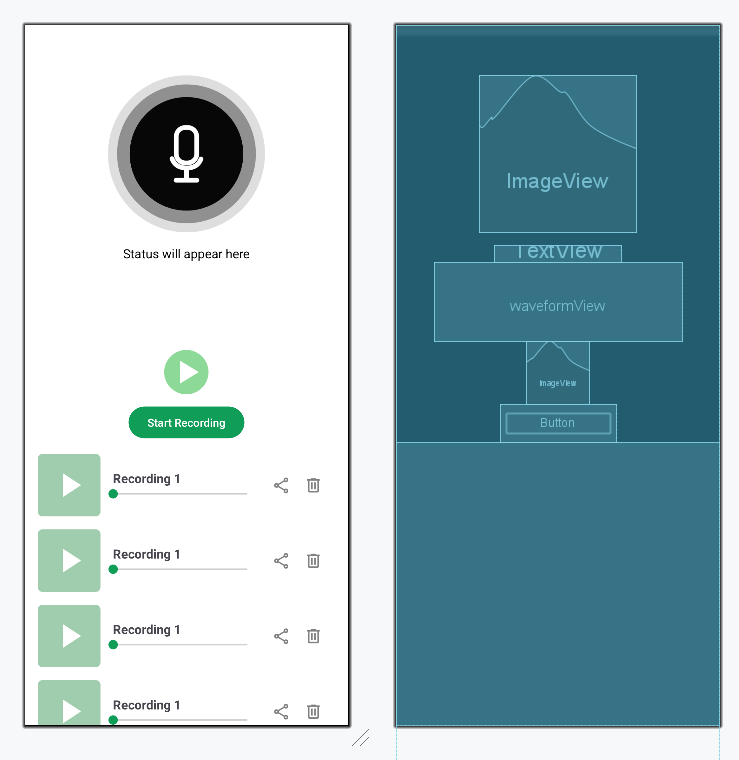
Navigate to the app > res > layout > activity_main.xml. Comments are added inside the code to understand the code in more detail. Create a new layout for each item of the recycler view and name it item_audio_recording.xml.
Design UI:
Navigate to app > java > {package-name}, right click and select New Java/Kotlin Class and set the name as AudioRecording and add the following code.
AudioRecordingFile:
Navigate to app > java > {package-name}, right click and select New Java/Kotlin Class and set the name as AudioRecordingAdapter and add the following code.
AudioRecordingAdapterFile:
Navigate to the app > java > Your app's package name > MainActivity. Below is the code for the MainActivity file. Comments are added inside the code to understand the code in more detail.
Refer to the following github repo to get the entire code: Audio-Recorder-in-Android