 |
VOOZH | about |
|
VOOZH | about |
The Adapter acts as a bridge between the UI Component and the Data Source. It converts data from the data sources into view items that can be displayed into the UI Component. In Android, SimpleAdapter is an easy adapter to map static data to views defined in an XML (layout) file. You can specify the data backing the list as an ArrayList of Maps. Each entry in the ArrayList corresponds to one row in the list. The Maps contain the data for each row.
SimpleAdapter allows us to add events to each list item but what if we want to add different events to different views that are part of our list item, we cannot achieve it by using SimpleAdapter itself. In a typical android application, a list item can consist of a complex layout that may contain different views. In that condition, we have to use customize SimpleAdapter. The basic syntax of SimpleAdapter.
class SimpleAdapter(
context: Context,
data: MutableList<HashMap<String, String>>,
resource: Int,
from: Array<String>,
to: IntArray
)
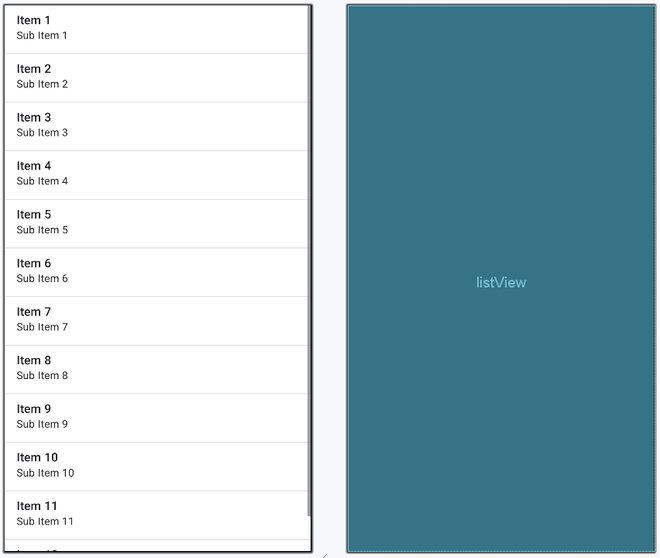
Below is the screenshot of the final application that we are going to create for this article. In this, you will notice that by clicking list_item nothing happens but when we click on Image then only Toast is displayed.
To create a new Project in Android Studio please refer to How to Create/Start a New Project in Android Studio.
We are going to use Java/Kotlin.
Now open activity_main.xml and insert the below code in it. It will create a ConstraintLayout which consists of a ListView. Below is the code for the activity_main.xml file.
activity_main.xml:
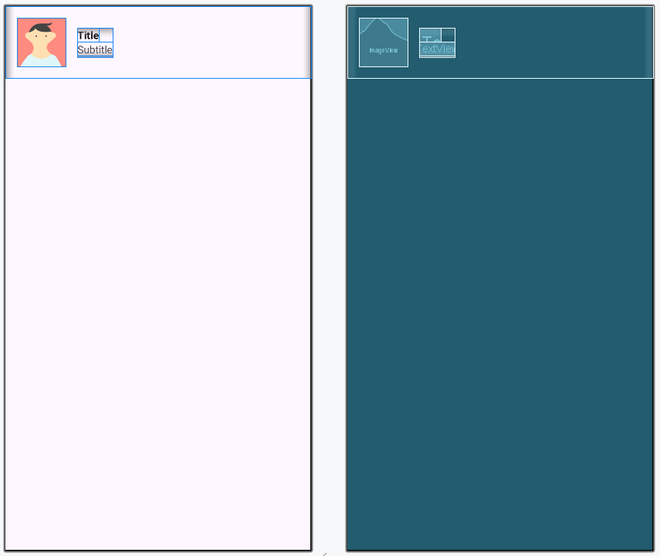
Go to the app > res > layout > right-click > New > Layout Resource File and creates a XML file. Name the file as list_item. Below is the code for the list_item.xml file.
list_item.xml:
Now create a new Kotlin class file and name it CustomSimpleAdapter. In this file, we will override the getView() method to add the custom code. Below is the code for the CustomSimpleAdapter file. Comments are added inside the code to understand the code in more detail.
CustomSimpleAdapter File:
Before writing any code in MainActivity file please add images that you want to show. Below is the code for MainActivity file. Comments are added inside the code to understand the code in more detail.
MainActivity File: