Create a simple calculator which can perform basic arithmetic operations like addition, subtraction, multiplication, or division depending upon the user input. A sample video is given below to get an idea about what we are going to do in this article.
Note that we are going to implement this project using the Java language.
👁 How-to-build-a-simple--Calculator-app--using-Android-Studio_ Pre-requisites:
Step-by-Step Implementation Building a calculator app is a great starting project for Android beginners.
Step 1: Create a New Project To Create a new project in Android Studio please refer to How to Create/Start a New Project in Android Studio .
Note that select Java as the programming language.
Directory Structure of the application is attached below:
👁 Directory_Structure
Step 2: Working with the activity_main.xml file Navigate to the app > res > layout > activity_main.xml and add the below code to that file.
Below is the code for the activity_main.xml file:
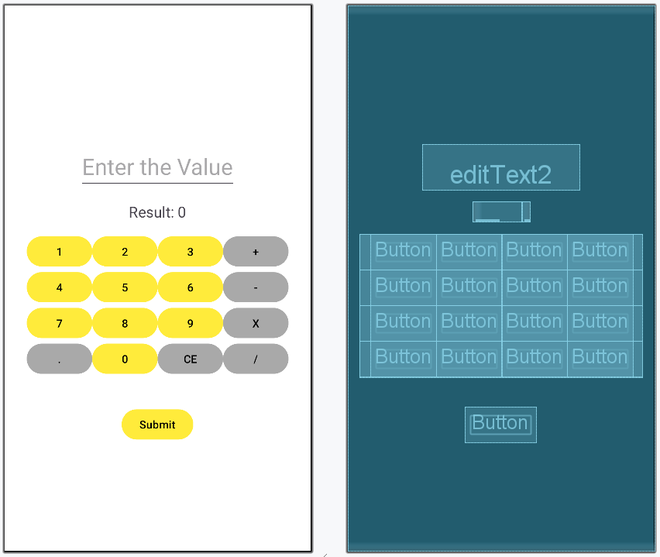
After using this code the UI will be like as follows: 👁 Layout
Step 3: Working with the MainActivity.java file Below is the code for the MainActivity.java file. MainActivity.java:
Explanation of the above Program: The app initializes buttons for numbers (0-9), operations (add, subtract, multiply, divide), clear, equal, and dot. Number buttons append their value to the EditText for user input. Operation buttons store the first number (num1), set the corresponding operation flag, and clear EditText. The dot button adds a decimal point if it doesn’t already exist in the input. The equal button performs the operation with the second number (num2) and displays the result in TextView. The clear button resets the EditText and result, clearing operation flags. The app handles basic arithmetic operations and division by zero errors. Output:
