 |
VOOZH | about |
|
VOOZH | about |
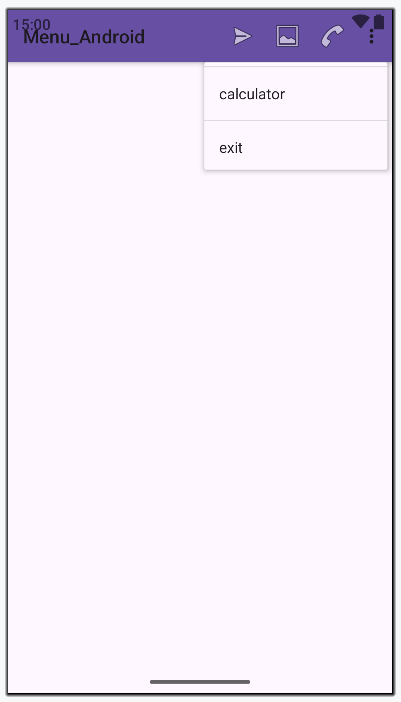
In Android, there are three types of Menus available to define a set of options and actions in our android applications. Android Option Menus are the primary menus of android. They can be used for settings, searching, deleting items, etc. When and how this item should appear as an action item in the app bar is decided by the Show Action attribute.
There are two main methods/options we can follow to implement option menu:
app:showAsAction="always"always: This ensures that the menu will always show in the action bar.
Example:
app:showAsAction="never"never: This means that the menu will never show, and therefore will be available through the overflow menu.
Example:
app:showAsAction="ifRoom"never: The menu item will be displayed in the Action Bar if there is enough room. If there isn't enough space, it will move to the overflow menu.
Example:
Below is the complete code for implementing the Options Menu in Android is given below:
To create a new project in Android Studio please refer to How to Create/Start a New Project in Android Studio.
The code for that has been given in both Java and Kotlin Programming Language for Android.
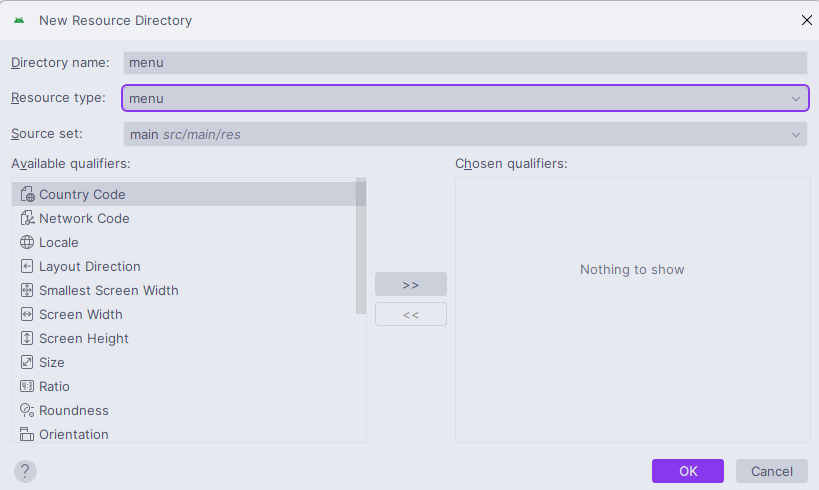
First, we will create a menu director which will contain the menu file. Go to app > res > right-click > New > Android Resource Directory and give the Directory name and Resource type as menu.
Now, we will create a menu_example file inside that menu resource directory. Go to app > res > menu > right-click > New > Menu Resource File and create a menu resource file and name it popup_menu. In the popup_menu file, we will add menu items. Below is the code snippet for the menu_example.xml file.
menu_example.xml:
In the MainActivity file, we will add functionalities to each menu options. Here is the code for the MainActivity in both Java and Kotlin.
MainActivity File:
We can setup the themes.xml file to change the color of the Action Bar. Here is the code for themes.xml:
themes.xml: