 |
VOOZH | about |
|
VOOZH | about |
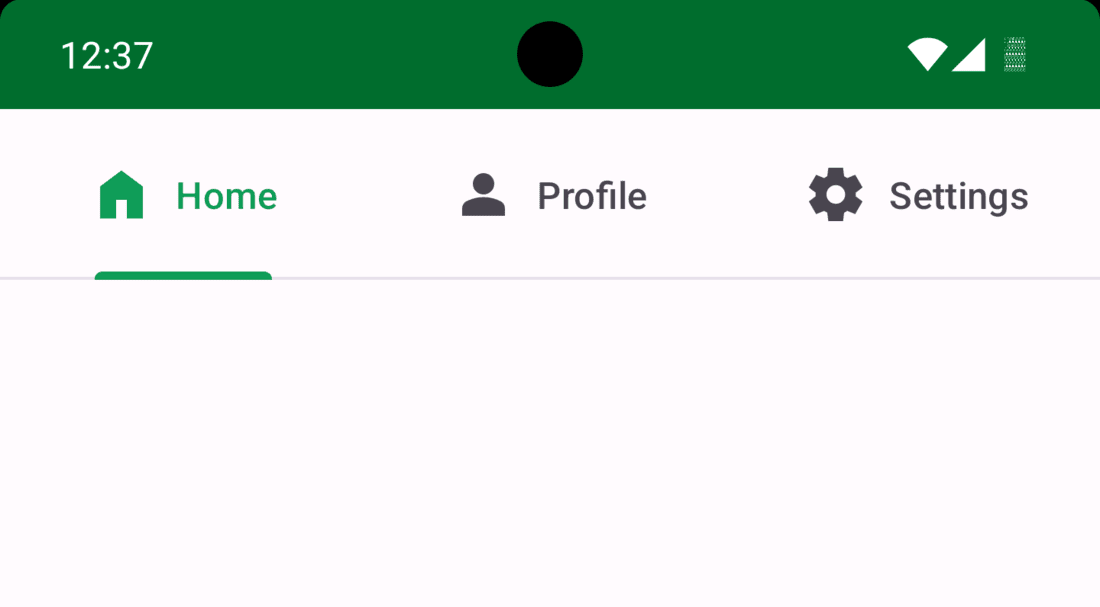
TabLayout is used to implement horizontal tabs. TabLayout is introduced in the design support library to implement tabs. Tabs are created using the newTab() method of TabLayout class. The title and icon of Tabs are set through setText(int) and setIcon(int) methods of TabListener interface respectively. Tabs of layout are attached over TabLayout using the method addTab(Tab) method.
In this article, we will make three separate tabs with their respective icons with the help of viewPager. A sample video of what we are going to build in this article is shown below. Note that we are going to implement this project in Java Language.
If you don’t know how to create a new project in Android Studio then you can refer to How to Create/Start a New Project in Android Studio?
Navigate to app > Gradle Scripts > build.gradle.kts(module) and add the following dependency in it:
implementation ("com.google.android.material:material:1.12.0")Right click on app folder then go to New > Fragment > Fragment (Blank), then proceed to add a name to your Fragment. We will be keeping it as MainFragment. Below is the code for the fragment
Right click on MainActivity file and go to New > Kotlin Class/File then set the name for your adapter. We will keeping it as ViewPagerAdapter. Below is the code for your adapter class file
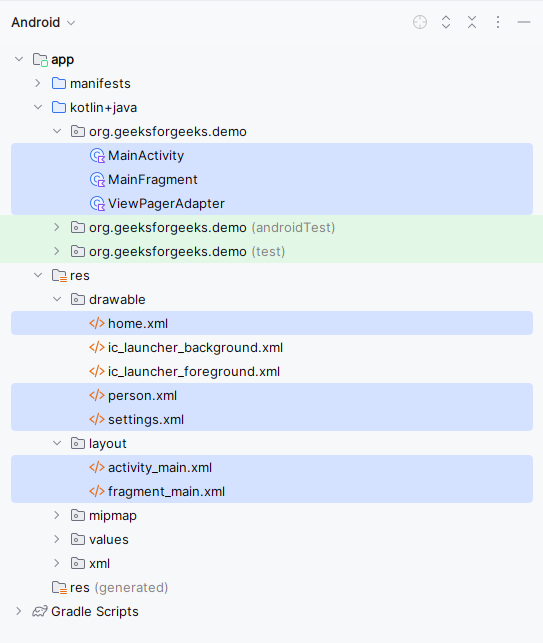
Navigate to res > drawable and right click on the folder and go to New > Drawable Resource file. Create 3 such files and add names as home.xml, person.xml and settings.xml. Below are the code for the drawable files.
Below is how the directory structure will look like after creating and adding all the files:
Navigate to app > java > package-name > MainActivity and also to res > layout > activity_main.xml and add the below code to those files. The code for the MainActivity file is provided in both Java and Kotlin.
Main Activity: