 |
VOOZH | about |
|
VOOZH | about |
In the 1st part of our SQLite database, we have seen How to Create and Add Data to SQLite Database in Android. In that article, we have added data to our SQLite Database. In this article, we will read all this data from the SQLite database and display this data in RecyclerView.
We will be working on the existing application which we have built in our previous article. In that application, we are simply adding the course list part where we can get to see our list of courses. A sample video is given below to get an idea about what we are going to do in this article.
To create a new project in Android Studio please refer to How to Create/Start a New Project in Android Studio.
Note that select Java as the programming language.
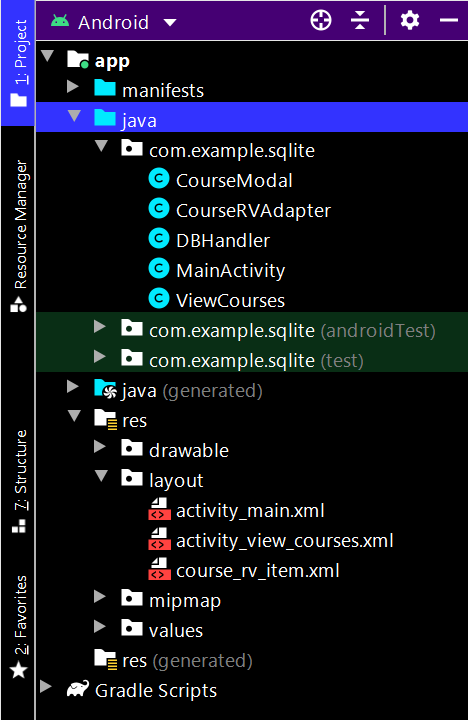
Below is the complete project file structure after performing the read operation:
Go to the activity_main.xml file and add a new Button to open a new activity for displaying our list of courses.
Now below is the updated code for the activity_main.xml file after adding the above code snippet.
Navigate to the app > java > your app's package name > Right-click on it > New > Java class and name it as CourseModal and add the below code to it. Comments are added inside the code to understand the code in more detail.
Navigate to the app > java > your app's package name > DBHandler and add the below code to it. In this, we are simply adding a new method for reading all the courses from the SQLite database.
Below is the updated code for the DBHandler.java file after adding the above code snippet.
To create a new Activity we have to navigate to the app > java > your app’s package name > Right click on package name > New > Empty Activity and name your activity as ViewCourses and create new Activity. Make sure to select the empty activity.
As we have added a new button to our activity_main.xml file so we have to add setOnClickListener() to that button in our MainActivity.java file.
Below is the updated code for the MainActivity.java file after adding the above code snippet.
Navigate to the app > res > layout > Right-click on it > New > Layout resource file and name it as course_rv_item and add the below code to it.
Navigate to the app > java > your app's package name > Right-click on it > New > Java class and name it as CourseRVAdapter and add the below code to it. Comments are added inside the code to understand the code in more detail.
Navigate to the app > res > layout > activity_view_courses.xml and add the below code to that file. Below is the code for the activity_view_courses.xml file.
Navigate to the app > java > your app's package name > ViewCourses.java file and add the below code to it. Comments are added inside the code to understand the code in more detail.
Now run your app and see the output of the app. Make sure to add the data before reading the data.