 |
VOOZH | about |
|
VOOZH | about |
In this article, we will build an Android app using Kotlin that connects to a local host server. You will learn how to configure your development environment, set up a local host server on your machine, and make network requests from the Android app. By the end of this article, you’ll have a fully functional app that communicates with a local backend server, enabling you to test APIs and backend logic without deploying to a live environment.
Note: make sure the hosting server device and the client device must be on the same network and none of them should be the source of the network.
Let us check Steps to Implementation of Integration of Local Host are mentioned below:
To set up a Node.js backend, install Express with npm install express to handle routing and server-side functionalities, and CORS with npm install cors to manage cross-origin requests. Express simplifies building web applications, while CORS allows your server to handle requests from different domains, essential for frontend-backend communication.
npm install express
npm install cors
To create a new project in Android Studio please refer to How to Create/Start a New Project in Android Studio.
Note: Select Kotlin as the programming language.
<uses-permission android:name = "android.permission.INTERNET"/>// Retrofit Gson Converter: This dependency allows Retrofit to automatically convert JSON responses into Kotlin objects using Gson.
implementation("com.squareup.retrofit2:converter-gson:2.9.0")// Retrofit Core Library: This is the core Retrofit library used for making HTTP requests in Android.
implementation("com.squareup.retrofit2:retrofit:2.9.0")
// Json response we are getting
{response : "API call successful" }
Note: The variable name defined in the data class and the key of the JSON response must be the same in order to receive the response from the API.
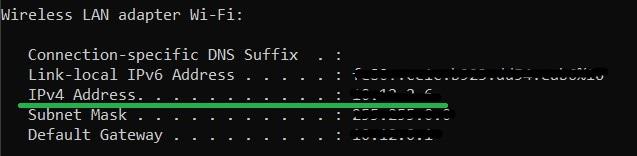
ipconfig (For windows)
ifconfig (For mac)