 |
VOOZH | about |
|
VOOZH | about |
Adding Icons at the Bottom of Tab Navigation in React Native is a fairly easy task. In this article, we will implement a basic application to learn to use icons in our tab navigation. For this, we first need to set up the application and install some packages.
Implementation: Now let’s start with the implementation:
npm install -g expo-cliexpo init tab-navigation-iconscd tab-navigation-iconsStep 4: Install the required packages using the following command:
npm install --save react-navigation react-native-gesture-handler
npm install --save react-native-vector-icons
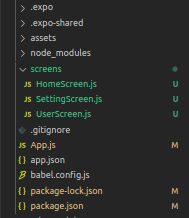
Project Structure: It will look like the following.
👁 ImageExample: Now, let's set up the Tab Navigator and add icons, along with some basic CSS styles to make the icons look presentable. There will be 3 screens in our demo application, namely- Home Screen, User Screen, and Settings Screen. Thus, we will have 3 tabs to navigate between these 3 screens, with our Home Screen being the default Screen.
The above code contains the logic for our Tab Navigator with icons at the Bottom of Tab Navigation. Now, we need the screens we need to navigate to.
Start the server by using the following command.
npm run androidOutput: If your emulator did not open automatically then you need to do it manually. First, go to your android studio and run the emulator. Now start the server again.
👁 ImageReference:https://reactnavigation.org/docs/tab-based-navigation/