 |
VOOZH | about |
|
VOOZH | about |
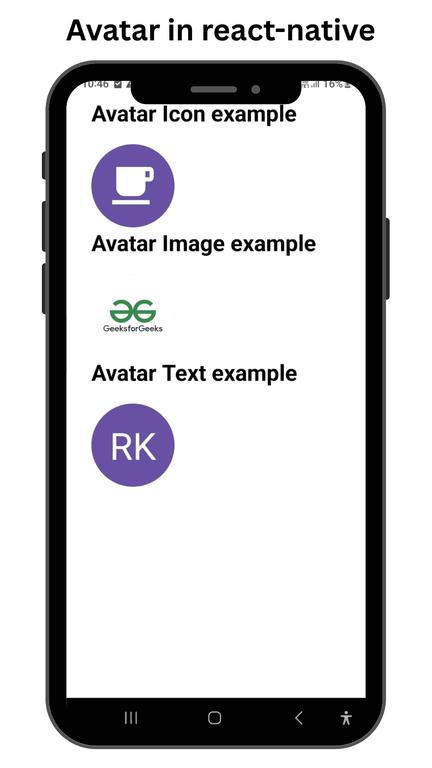
In this article, we will create 3 different kinds of Avatars using the react-native-paper library. An avatar is used for representation purposes in the form of icons, images, or text. In our project, we will create all these Avatars using material design. To give you a better idea of what we’re going to create, let’s watch a demo video.
Now, create a project with the following command.
npx create-expo-app app-name --template
Note: Replace the app-name with your app name for example : react-native-demo-app
Next, you might be asked to choose a template. Select one based on your preference as shown in the image below. I am selecting the blank template because it will generate a minimal app, as clean as an empty canvas in JavaScript.
It completes the project creation and displays a message: "Your Project is ready!" as shown in the image below.
Now go into your project folder, i.e., react-native-demo
cd app-nameStart the server by using the following command.
npx expo startThen, the application will display a QR code.
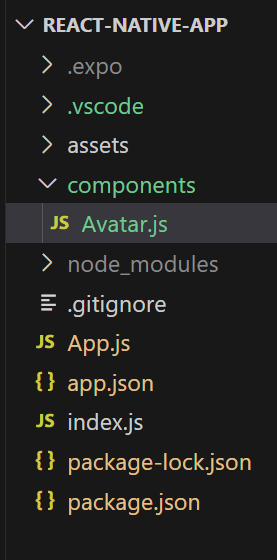
You can create a new folder called "components" to organize all component files better, as mentioned in the image below. Alternatively, you can write the component code directly in App.js.
- : Import required libraries at the top of the file.
- : Create a StyleSheet to style components like container and text.
- : This component is used to display an icon, image, text inside the avatar as mentioned in below article.
- : This component is used to display text on the screen.
Now, wrap the Avatars and Texts components with a View component and return from the AvatarExample component. Also, ensure to export the AvatarExample.
Avatar.js:
Now call this AvatarExample Component in the main "App" Component in App.js.
App.js:
You can write the whole code in one file, i.e, App.js.
App.js:
Output