 |
VOOZH | about |
|
VOOZH | about |
The floating action button is a bit different button from the ordinary buttons. Floating action buttons are implemented in the app's UI for primary actions (promoted actions) for the users and the actions under the floating action button are prioritized by the developer. For example the actions like adding an item to the existing list. So in this article, it has been shown how to implement the Floating Action Button (FAB), and also the buttons under the FABs are handled with a simple Toast message.
Note that we are going to implement this project using Java/Kotlin language.
There are mainly four types of floating action buttons available on Android.
In this article let's discuss the Normal/Regular Floating Action Button with a sample example in Android.
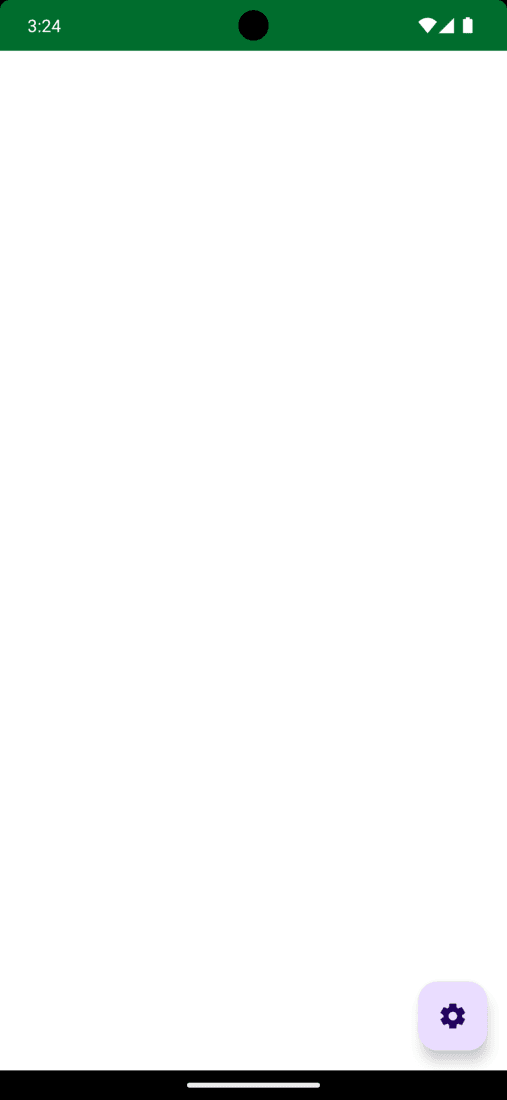
Regular FABs are FABs that are not expanded and are regular size. The following example shows a regular FAB with a settings icon.
To create a new project in Android Studio please refer to How to Create/Start a New Project in Android Studio.
The code for that has been given in both Java and Kotlin Programming Language for Android.
Go to Module build.gradle.kts file and add this dependency and click on Sync Now button.
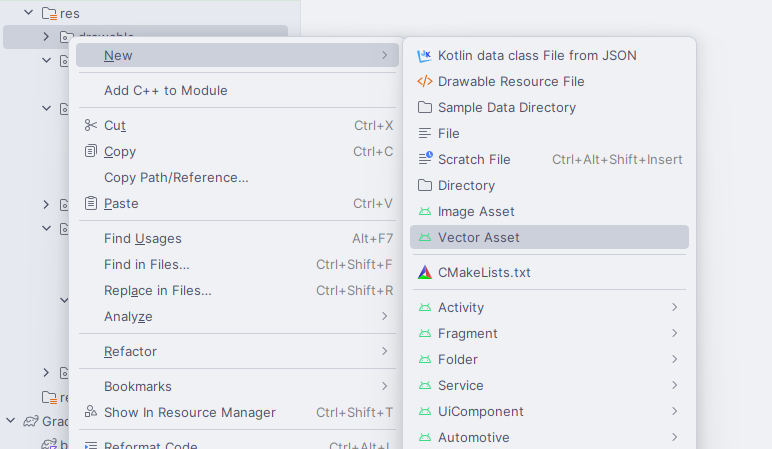
implementation ("com.google.android.material:material:1.12.0")For demonstration purposes will import 3 icons in the Drawable folder, and one can import the icons of his/her choice. One can do that by right-clicking the drawable folder > New > Vector Asset. Refer to the following image to import the vector Icon.
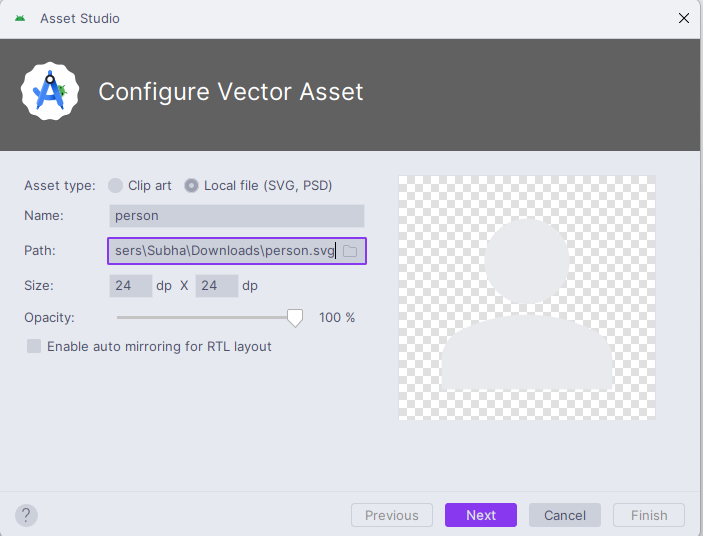
Now select your vector icon
Next, go to the activity_main.xml file, which represents the UI of the project. Below is the code for the activity_main.xml file. Comments are added inside the code to understand the code in more detail.
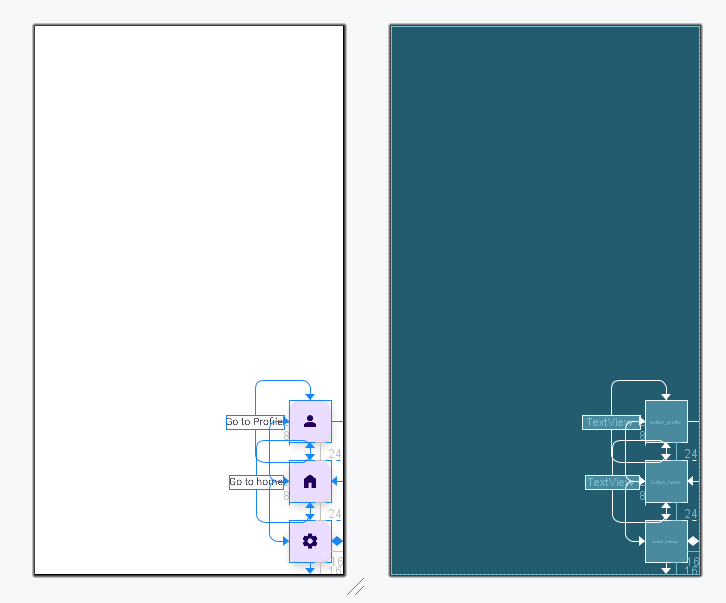
In the activity_main.xml file add the floating action buttons and invoke the following code. Now invoke the normal FAB. Which is of 56dp radius. We have chained the sub-FABs to the parent FABs so that they are in a single key line. Comments are added inside the code to understand the code in more detail.
Go to the MainActivity File and refer to the following code. Below is the code for the MainActivity File. Comments are added inside the code to understand the code in more detail. Now, we handle all FABs using the setOnClickListener() method you may refer to Handling Click events in Button in Android.
In this code, it's been shown that when sub FABs are to be visible with onClickListener. Comments are added inside the code to understand the code in more detail.
MainActivity File: