 |
VOOZH | about |
|
VOOZH | about |
Firebase Realtime Database is the backend service which is provided by Google for handling backend tasks for your Android apps, IOS apps as well as your websites. It provides so many services such as storage, database, and many more. The feature for which Firebase is famous for its Firebase Realtime Database. By using Firebase Realtime Database in your app you can give live data updates to your users without actually refreshing your app. In this article, we will be uploading Google/Excel Sheet Data into the firebase real-time database. This can be useful when you are creating a quiz app where you have to upload a lot of question. In that case, you can upload your data using an excel sheet.
We will be building a simple application in which we will be uploading data into the firebase real-time database using Google/Excel Sheet. Firstly we will be selecting an excel file and then it will be uploaded to firebase by taking the total number of rows and columns and then a random id will be generated in which row-wise data will be stored.
Note that we are going to implement this project using Java/Kotlin language.
To create a new project in Android Studio please refer to How to Create/Start a New Project in Android Studio.
For adding data to Firebase we should have to give permissions for accessing the internet. For adding these permissions navigate to the app > manifests > AndroidManifest.xml and Inside that file add the below permissions to it.
<uses-permission android:name="android.permission.INTERNET" />Add these implementations into it
dependencies {
 ...
 implementation("com.github.bumptech.glide:glide:4.16.0")
}
To add Firebase Database to your project refer to this article: How to Save Data to the Firebase Realtime Database in Android?
Create a simple Google Spreadsheet which is shown below. Make sure to use the same headers as shown in the below file.
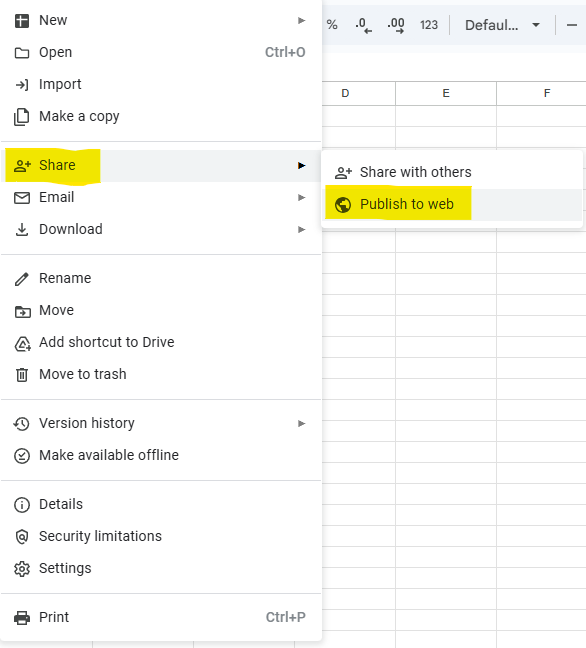
After you have created our excel file. Now we have to publish this excel file to use it inside our app. For publishing it.
After this a dialog box will pop up select type of web share as CSV and then click on publish.
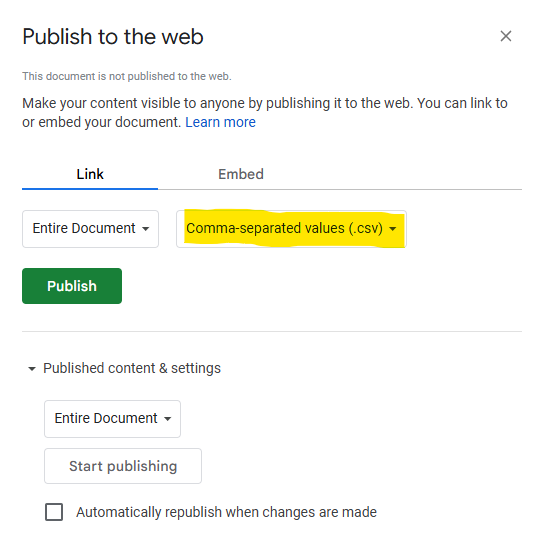
Now we have created a URL in which we will be getting the data in the CSV format. Also, a sharable link will appear copy it.
Note: this is the link which is used in the application created below.
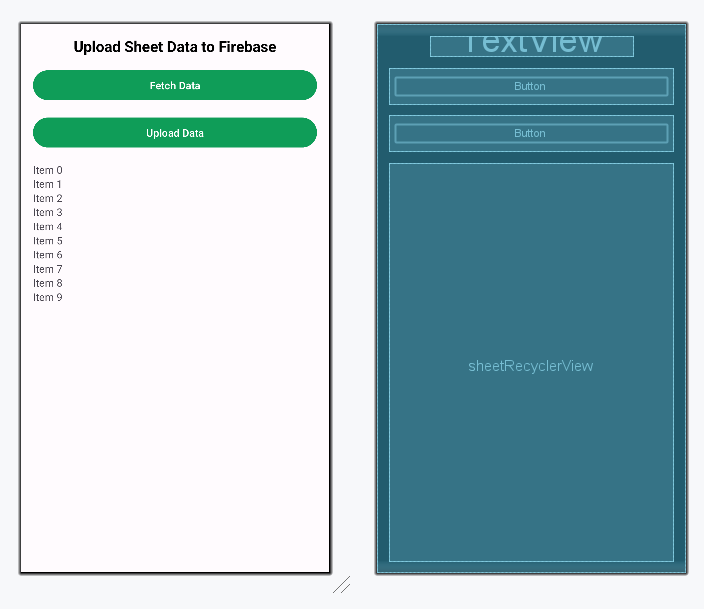
Navigate to the app > res > layout > activity_main.xml and add the below code to that file. Below is the code for the activity_main.xml file. Now, Create a layout file for each item in recyclerview. Navigate to the app > res > layout > Right-click on it > New > layout resource file and give the file name as items and add below code to it.
Design UI:
For storing our data we have to create a new java class. For creating a new java class, Navigate to the app > java/kotlin > your app's package name > Right-click on it > New > Java/Kotlin class and name it as UserModal and add the below code to it.
For creating a new Adapter class. Navigate to the app > Java/Kotlin > your app's package name > Right-click on it > New > Java/Kotlin class and name it as UserRVAdapter and add the below code to it.
SheetRow is a new file created which will help us create new rows in the Application. Navigate to the app > Java/Kotlin > your app's package name > Right-click on it > New > Java/Kotlin class and name it as SheetRow and add the below code to it.
Go to the MainActivity file and refer to the following code. Below is the code for the MainActivity file. Comments are added inside the code to understand the code in more detail.